background image

MERCURY ELITE PRO Qx2

DEVICE SETUP

5

2.2 QUICK START

If you purchased the OWC Mercury Elite Pro Qx2 with drives, they have been pre-configured 
as a RAID 5 array and the OWC Drive Guide formatting utility has been pre-installed to assist 
you with the formatting process. Follow the steps below to use the Drive Guide to format 
your Qx2 for Mac (OS X 10.4 and later) or Windows (XP and later).
1. Plug in your Qx2, then connect it to your computer using the proper cable. If you prefer to 

use a different formatting utility, do so at this time and skip to 

Section 2.3

.

2. Your drive will show up as “OWC SETUP”. Open your drive to view its contents.
3. Double-click the OWC Drive Guide application.
4. Follow the simple on-screen instructions to complete the formatting process.
5. Once the formatting is finished the drive is ready to use.

NOTICE:

 If you purchased the Qx2 without drives and are adding your own pre-formatted 

drives, be aware that the default mode is set to RAID 5. This means the Qx2 will erase any 
pre-existing data or formatting on the drives that you install in the Qx2. This is true of all 
modes except Independent Drive Mode. See 

Section 2.3.2

 for more information.

2.3 RAID SETTINGS 

2.3.1 Setting the RAID Mode

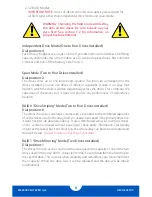
IMPORTANT NOTE:


Drives of identical model and capacity are required for 

all RAID types other than independent drive mode and span mode.

To switch RAID modes, follow these three steps (continued on next page):

1. With the Mercury Elite Pro Qx2 turned off, adjust the RAID dial so that the arrow is 

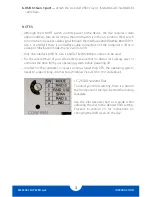
pointing to the desired RAID level (see section 1.5.2, RAID Selector Dial).

2. While using a paperclip or small screwdriver to hold down the “Confirm” button, turn 

on the Qx2. The Qx2 will build the newly selected RAID, during which time the LEDs 
will flash. This process will take 20-30 seconds. When the LEDs stop flashing, release 
the “Confirm” button. The Qx2 will show up on your computer as an unformatted 
volume (or individual disks if you selected independent drive mode).

3. Format the new volume. Formatting instructions can be found at:

www.owcdigital.com/format


WARNING:


Changing the RAID mode will create 

a new array and destroy all data on the drives. 

Changing the RAID mode will also require you to 

reformat the array afterward.

!

!

Summary of Contents for Mercury Elite Pro Qx2

Page 1: ...M E R C U R Y E L I T E P R O Q X 2 Assembly Manual User Guide...

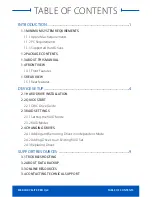
Page 2: ...Front Features 1 5 REAR VIEW 1 5 1 Rear Features DEVICE SETUP 4 2 1 HARD DRIVE INSTALLATION 2 2 QUICK START 2 2 1 OWC Drive Guide 2 3 RAID SETTINGS 2 3 1 Setting the RAID Mode 2 3 2 RAID Modes 2 4 CHA...

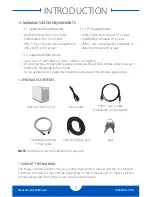
Page 3: ...s cable NOTE Hard drive screws included but not pictured 1 3 ABOUT THIS MANUAL The images and descriptions may vary slightly between this manual and the unit shipped Functions and features may change...

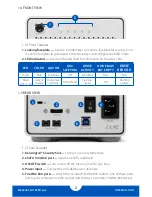
Page 4: ...EBUILD Power Blue Solid blue Off Solid blue N A N A Drive A B C D Green Orange Solid green all four Off all four Flashing green Off Flashing orange 1 5 REAR VIEW 1 5 1 Rear Features 1 Kensington Secur...

Page 5: ...mode the Qx2 will turn off Only one interface USB 3 1 Gen 1 eSATA FireWire 800 at a time can be used For the safe removal of your drive and to ensure that no data is lost always eject or unmount the d...

Page 6: ...l the drive tray out 5 Set the drive tray as shown on your work surface If you are replacing an existing hard drive unscrew it from the drive tray at this time If your Qx2 was purchased without drives...

Page 7: ...a or formatting on the drives that you install in the Qx2 This is true of all modes except Independent Drive Mode See Section 2 3 2 for more information 2 3 RAID SETTINGS 2 3 1 Setting the RAID Mode I...

Page 8: ...o to Four Drives Installed Dial position 0 The drives show up as one large volume with a size equal to the combined capacities of all the drives used in the array RAID 0 is used when speed is the prim...

Page 9: ...o Qx2 is set to independent mode you can add or remove any drive without needing to create a new RAID set IMPORTANT NOTE To avoid data corruption it is essential to unmount all drives and turn off the...

Page 10: ...will flash orange Depending on the capacity of the drives being used the rebuild process will last from several hours to a few days Once the rebuild is complete the drive LED will turn green and flas...

Page 11: ...loss we strongly suggest that you keep two copies of your data one copy on your Mercury Elite Pro Qx2 and a second copy on your internal drive or another storage medium such as an optical backup or on...

Page 12: ...hard drives into this drive enclosure Failure to do so can cause damage to your drive mechanisms and or the hard drive enclosure Read this user guide carefully and follow the correct procedures when s...

Reviews: