Hydra 3000 Uno Technical Manual
Doc Part No.: OVZ20041
© Overview Ltd. 2020
Page 23 of 74
Revision: 01
This is the property of Overview Ltd. No copying without permission.
Presets and tours
•
Set a preset
To set a preset, first move the camera to the required position (including the desired zoom) using the
PTZ commands. Then press the “+” button next to “Preset” on the main screen. The position will be
stored in the next available preset number and a new window will pop up, showing the number of the
preset given to that position and asking for a name for it.
•
Delete a preset
To a delete a previously stored preset position, select it on the presets dropdown menu and press the
“
-
“ button next to it.
•
Move the camera to a preset position
To move the camera to a previously stored preset position, select the preset on the presets dropdown
menu and press the “R” button next to it.
•
Set (or modify) a Tour:
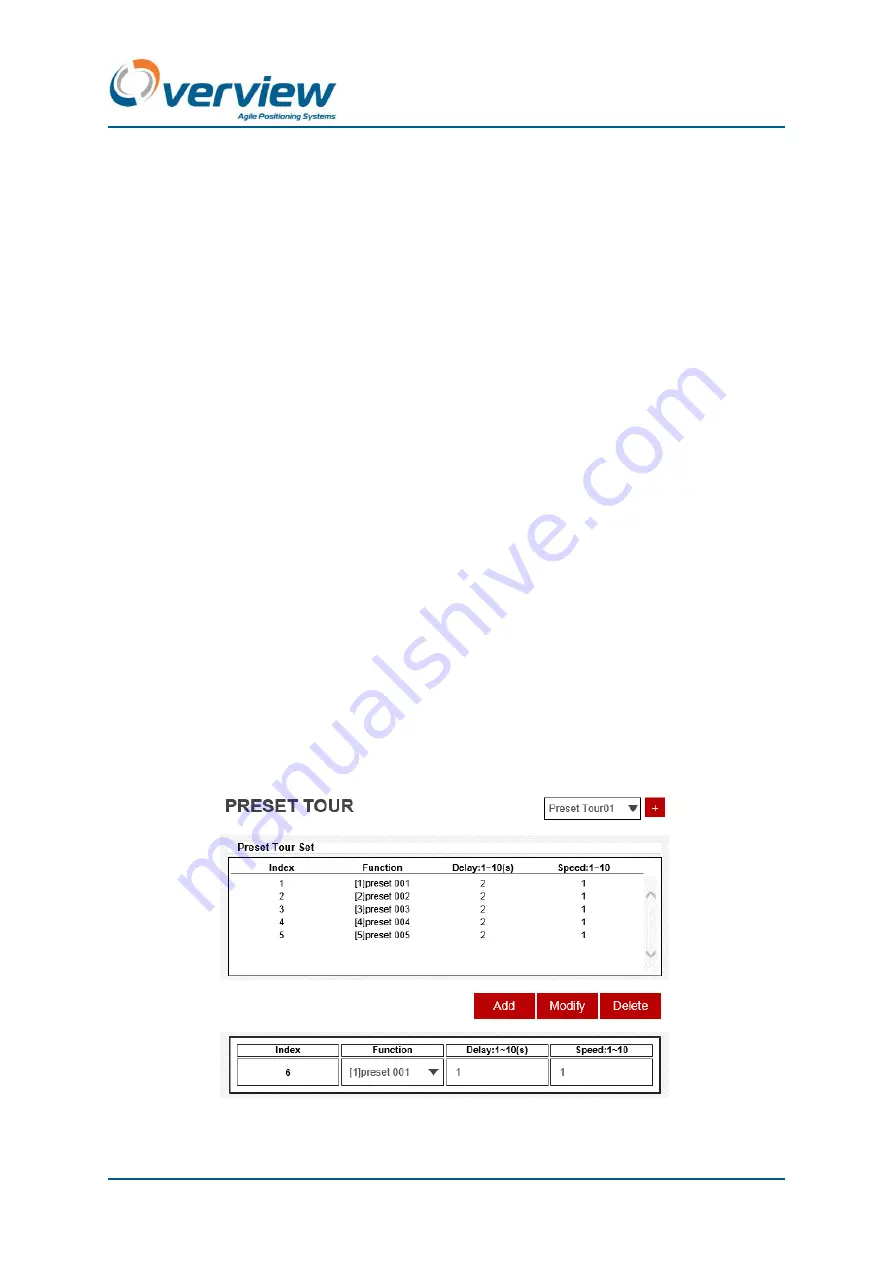
To set a new tour/patrol, click on “+” button next to tour dropdown menu. A new window will pop up,
as shown on Figure 3. On the right top corner, select the tour you want to create or modify.
The first table indicates the path the camera will follow for selected tour, including the order for each
position (“Index”), the preset (“Function”), the amount of seconds the camera will
stay in that position
(“Delay”) and the speed the camera will use to move from previous position to that one (“Speed”).
The second table shows the next position in the path or selected position within the path (if any of the
position were clicked). To add a new position, select the preset the camera should go, the time it
should stay in that position and the speed. Then, press “add”. To modify any position, make the
modifications on position being previously clicked and press “modify”. To delete selected p
osition,
press “delete”.
Figure 3: Tour configuration menu


