background image

11

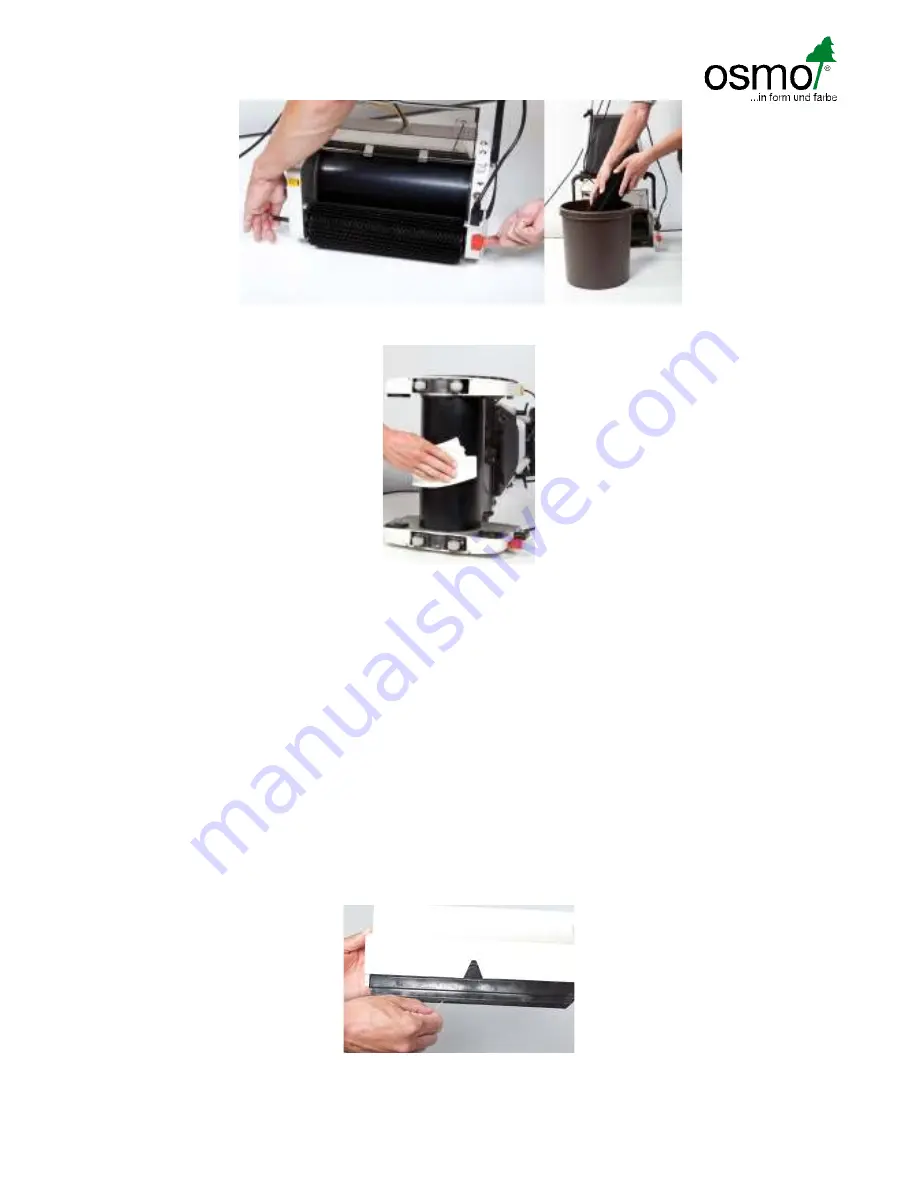
6.  Wash the brushes either in a bucket or under running water. 

7.   Before you position the Orbiter on its side it is important to remove the Bowden cable and the water hose from the 

fresh water tank.

8.   Position the Orbiter on its side and wipe the drum dry using a cleaning cloth.  

The Orbiter can be cleaned with a hose and brush in outdoor areas.

9.   Reinsert the brushes by reinserting the floating axles from the right.

Repair

To ensure the long term enjoyment of the Osmo Wood Orbiter, please observe the following points:

-   Clean the brushes on a regular basis. Do not use a high-pressure or steam cleaner.
-   Ensure that the machine is not resting on the brushes when it is not in use.  

Always store your additional brushes in an upright position.

-   Swap the front brush with the rear brush on a regular basis or turn them if necessary.  

In case the bristles should become hard, allow the machine to run shortly over a concrete or stone surface.

1.   Ensure that the filter in the fresh water tank is kept clean. For this, push the end of the Bowden cable into  

the filter holder and turn it anti-clockwise, clean it under running water and then reinsert. 

2.   Always keep the nozzles clean. 

Pull

Push

Summary of Contents for Wood Orbiter

Page 1: ...perating Manual Osmo Wood Orbiter Please read the operating manual carefully and observe the safety notices and information on making a suitable brush selection and correctly setting the brush pressur...

Page 2: ......

Page 3: ...quid is striped by a steel blade and conveyed to the dirty water tank Process for assembling the Osmo Wood Orbiter Ensure that all the parts in the image are available please compare the parts to the...

Page 4: ...an Allen key Ensure that the centre grip is assembled according to the position described RH button and LH button and the cable retainers are located on the right hand side Push the cable retainer ont...

Page 5: ...g the retaining collars down Important FIRMLY tighten the 4 screws using the washers If the tank is not sitting correctly it will leak Finally Connect the power cable Remove the dirt pan Before the co...

Page 6: ...n without pressing the pedal Moving the Orbiter from A to B Push the red button it is located on the right hand side to the lower position lifting the brushes so that the machine can be rolled away Th...

Page 7: ...using the machine for the first time some loose bristles may come out of the brush body Turn the Orbiter off and disconnect from the mains Now remove the bristles from the drum and then restart the ma...

Page 8: ...from Osmo Wash Care internal Water external 2 Exterior use First apply the Wood Reviver Power Gel using the Osmo floor brush a hard bristle brush or scrubber and then move over the area with the Orbit...

Page 9: ...push the Orbiter to the next track whereby you should overlap the already cleaned track Graphic 1 In large halls the floor can also be cleaned by separating the tracks Graphic 2 5 If the dirty water t...

Page 10: ...y removed dirt with the return brush Only use the edge brush on surfaces where surrounding walls have been protected risk of dirt being dispersed sprayed on the wall Cleaning the Orbiter 1 Push the ri...

Page 11: ...ase observe the following points Clean the brushes on a regular basis Do not use a high pressure or steam cleaner Ensure that the machine is not resting on the brushes when it is not in use Always sto...

Page 12: ...Osmo Holz and Color GmbH Co KG Affh ppen Esch 12 D 48231 Warendorf P O Box 110161 D 48203 Warendorf Phone 49 0 2581 922 100 Fax 49 0 2581 922 200 www osmo com info osmo com...

Reviews: