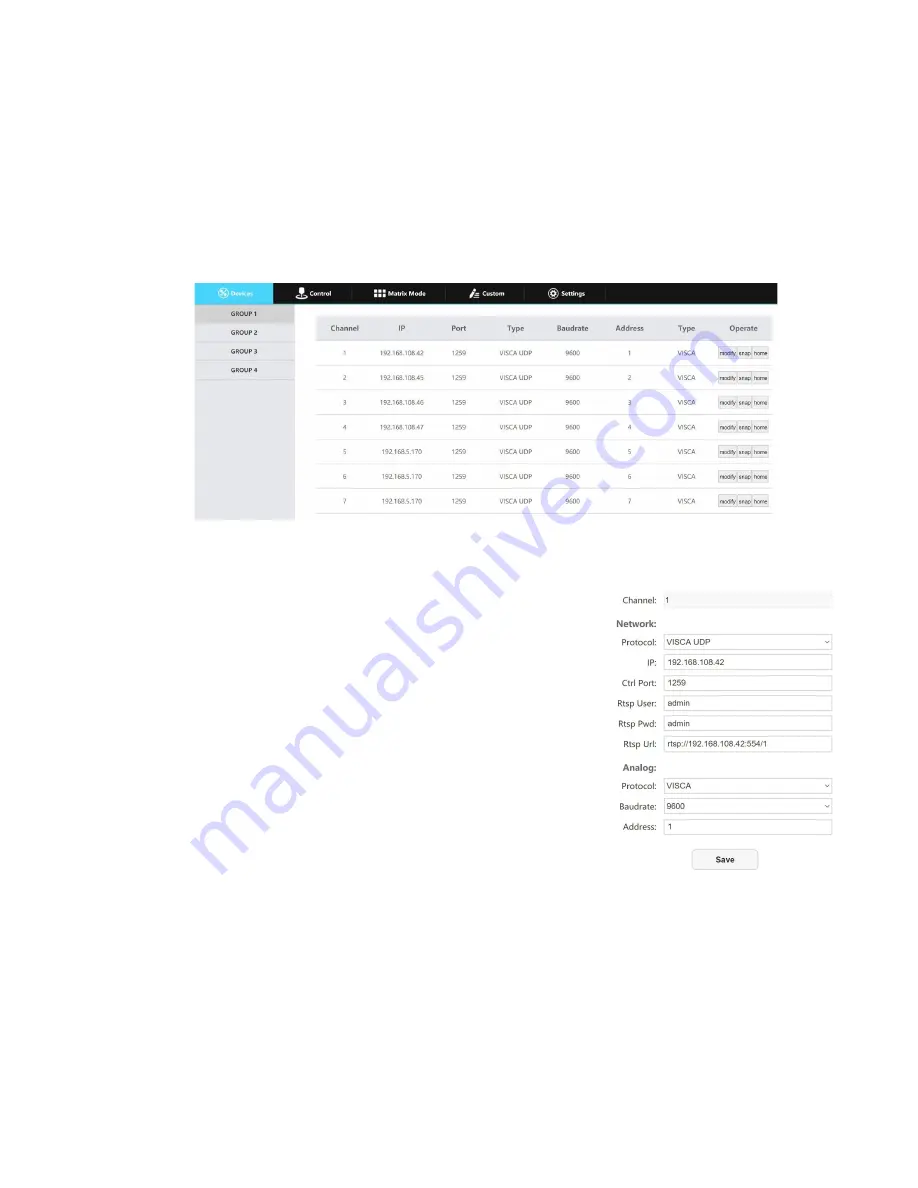
From the Web Interface
To add a camera to the controller from the web interface, follow the steps below.
1.
Type the IP address displayed on the controllers OSD into a web browser to access the web interface.
2.
Type in the login credentials to access the joysticks WebUI configuration page.
a.
Default username: “admin”
b.
Default password: (there is no password by default)
3.
Click the Group # of the camera(s) you wish to configure.
4.
Click the Modify button under the “Operate” column of the camera address you wish to configure a
camera for.
5.
From here, fill out the information based on the deployed connection to the camera, with your options
detailed below.
● Network:
○
Protocol:
Options include: VISCA (UDP), VISCA (TCP),
SONY VISCA (UDP), ONVIF, & NDI.
○
IP:
Enter the IP address of your camera
○
Ctrl Port:
Enter the control port of your camera
○
Rtsp User:
Enter the camera’s RTSP Authorization
username.
○
Rtsp Pwd:
Enter the camera’s RTSP Authorization
password.
○
Rtsp Url:
Enter the camera’s RTSP URL of the camera
for use with the HDMI Output. (Auto fills based on the “
IP
”
field above.
● Serial:
○
Protocol:
Options include: VISCA, PELCO-D, &
PELCO-P
○
Baud Rate:
Options include: 1200, 2400, 4800, 9600, 19200, 38400, & 115200
○
Address:
(Unchangeable) This address matches the camera address at the top of the window.
6.
Once the above fields are filled, click the Save button to finish adding the camera to the controller.
15
Rev 1.2 2/21


