29716AB
41
Schedule
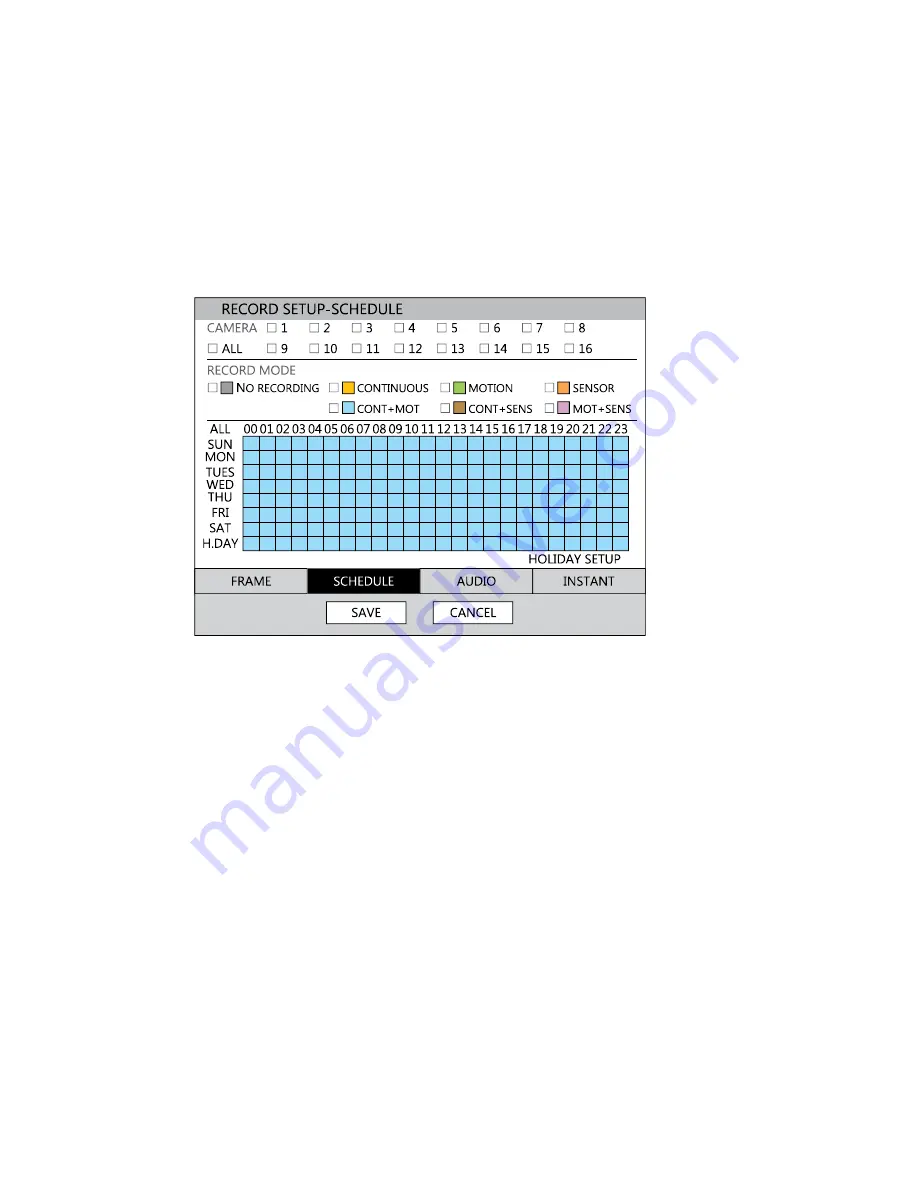
Set the recording schedule for each camera:
1. Press MENU on the front panel or remote control.
or
Click MENU on the Mouse-over menu and select SETUP.
2. Select RECORD > SCHEDULE.
3. Select a camera to create a recording schedule, or select ALL.
4. Select the check box of the desired RECORD MODE.
5. Click hour block or the day of the week to set the entire day.
NO RECORDING
No Color
No recording.
Even if you set recording frames and select ON in
RECORD > CAMERA, the DVR will not record anything if
you set OFF in RECORD > SCHEDULE.
CONTINUOUS
Yellow
CONTINUOUS recording.
MOTION
Green
MOTION-detection recording.
In this mode, the DVR records only when motion is
detected in the motion area, and stops recording when
motion is not detected. Adjust motion area settings in
RECORD > MOTION/EVENT SETUP > INPUT.
If you set motion to OFF in RECORD > MOTION /EVENT
CONFGURATION and set CONT + MOT in SETUP >
RECORD > SCHEDULE the DVR will NOTrecord when
motion is detected.
Summary of Contents for OE3-E12004
Page 2: ...2...
Page 14: ...14 Notes...
Page 26: ...26 Notes...
Page 34: ...34 User Setup Use the User Setup to Add or Delete users...
Page 54: ...54 Status View Displays status screens for Disk Record Audio...
Page 55: ...29716AB 55 Status View continued Sensor Network Event...
Page 56: ...56 Notes...


