


OMEGA-VSHPe.F-IOM-2205
15
9.
TROUBLESHOOTING
Refer to the
‘
Troubleshooting Guide
’
for identifying com-
mon issues and possible resolutions. The microproces-
sor control board has a number of LED lights for simple
identification of common alarms and faults. Refer to
’
LED Code Table Guide
’.
TEST MODE
A Test mode feature can be enabled in order to perform
diagnostic testing of the unit by reducing all timers.
To enable test mode press the test mode button on the
control board.
CLOCK SETTING
Using the webpage tool the internal date and time of the
controller can be set to assist with diagnostics when
using the data log. An optional battery will preserve date
and time in the event of a power loss.
WEB PAGE ACCESS
The Omega controller features a webpage configuration
and troubleshooting tool. Unit status and diagnostics
temperature (Supply Air, Entering Water, Leaving Water
and Suction Temperature) readings can be easily ac-
cessed through the controller webpage tool.
The imbedded webpage is accessed by connecting to
the control board, no internet connection required. There
are two ways to connect: using a mini
-
wireless router or
directly to a laptop. Wireless router is the preferred
method for fewer configuration steps and works with
Tablets or Smartphones.
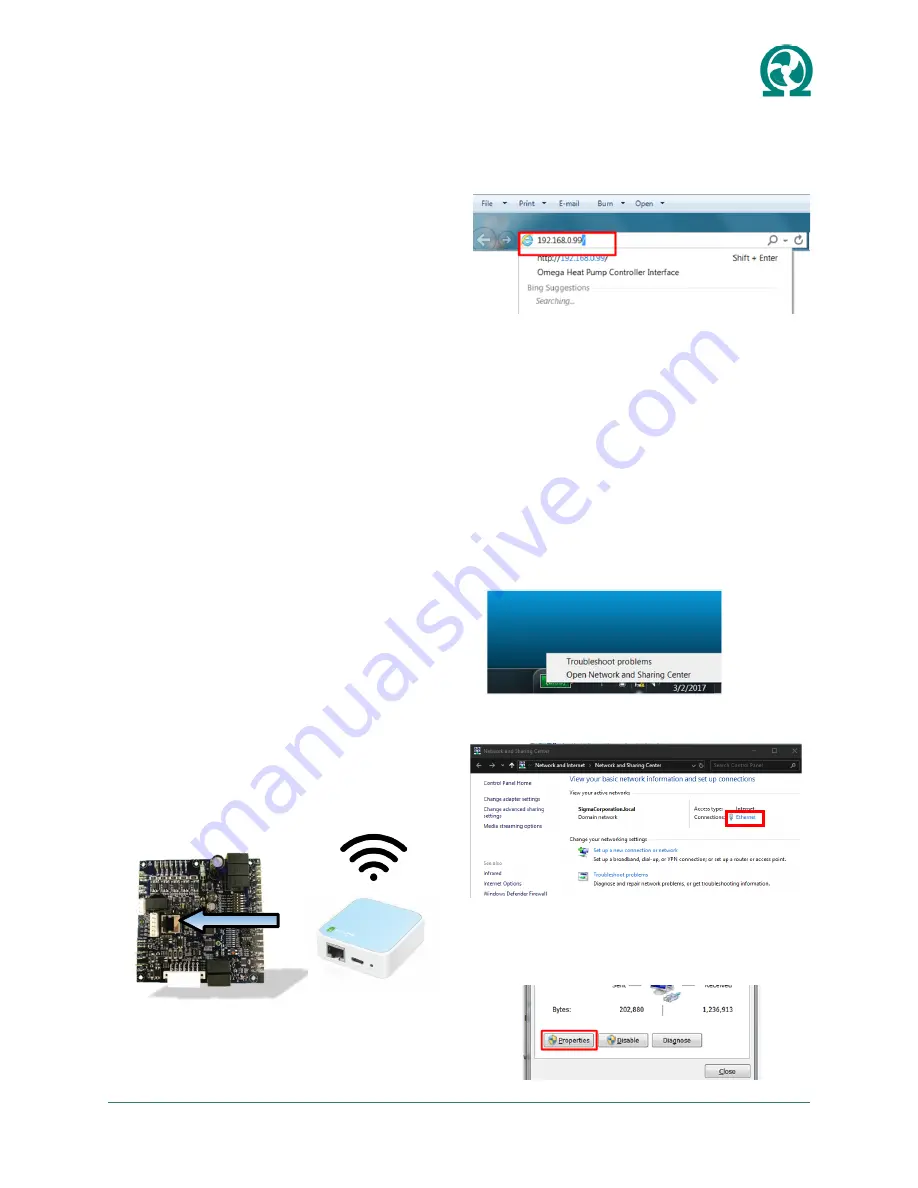
Wireless Router Method
1.
To connect to the controller you will need the follow-
ing: Ethernet cable, Laptop/Tablet, and wireless
router (e.g. TP Link TL
-
WR802N, shown below).
Configure routers as per manufacturer instructions.
Setup as Access point with Static IP (leave IP ad-
dress blank).
2. Remove electrical box access panel and connect
router via ethernet cable directly into surface mounted
ethernet port (RJ45) on control board.
3. Connect tablet, laptop or phone to WIFI router. Turn
off mobile data. Once connected open up your internet
browser (i.e. Internet Explorer, Google Chrome) and
type in the following address
192.168.0.99
Direct to Laptop Method
1. To connect to the controller you will need the follow-
ing: Ethernet cable & Laptop.
2. Remove electrical box access panel and connect
ethernet cable directly into surface mounted ethernet
port (RJ45) on controller board.
3. On laptop access
“
Network and Sharing Center
“
though the
“
Network & Internet Settings
”
icon located in
the bottom right taskbar.
4. In the Network & Sharing Center click on
“
Ethernet
” /
“
Local Area Connection
”
as indicated below.
5. Local Area Connection Status will open, click on
Properties, then click on
“
Internet Protocol Version 4
(TCP/IPv4)
”,
and click on Properties for IPv4.


