


2-46
Installing and Setting up the Machine >
Embedded Web Server RX
Changing Device Information
1
Display the screen.
1
Launch your Web browser.
2
In the address or location bar, enter the machine's IP address or the host name.
Print the status page to check the machine's IP address and the host name.
[
Menu
] key > [
▲
] [
▼
] key > [
Report Print
] > [
►
] key > [
▲
] [
▼
] key > [
Print Status Page
] >
[
OK
] key > [
OK
] key
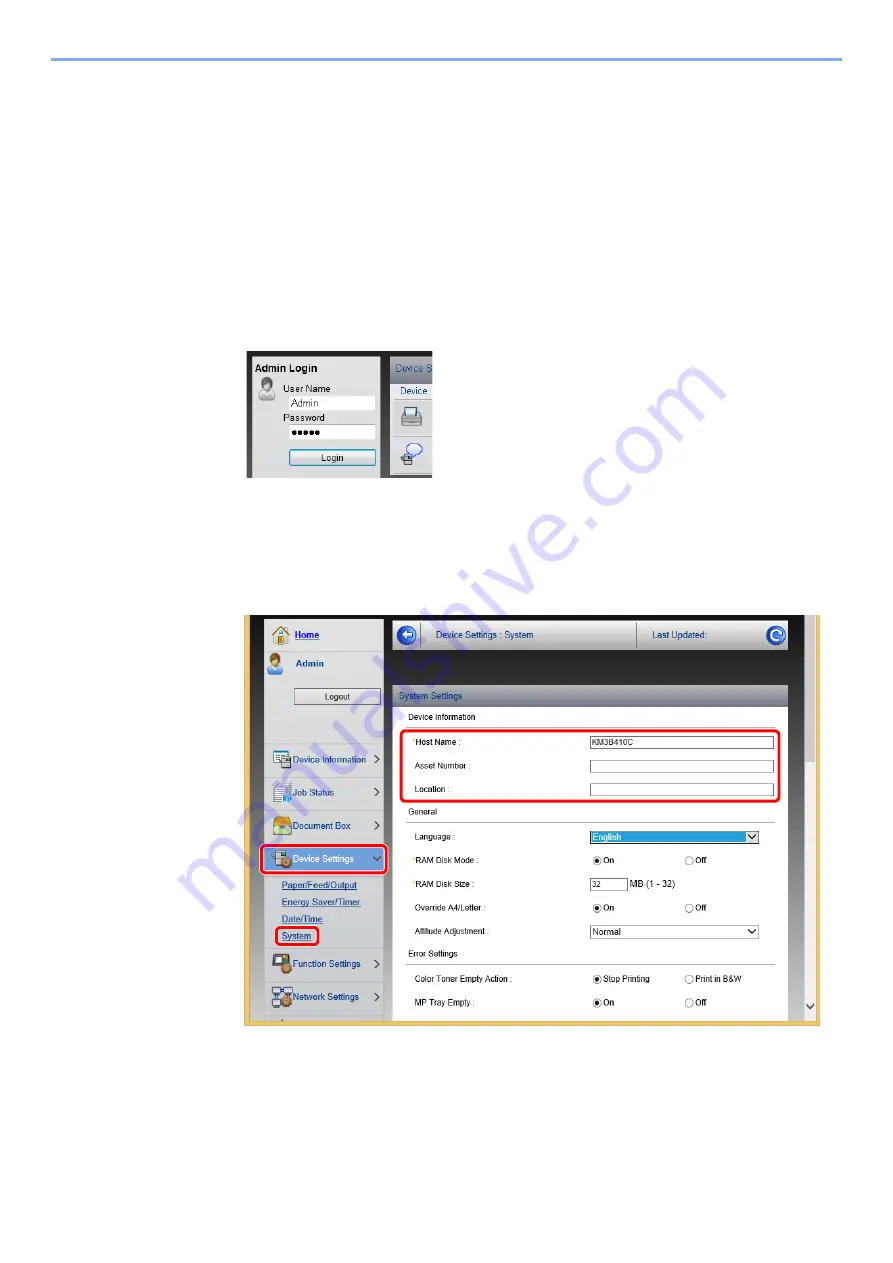
3
Log in with administrator privileges.
The factory default setting for the default user with administrator privileges is shown below. (Upper
case and lower case letters are distinguished (case sensitive).)
Login User Name:
Admin
Login Password:
Admin
4
From the [
Device Settings
] menu, click [
System
].
2
3
1
Summary of Contents for d-COLORP2230
Page 1: ...Code 597401 01en d COLORP2230 OPERATION GUIDE...
Page 217: ...9 28 Troubleshooting Troubleshooting 3 4 5 6...
Page 221: ...9 32 Troubleshooting Troubleshooting 2 3 4...
Page 224: ...9 35 Troubleshooting Troubleshooting 4 5 6 A2 A2...
Page 226: ...9 37 Troubleshooting Troubleshooting 4 5 6 7 A2 A2 A3...
Page 227: ...9 38 Troubleshooting Troubleshooting 8...
Page 256: ......


