background image

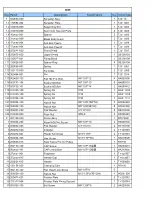
Key Part #

Descriptions

Specifications

Qty Cross Index

4035

19 240049-000

Hand Wheel

2

TH120065

20 000002-101

Hex Screw

M6*1.0P*12

2

HA010405

21 000103-108

CAP Screw

M6*1.0P*25

2

HA020413

22 011004-102

Spring Pin

6*20

4

HG011111

23 000104-108

CAP Screw

M8*1.25P*25

12 HA020513

24 360476-901

Bolt

1

TJ010076

25 003202-107

Set Screw

5-16''-18NC*5-16''

7

HB030804

26 380386-901

Lock Bolt

1

RTH16

27 006001-054

Flat Washer

8.5*20*2.0t

1

HE014500

28 008007-200

Hex Nut

M10*1.5P(17B*8H)

4

HW011000

29 003007-302

Hex Screw

M12*1.75P*100

1

HS010759

30 000004-214

Hex Screw

M10*1.5P*90

1

HS010653

31 000004-202

Hex Screw

M10*1.5P*25

1

HS010613

32 000004-206

Hex Screw

M10*1.5P*50

1

HS010628

33 006305-100

Spring Washer

8.2*15.4

8

HE021100

34 006307-100

Spring Washer

10.2*18.5

13 HE021300

35 006303-100

Spring Washer

6.1*12.3

1

HE020900

36 011003-106

Spring Pin

5*28

2

HG011016

37 050563-000

Table

1

TJ020005

38 380478-902

Motor Pulley

1

TJ020006

39 050561-000

Rear Fixed Bracket

2

TJ020002

40 000203-105

Set Screw

M6*1.0P*14

4

HA030406

41 110022-156

Blade Guard

1

TJ010050

42 050346-000

Extension Table

2

TJ010051

43 006002-093

Flat Washer

13.5*28*2.0t

2

HY017100

44 171421-422

Rail Support Plate

1

45 190102-422

Front Rail

1

46 250467-615

Rail Cap

2

TH120028

47 008311-100

Nylock Nut

M12*1.75P(19B*14H)

2

HC041200

48 170130-094

Wrench

2

TJ010058

49 170489-904

Wrench

2

TH100071

*50 TJ02-02

Switch

TJ0B

51 171364-000

Body

1

TJ020004

52 171365-000

Cover

1

TJ020008

53 230114-906

Handle

2

PJ010018

54 000004-103

Hex Screw

M10*1.5P*30

6

HA010616

55 000004-101

Hex Screw

M10*1.5P*20

3

HA010610

56 006308-100

Spring Washer

12.2*21.6

1

HE021500

57 000004-104

Hex Screw

M10*1.5P*35

4

HA010619

58 000704-102

Socket HD Bolt

M8*1.25P*25

6

HA080513

59 130061-000

Key

2

TJ010041

60 000003-106

Hex Screw

M8*1.25P*30

1

HA010516

61 020006-000

Hex HD Bolt

SB9R-2

1

HN031200

Summary of Contents for 4035

Page 1: ...ssional Tablesaw Owner s Manual Oliver Machinery M 4035 03 2007 1210 Andover Park East Tukwila WA 98188 Copyright 2003 Fax 1 206 575 2723 www olivermachinery net Phone 1 206 575 2722 email info oliver...

Page 2: ...negligence accidents unauthorized repairs alterations lack of maintenance acts of nature or items that would normally be consumed or require replacement due to normal wear In no event shall Oliver be...

Page 3: ...ectrical Code 4 Eye safety Wear an approved safety shield goggles or glasses to protect eyes Common eyeglasses are only impact resistant they are not safety glasses 5 Personal protection Before operat...

Page 4: ...as been turned off and the blade has come to a complete stop 20 Miter Gauge and Rip Fence Never use the miter gauge and rip fence at the same time 21 Damaged Saw Blade Never use a damaged saw blade or...

Page 5: ...sembly 11 13 Miter Gauge 14 Controls 14 Dust Collection 14 Electrical Connections 15 Replacing the Blade 15 Replacing and Tensioning the Drive Belt 16 Maintenance 16 Troubleshooting 17 18 Specificatio...

Page 6: ...damage and call the freight carrier if any Contents Blade guard 2 Blade guard support 3 Arbor wrenches 4 Wheel handle 5 Accessory holders 6 Tools 7 Hardware packet 8 Extension wing hardware 9 Mitre g...

Page 7: ...t Cover cleaned surfaces with WD 40 or a 20W machine oil Pay particular attention to cleaning in the miter slot and the faces of table and extension wing Extension Wing Assembly 1 Attach extension win...

Page 8: ...well as a bolt while the four inside holes require the bolts only 2 Set the front guide on the support bracket as shown in Figure 5 and secure into place with the short bolts provided in hardware pac...

Page 9: ...he fence back on the guides and check again for alignment to the mitre guage If it is still mis aligned repeat the procedure Adjusting the Scale Reader 1 Raise the blade to it s maximum height 2 Place...

Page 10: ...square B Figure 11 on the table and check to see that the blade is at a 90 angle to the table as shown in Figure 11 Make sure ruler is in between the blade teeth 5 If blade is not 90 open the motor co...

Page 11: ...he front trunnion in or out The adjusting stop screw should stop against the front trunnion bracket when blade is 45 to table 12 Tighten the hex nut A Figure 13 while holding the adjusting stop bolt B...

Page 12: ...the shaft into place by turning the bolt A Figure 18 until it secures the shaft then tighten the bolt with the jam nut B 5 Place bracket assembly E Figure 17 on to the shaft and thread a hex head bol...

Page 13: ...Figure 21 on the rear fork Thread the guard support in or out by turning the hex head F Figure 21 to bring the splitter in line with the blade Repeat the same procedure for front fork 10 Tighten the j...

Page 14: ...gaged or the key is in the OFF position C Main Control Turn key to the OFF position and remove from the lock The key should be given to a supervisor when the saw is not in use by an authorized user D...

Page 15: ...not disconnect the power source and reverse any two power leads Electrical Connections for a 1 Phase Unit This saw is 1 Phase 220V only Oliver Machinery recommends using a dedicated circuit Make sure...

Page 16: ...Disconnect the machine from power source before proceeding with any maintenance or troubleshooting Failure to comply may cause serious injury Periodically clean the inside of the machine for dust con...

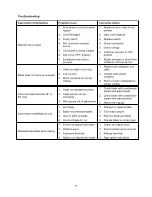
Page 17: ...quate size cable 2 Contact local electric company 3 Refer to motor nameplate for correct voltage Does not make accurate 45 or 90 cuts 1 Stops not adjusted correctly 2 Angle pointer not set accurately...

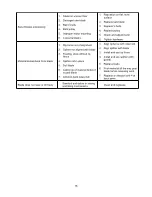
Page 18: ...Splitter not aligned with blade 3 Feeding stock without rip fence 4 Splitter not in place 5 Dull blade 6 Letting go of material before it is past blade 7 Anti kick back paws dull 1 Align rip fence wi...

Page 19: ......

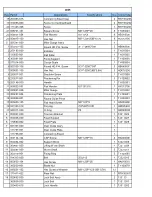
Page 20: ...8 Spring Pin 5 32 1 HG011018 1 20 011004 102 Spring Pin 6 20 1 HG011111 1 21 008304 100 Nylock Nut M6 1 0P 10B 7H 2 HC040600 1 22 008302 100 Nylock Nut M5 0 8P 8B 6H 8 HC040400 1 23 006001 029 Flat Wa...

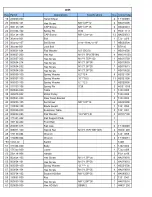
Page 21: ...sher 8 5 18 3 0t 1 HY013700 12 090067 008 Miter Guage 1 TH010302 13 380287 904 Positioning Plate 1 TH120601 14 380069 901 Round Guide Piece 1 TH030303 15 000403 105 Flat Head Screw M6 1 0P 6 1 HA05040...

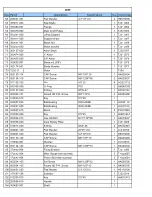
Page 22: ...36 011003 106 Spring Pin 5 28 2 HG011016 37 050563 000 Table 1 TJ020005 38 380478 902 Motor Pulley 1 TJ020006 39 050561 000 Rear Fixed Bracket 2 TJ020002 40 000203 105 Set Screw M6 1 0P 14 4 HA030406...

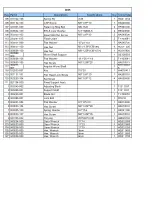
Page 23: ...ound HD Phil Screw M4 0 7P 6 4 HA040402 82 012003 012 Key 5 5 28 1 83 030207 000 Ball Bearing 6203 2NSE 1 HJ032100 84 030201 000 Ball Bearing 6005 2NSE 1 HJ031000 85 340007 615 Block 2 PG010046 86 012...

Page 24: ...360271 901 Angular Worm Shaft 1 RTH16001 6 118 012003 007 Key 5 5 20 1 HH010411 119 002101 101 Pan Head Lock Screw M5 0 8P 20 1 HA350310 120 000203 104 Set Screw M6 1 0P 12 4 HA030405 121 921154 000 F...

Reviews: