Page: 68
Service Guide ML390/391
Chapter 3 Maintenance & Disassembly
3.2.24 Paper Pressure Guide
· Perform these procedures:
3.2.01
,3.2.02
.
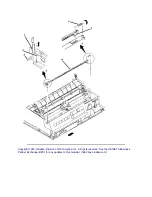
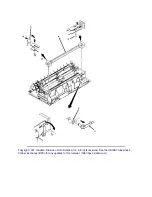
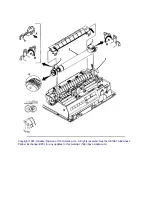
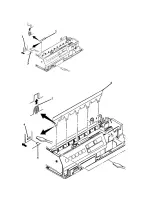
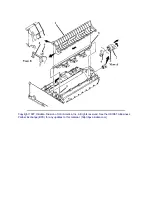
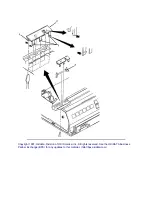
· Use a straight-slot screwdriver to detach the coupling holes (1) of the support spring (2) from the
projections (3) on the main chassis. (Microline 391-Plus ONLY)
· Work from left to right and use a straight-slot screwdriver to detach the coupling holes (4) from the
projections (5) on the chassis.
· Remove the paper pressure guide (6).
NOTE:
When installing the paper pressure guide, be sure to fit it into the projections (5) and guide plates (7) at the
same time.
The Microline 390 / 390-Plus has five coupling holes and ten guide plates.
The Microline 391 / 391-Plus has seven coupling holes and thirteen guide plates.
P/N 50911501 Guide: Paper Pressure Both 90 RSPL A B C
B.2.05
, B.2.07
P/N 50911601 Spring: Release 391 RSPL A B
B.2.05
P/N 50911602 Guide: Paper Pressure Both 91 RSPL C
B.2.05
, B.2.07
P/N 50913901 Spring: Support 391+ RSPL A B C
B.2.05
, B.2.07
Summary of Contents for MICROLINE Turbo ML390
Page 49: ...Partner Exchange BPX for any updates to this material http bpx okidata com ...
Page 53: ...Page 29 Service Guide ML390 391 Chapter 2 Principles of Operation ...
Page 81: ......
Page 95: ...Partner Exchange BPX for any updates to this material http bpx okidata com ...
Page 106: ...Partner Exchange BPX for any updates to this material http bpx okidata com ...
Page 110: ......
Page 115: ......
Page 132: ......
Page 222: ......

