BASIC OPERATION
- 84 -
1
2
3
4
5
6
• When the temporary workspace is full on the
equipment’s hard disk, a message appears and the job
is canceled. The available workspace can be viewed
on the TopAccess [Device] tab.
Scan to USB
The Scan to USB function stores scans to a USB storage
device.
To store data in a USB storage device, the Save to USB Media
setting must be enabled by the administrator. For details, refer
to the
TopAccess Guide
.
Note
• USB storage devices must meet requirements below.
However, some USB storage devices may not be used with
this equipment even though the requirements below are
met.
- FAT16 or FAT32 format
- Single-partition (USB storage devices with multiple
partitions are not supported.)
Scanning to USB
1
Place the original(s).
2
On the control panel, press the [SCAN]
button to enter the SCAN menu.
3
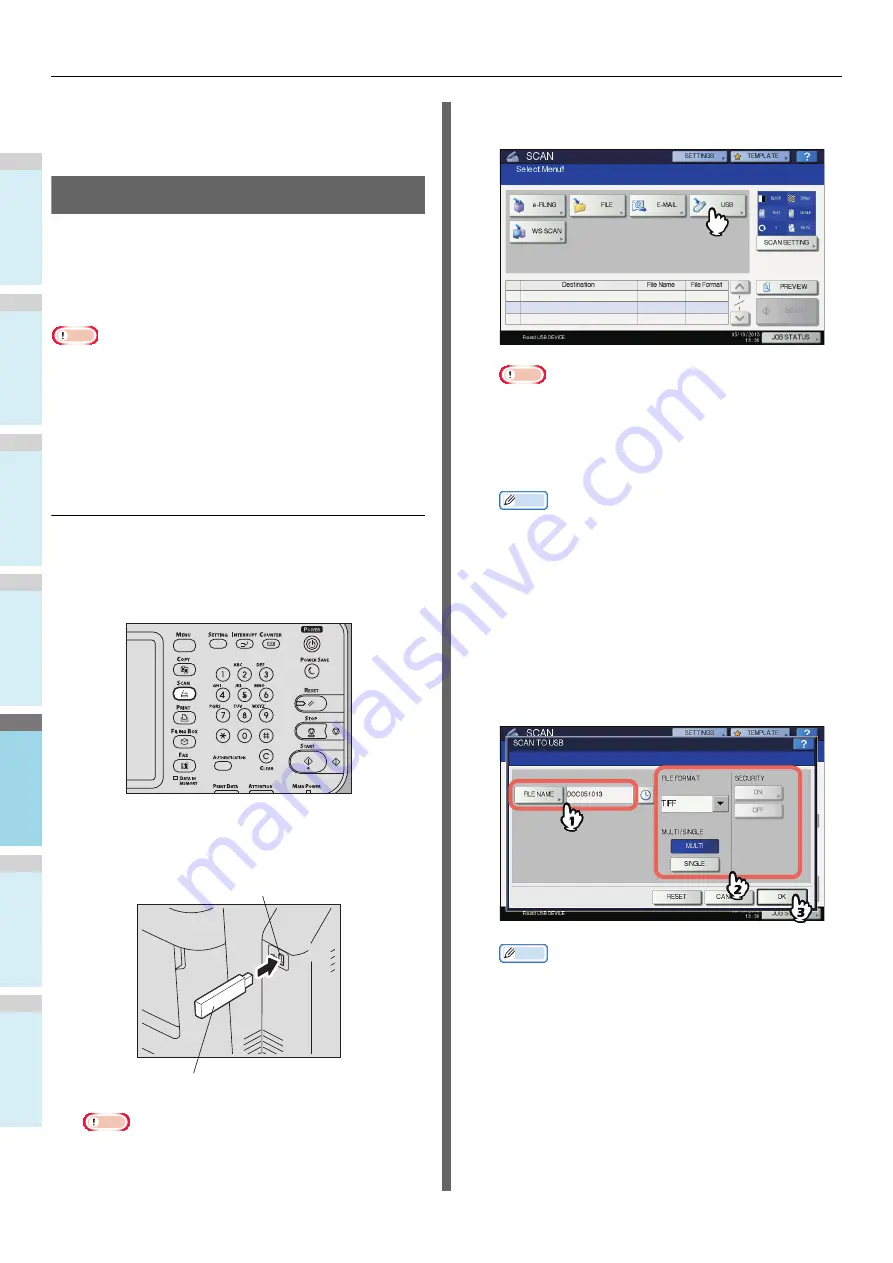
To store scans in a USB storage device,
connect the device to the equipment and
wait a few seconds.
Note
• Connect the USB storage device to the USB port.
4
When “Found USB DEVICE.” message
appears on the touch panel, press [USB].
Note
• When you store scans in a USB storage device, never
attempt to remove the device from the equipment until
data transmission is completed. Removing the USB
storage device during data transmission may corrupt
the device.
Memo
• Storing scans to a USB storage device may take a long
time depending on the volume of the scans.
• Press [PREVIEW] in this step and then select the scan
function in order to preview your scans at the end of
the operation.
5
Define the settings for the new file as
required.
1) Press [FILE NAME] to change the file name.
2) Select an option for each of the FILE FORMAT,
MULTI/SINGLE PAGE and SECURITY settings.
3) After the settings are done, press [OK].
Memo
• To clear the settings, press [RESET].
• [FILE NAME]
Pressing this button displays an on-screen keyboard.
Change the file name using the keyboard and digital
keys, and then press [OK] to set the entry. A maximum
of 128 letters can be used for the file name.
USB Port
USB Storage Device
Summary of Contents for MB760dnfax
Page 27: ...1 2 3 4 5 6 2 Copying HOW TO MAKE COPIES P 28 BASIC COPY MODES P 43...
Page 57: ...1 2 3 4 5 6 3 Fax SENDING RECEIVING A FAX P 58 CHECKING AND CANCELING THE COMMUNICATIONS P 71...
Page 75: ...1 2 3 4 5 6 4 0 Scanning BASIC OPERATION P 76...
Page 89: ...1 2 3 4 5 6 5 Utilities that can be used with this machine List of Utilities P 90...
Page 91: ...1 2 3 4 5 6 6 Index...
Page 94: ...May 2013 45611202EE Rev1...


