BASIC OPERATION
- 78 -
1
2
3
4
5
6
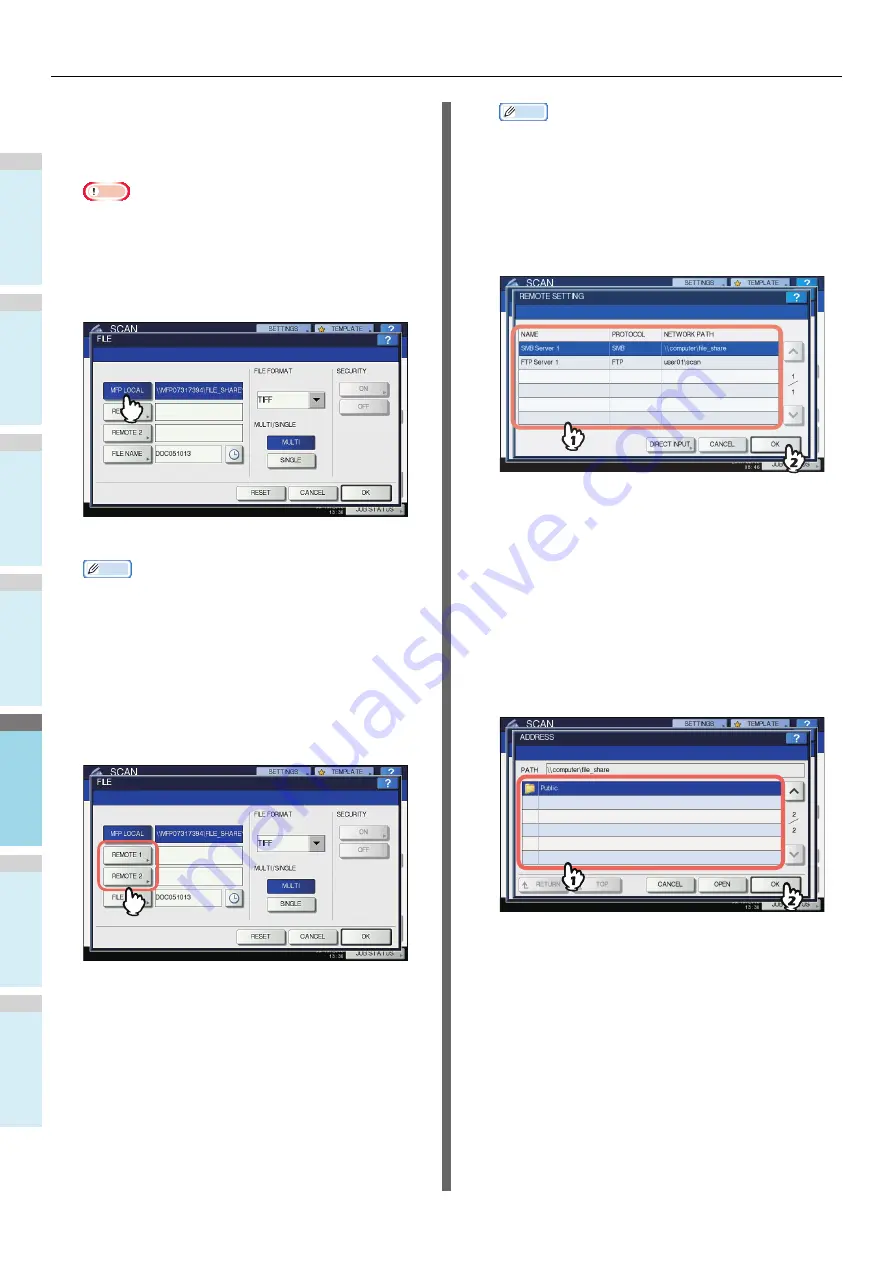
• To store the scan in the equipment’s shared folder,
proceed to step 4.
• To store the scan in a network folder, proceed to step
5.
Note
• Storing data in a network folder requires the
administrator to set the equipment configuration. For
details, refer to the
TopAccess Guide
.
4
Make sure that [MFP LOCAL] is selected
and highlighted.
Proceed to step 9.
Memo
• If saving data in a network folder is enabled by the
administrator, you can select 2 file destinations from
[MFP LOCAL], [REMOTE 1] and [REMOTE 2]. If you
select [MFP LOCAL], you can specify a network folder
(REMOTE 1 or 2) as a remote destination. To set a
network folder as a remote destination, proceed to step
5.
5
To store the scan in a network folder, press
[REMOTE 1] or [REMOTE 2].
• If the selected remote destination (REMOTE 1 or 2) is
configured by the administrator so that you can specify
a desired network folder, the screen for setting up the
remote destination is displayed. Proceed to step 6.
• If the selected remote destination (REMOTE 1 or 2) is
already defined by the administrator so that the scan is
saved in a specified network folder, pressing the button
does not display the screen for specifying the file
destination. In this case, you cannot change the file
destination. Proceed to step 9. If you need to change
the remote destination, ask your network administrator
for help.
Memo
• If saving data in a network folder is enabled by the
administrator, you can select 2 file destinations from
[MFP LOCAL], [REMOTE 1] and [REMOTE 2].
6
Select the desired file destination from the
list.
1) Select the file destination.
2) Press [OK].
• If FTP, NetWare IPX, NetWare IP or FTPS is selected
for the file destination, proceed to Step 9.
• If SMB is selected for the file destination, proceed to
Step 7.
• If your desired file destination has not been registered
in the equipment, press [DIRECT INPUT] and proceed
to Step 8.
7
If SMB is selected for the file destination,
select the folder to be stored.
1) Select the folder to be stored.
2) Press [OK].
Proceed to Step 9.
Summary of Contents for MB760dnfax
Page 27: ...1 2 3 4 5 6 2 Copying HOW TO MAKE COPIES P 28 BASIC COPY MODES P 43...
Page 57: ...1 2 3 4 5 6 3 Fax SENDING RECEIVING A FAX P 58 CHECKING AND CANCELING THE COMMUNICATIONS P 71...
Page 75: ...1 2 3 4 5 6 4 0 Scanning BASIC OPERATION P 76...
Page 89: ...1 2 3 4 5 6 5 Utilities that can be used with this machine List of Utilities P 90...
Page 91: ...1 2 3 4 5 6 6 Index...
Page 94: ...May 2013 45611202EE Rev1...


