background image


Installing upgrades > 135

(b)

Using the 

UP

/

DOWN

 arrow keys (2), navigate to 

the Report Print menu and press 

OK

 (3) once for the 

menu map.

(c)

Press 

OK

 (3) again to print the menu map.

(d)

When the menu map is printed, press 

Return

 (4) to 

exit the menu system.

11.

Examine the first page of the menu map.

Near the top of the page, between the two horizontal lines, you 
will see the current MFP configuration. This list contains the 
figure for total memory size.

This should indicate the total memory now installed, which 
should be the size of memory board you have installed plus 
256MB.

H

ARD


DISK


DRIVE

The optional 40GB internal hard disk drive (HDD) enables 
collating of printed pages and can be used to store overlays and 
macros, fonts, and secure or proof documents waiting to be 
printed.

1.

Switch the MFP off and disconnect the AC power cable.

2.

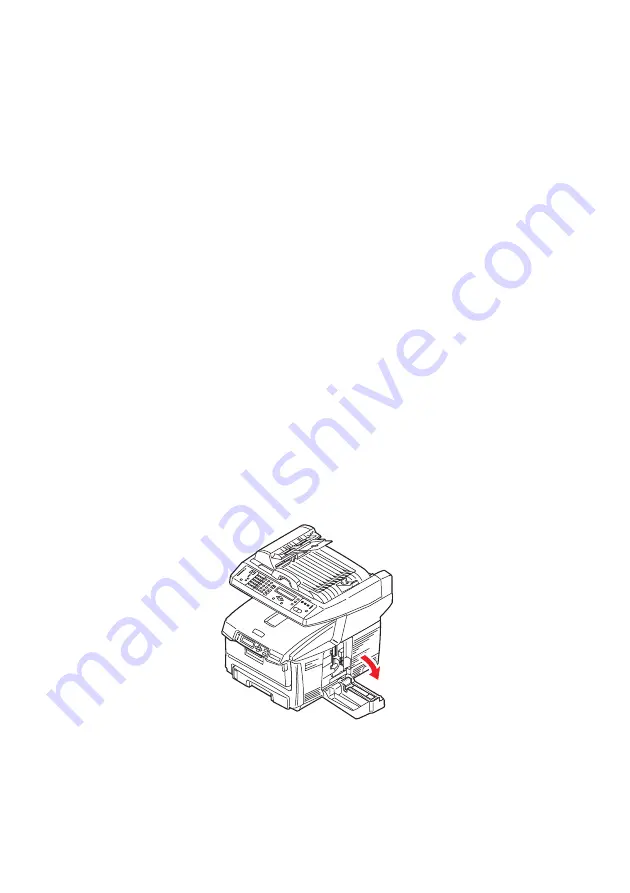
Pull open the access panel on the side of the machine.  

3.

Locate the clip (1) on the top of the disk unit into the slot (2) 
in the printer.

Summary of Contents for CX2033 MFP Plus

Page 1: ......

Page 2: ...onstitute endorsement by the manufacturer While all reasonable efforts have been made to make this document as accurate and helpful as possible we make no warranty of any kind expressed or implied as...

Page 3: ...own stacker 21 Face up stacker 21 Loading paper 22 Cassette tray 22 Multi purpose tray 25 Configuring your machine 26 Minimum configuration requirements 26 Pre configuration information 26 General 26...

Page 4: ...07 Toner cartridge replacement 108 Image drum replacement 114 Transfer belt replacement 119 Fuser replacement 123 Clean the ADF 127 Clean the document glass 128 Clean the LED head 128 Installing upgra...

Page 5: ...ement 185 RGB Versus CMYK color 186 About the printer drivers 186 Office color 187 Graphic pro 190 CMYK ink simulations CMYK source data 199 Rendering intents 201 Pure black text graphics 202 Color ma...

Page 6: ...uce vomiting if person is unconscious If inhaled move the person to an open area for fresh air Seek medical attention If it gets into the eyes flush with large amounts of water for at least 15 minutes...

Page 7: ...her toner cartridge may not operate at all even if it is described as compatible and if it does work your product s performance and print quality may be degraded Specifications subject to change witho...

Page 8: ...o your documents Up to 20 pages per minute in full color for fast printing of high impact color presentations and other documents Up to 10 copies per minute at 300 dpi in full color for fast copying U...

Page 9: ...mails for security reasons Multi tasking Supports scanning one job while printing another to ensure greater productivity Digital Copying An intuitive control panel makes digital copying fast and easy...

Page 10: ...multi page documents Additional memory to allow printing of more complex pages Additional paper tray for loading a further 530 sheets to minimize operator intervention or different paper stocks for l...

Page 11: ...display Status LEDs and operator buttons 4 Front Cover release lift 5 Paper tray Standard blank paper tray Holds up to 300 sheets of 20 lb 80g m paper 6 Multi purpose feeder shown closed Used for fee...

Page 12: ...on with the multi purpose feed tray the paper path through the MFP is essentially straight This avoids bending the paper around curves in the paper path and enables feeding of up to 54 lb 203g m media...

Page 13: ...aling can be made from preset percentages 2 One touch keypad Provides one touch dialing of your most often used or favorite fax numbers 3 Keypad Alpha numerical keys used to enter copy quantity fax nu...

Page 14: ...Down Left Right Keys Used to move the cursor in the LCD up down left right The up down keys are used to switch function indication 10 OK Used to select and confirm current setting selections 11 Return...

Page 15: ...set up the MFP 15 Reset Select to change the scanner to the factory default settings 16 Power save Press once to go to sleep mode continuous press is invalid 17 Power LEDs Power Alarm Sleep Illuminate...

Page 16: ...ms However if your system does not support auto launching CD ROMs press the Start button choose RUN type d setup exe d the CD ROM drive in use and then click OK 4 Follow the on screen instructions to...

Page 17: ...over network connections 1 To search and install select File Search All Devices 2 Click Search 3 Highlight the required search result and click Add The MFP network setup tool allows you to configure y...

Page 18: ...e high fuser temperatures used in the printing process Envelopes should be free from twist curl or other deformations They should also be of the rectangular flap type with glue that remains intact whe...

Page 19: ...er Label Letter size Avery 7162 7664 7666 White Laser Labels size A4 Banner Paper Oki 52206002 100 count 8 5 x 35 4 inches 215 90 x 899 16 mm Oki SynFlexTM Paper Oki 52205901 8 5 x 11 inches 215 90 x...

Page 20: ...plications this function is enabled in the driver settings When printing from other systems this function is enabled in the Print Menu SIZE DIMENSIONS WEIGHT G M A6 4 1339 x 5 8268 inches 105 x 148mm...

Page 21: ...10 envelopes can be loaded at one time subject to a maximum stacking depth of 0 3937 inches 10mm Watermarked or headed paper should be loaded print side up and top edge into the MFP FACE DOWN STACKER...

Page 22: ...E TRAY 1 Remove the paper tray from the MFP 2 Fan the paper to be loaded at the edges 1 and in the middle 2 to ensure that all sheets are properly separated then tap the edges of the stack on a flat s...

Page 23: ...and paper guides 2 to the size of paper being used To prevent paper jams Do not leave space between the paper and the guides and rear stopper Do not overfill the paper tray Capacity depends on the ty...

Page 24: ...epending on paper weight 6 For face up printing make sure the face up rear stacker 3 is open and the paper support 4 is extended Paper is stacked in reverse order and tray capacity is approximately 10...

Page 25: ...Do not exceed the paper capacity of about 50 sheets or 10 envelopes Maximum stacking depth is 0 3937 inches 10 mm 3 Press the tray latch button 3 inwards to release the paper platform so that the pape...

Page 26: ...ument s via intranet FTP HTTP or CIFS Protocol environment Windows 2000 Windows XP HTTP or FTP server PRE CONFIGURATION INFORMATION GENERAL There are no factory default PIN or passwords these should b...

Page 27: ...OP3 server 9 POP3 Port 110 Explanation 1 DHCP Enable Choose Yes to obtain IP subnet gateway addresses automatically from DHCP server After changing setting from Disable to Enable switch scanner module...

Page 28: ...etwork administrator 8 POP3 Server The IP address of your POP3 server 9 POP3 Port The port number of your POP3 Server Enter the DNS name or IP and port number of your POP3 server if your mail server r...

Page 29: ...e automatically given for the MFP 2 IP Address An IP Internet Protocol address uniquely identifies a host connection to an IP network System administrator or network designer assigns the IP address Th...

Page 30: ...tinations must be defined by the system administrator before the MFP can be used to distribute any scanned document s on the network Network and E mail parameters Defines the parameters for TCP IP SMT...

Page 31: ...P s Management Utility please refer to the user s manual of the Network Setup Tool on the CD ROM supplied 3 From the MFP scanner control panel For illustration purposes only the configuration menu opt...

Page 32: ...URL field of your browser and then press Enter The MFP web page appears For example http 192 168 1 41 Note The Administrative Settings are blocked by a password It is recommended that the system admin...

Page 33: ...dy done so install the MFP Network Setup Tool as described in MFP network setup tool on page 16 Note The Administrative Settings are blocked by a password It is recommended that the system administrat...

Page 34: ...CRIPTION OR CHOICE Model Displays the model name Device name Displays the device name Scanner MAC address Displays the scanner MAC address Printer Serial No Displays serial number F W version Displays...

Page 35: ...d Recycled Rough Tray 2 Media Type Plain LTRhead Transparency Bond Recycled CardStock Rough MP Media Type Plain Letterhead Transparency Labels Bond Recycled CardStock Rough Density Control Auto Manual...

Page 36: ...users did not enter anything in the Subject field in e mail message from the MFP Def From Default From field in e mail and fax messages from the MFP Up to 64 characters are allowed Scan Size Limit Th...

Page 37: ...ual receive ECM mode Speaker volume Id Enter MFP ID number Station Enter MFP telephone number Enable Disable Enable Disable Enable Disable 0 1 2 3 4 5 6 7 8 9 10 0 1min 2min 3min 4min 5min 6min 1 ring...

Page 38: ...lowing security settings Copy restricts the use of the copy function only Copy Scan to restricts the use of the copy and scan functions Fax restricts the use of the fax function only Fax Copy restrict...

Page 39: ...Power Save Enable Disable Power Save Time Select to enter power saving mode after the machine has stopped using for a specific period Choice 5 15 30 60 240 minutes Default Mode Scan to Copy Fax Stand...

Page 40: ...rd it is recommended that the administrator create a new password to ensure security ITEM DESCRIPTION OR CHOICE Address Book Manager Set up a list of e mail addresses and groups to which to send your...

Page 41: ...nternal IBM ProPrinter III XL emulation fonts including any downloaded to flash memory or hard disk Print FX Font Execute Prints complete list of all internal Epson FX emulation fonts including any do...

Page 42: ...tray sequence order when automatically switching MP Tray Usage DO NOT USE WHEN MISMATCH If a document to be printed demands a paper size not installed in the selected tray the MFP can automatically fe...

Page 43: ...ty of print jobs are in color The MFP automatically switches between 20ppm for each color page and 32ppm for each black and white page When black and white pages are printed the 3 color drums are auto...

Page 44: ...E DESCRIPTION ITEM CHOICE DESCRIPTION Tray1 Papersize A4 A5 A6 B5 LEGAL14 LEGAL13 5 LEGAL13 LETTER EXECUTIVE CUSTOM Selects the size of paper loaded in Tray 1 upper tray if both trays installed For CU...

Page 45: ...Selects the size of paper loaded in Tray 2 lower if installed For CUSTOM setting see X DIMENSION and Y DIMENSION later in this table Tray2 Mediatype PLAIN LETTERHEAD TRANSPARENCY BOND RECYCLED CARDSTO...

Page 46: ...lected type of media MPT Mediaweight Medium 20 24 lb 75 90g m Heavy 24 32 lb 91 120g m ULTRA HEAVY 32 54 lb 121 203g m Selects the media weight to be fed from the multi purpose tray Unit Of Measure MI...

Page 47: ...adjust the color balance C Highlight C Mid Tone C Dark M Highlight M Mid Tone M Dark Y Highlight Y Mid Tone Y Dark K Highlight K Mid Tone K Dark 3 0 3 3 0 3 3 0 3 3 0 3 3 0 3 3 0 3 3 0 3 3 0 3 3 0 3 3...

Page 48: ...e data When a job is sent the MFP will require a warm up time of up to 1 minute before printing can begin Personality AUTO EMULATION PCL IBM PPR III XL EPSON FX PS3 EMULATION This item selects which i...

Page 49: ...t due to a paper jam once the jam has been cleared Error Report ON OFF If ON the MFP will print error details when a PostScript Emulation error occurs ITEM CHOICE DESCRIPTION ITEM CHOICE DESCRIPTION F...

Page 50: ...4 24 mm Sets the non printable page area NORMAL is PCL compatible True Black OFF ON Selects whether black image data is printed using black toner ON or 100 CMY OFF Valid in PCL emulation mode only Pe...

Page 51: ...ne Form Length 11 Inch 11 7 Inch 12 Inch 279 40 297 18 204 80 millimeters Specifies the length of paper TOF Position 0 0 Inch 1 0 Inch 0 25 4 mm Specifies the distance of print from the top edge of th...

Page 52: ...t CR Function CR CR LF Selects whether a received carriage return character 0Dh also causes a line feed Line Length 80 COLUMN 136 COLUMN Specifies the number of characters per line Form Length 11 inch...

Page 53: ...ncel Power Save ENABLE DISABLE Enables or disables automatic power save mode Delay before entering this mode is set in the system configuration menu Paper Black Setting 2 0 2 Used for small adjustment...

Page 54: ...ulti purpose tray Color Page Count The total number of pages printed in color Mono Page Count The total number of pages printed in monochrome K Drum Life Remaining C Drum Life Remaining M Drum Life Re...

Page 55: ...t allow an anonymous account for authentication of connection to the web page the user will be prompted to enter a user name and password first when connecting to the web site In this mode the file sa...

Page 56: ...and select Properties 2 Select the Directory tab on the Properties page Ensure the privileges for Read Write and Directory Browsing are selected Note Make sure that the account stored in your compute...

Page 57: ...t Windows systems Set up the shared directory as per the network settings for sharing in MS Windows Under the User level mode of Windows 2000 use the account and password with the privilege of write a...

Page 58: ...6 Using the UP arrow key navigate to Country Code and press OK 7 Select the country in which the MFP is situated and press OK 8 Press Return to go back to the main menu settings screen 9 Using the UP...

Page 59: ...Fax Settings and press OK 3 Press OK to select Phone Book 4 Press OK to select Edit Speed Dial then press OK 5 Using the UP DOWN arrow keys navigate to the desired speed dial entry location index numb...

Page 60: ...mber then press OK 6 Press OK enter the new group name using the alpha numeric keypad and press OK 7 If multiple numbers are required repeat step 6 to add other entries to the group Deleting a speed d...

Page 61: ...sing the DOWN arrow key navigate to Delete Group Dial then press OK 5 Using the UP DOWN arrows keys scroll through the group dial entries and press OK to select the required group ID This can be repea...

Page 62: ...ix digits the MFP will wait until the outside line is available secondary dial tone detected before dialling the rest of the number 1 Press the Menu button on the control panel 2 Using the UP arrow ke...

Page 63: ...rt button to receive the fax To enable the manual receive option 1 Press the Menu button to prompt the menu settings screen 2 Using the UP arrow key navigate to Fax Settings and press OK 3 Using the U...

Page 64: ...menu Adding a telephone handset If you want to add a telephone handset to your MFP connect the line to the Tel socket in certain countries it may be necessary to use a telephone plug adaptor Note When...

Page 65: ...UP arrow key navigate to Fax Settings and press OK 3 Using the UP arrow key navigate to Setup Fax then press OK 4 Using the UP DOWN arrows keys navigate to Ring Response and press OK 5 Select the requ...

Page 66: ...PostScript 3 emulation If you print mainly from general Office applications choose one of the PCL drivers For faster printing of PDF documents choose PostScript If you print mainly from professional D...

Page 67: ...l order If using the face up rear paper stacker reverse order would normally stack your pages in numerical order 4 You can specify how many pages to print on a sheet Pages will be scaled to fit the nu...

Page 68: ...ng for paper weight should match the type of paper on which you intend to print 4 A variety of document finishing options can be selected such as normal one page per sheet or N up where N can be any n...

Page 69: ...eted from the MFP s hard disk after printing It remains there for future use until you delete it from the printer control panel or from your PC with the Storage Device Manager utility There are three...

Page 70: ...enter a name for this print job The name may be up to 16 alpha numeric characters If you have more than one print job stored on the MFP when you come to print you will need a distinctive name to dist...

Page 71: ...you have more than one stored document a list appears in the display 4 Use the buttons to select the name of the print job you wish to print and press ENTER to select it 5 If necessary use the button...

Page 72: ...r mind about printing a stored document you can delete it from the MFP s hard disk without printing it first 1 Follow Steps 1 to 4 in the above procedure for printing the document 2 Use the buttons to...

Page 73: ...d fax pages from books newspaper clippings or paper with wrinkles or curls place them on the glass PLACING DOCUMENT S IN THE ADF Before using the ADF please make sure that your paper meets the followi...

Page 74: ...2 Place the document with the text face UP in the ADF and make sure that the top of each page is fed in first 3 Adjust the Paper Guides 1 to center the document in the ADF Note To transmit irregular...

Page 75: ...Operation 75 PLACING DOCUMENT S ON THE GLASS 1 Open the document cover 2 Place your document with the text face DOWN on the glass and align it to the upper left corner 3 Close the document cover...

Page 76: ...ddress Book 2 Use the UP and DOWN arrows 3 to select multiple e mail addresses and press the OK button 4 Or for a fast operation you may simply type the initial letter of the e mail address using the...

Page 77: ...Network Setup Tool MENU ITEM DESCRIPTION Attachment The file name of the scanned document Up to 64 characters can be entered in this field From Enter your From address If an e mail can not be sent not...

Page 78: ...3 on the control panel to cancel the operation If you stop typing in the From Subject To CC or BCC fields for three minutes the LCD display automatically clears what you have typed This machine allow...

Page 79: ...and starting the Network Setup Tool on the CD ROM supplied 1 Place your document s with text face UP in the ADF or face DOWN on the glass 2 Press Send Mode 1 and FTP Address 2 buttons on the control...

Page 80: ...ument s in color ADVANCED OPERATION Set up the Printer Options and Media Type See Contents of each printer menu on page 40 and the instructions following Accessing additional settings Note Factory def...

Page 81: ...menu for the Additional Settings when all printer options are installed if there are any changes in the option condition the settings will return to the these factory default settings Quality Speed T...

Page 82: ...n 1 Horizontal 4 in 1 Vertical Edge Erase 0 6 13 19 25 mm 0 0 2362 0 5118 0 748 0 9843 inches Margin Shift Right 0 6 13 19 25 mm 0 0 2362 0 5118 0 748 0 9843 inches Note When Collate is set the items...

Page 83: ...Operation 83 Bottom 0 6 13 19 25 mm 0 0 2362 0 5118 0 748 0 9843 inches Paper Supply Legal Letter A4 A5 Input Tray Auto Tray 1 Tray 2 Optional MP...

Page 84: ...prompt the Copy screen 2 Press the Select 4 button to choose a preset value from 100 25 50 70 141 200 and 98 fit to page 3 Alternatively continue to press the Select 4 button until the 25 400 LED is...

Page 85: ...set to the Normal level of density If your original document comes with a lighter or darker contrast you can improve the quality by using the Adjusting Density feature To change density 1 Press the Co...

Page 86: ...the Copy screen 2 Enter number of copies required with the numeric keypad The LCD display will confirm the copy count selected FAXING BASIC OPERATION Sending a fax to a single location Control menu fa...

Page 87: ...o display the fax number of the last transmission successful or not then press the Mono button 6 to send a fax to this number Note If the destination fax number has an extension number press the Pause...

Page 88: ...ings button 2 to prompt the Additional settings screen Control menu faxadv_oda jpg note If the MFP is in use i e sending a fax or scanning then any incoming faxes will be rejected During other functio...

Page 89: ...ax screen 2 Press the Additional Settings button and press OK 3 Select the appropriate quality setting and press OK 4 Press Return to exit the menu and return to the fax screen Adjusting density The m...

Page 90: ...screen 2 Press the Additional Settings button 3 Using the DOWN arrow key navigate to the Doc Size setting and press OK 4 Select the required size setting and press OK 5 Press Return to exit the menu...

Page 91: ...1 Place your document s with text face UP in the ADF or face DOWN on the glass 2 Press the Fax Mode button on the control panel to prompt the Fax screen 3 Press the Additional Settings button 4 Using...

Page 92: ...re faxing If the remote machine is set to hold data in memory for transmission to a local machine when contacted the procedure is called polling receive To set the fax to poll receive 1 Press the Fax...

Page 93: ...face DOWN on the glass 2 Press the Fax Mode button on the control panel to prompt the Fax screen 3 Enter the destination fax numbers by either typing in the number using the numeric keypad pressing th...

Page 94: ...Using the UP DOWN arrow keys navigate through the list of fax jobs 6 Press OK to select the required job s for deletion The selected row s will be marked with an 7 Press Return to finish selection and...

Page 95: ...ey navigate to the Reports and press OK 4 Select required report and press OK to print Activity report Transmission report The transmission report can be modified with the following options available...

Page 96: ...t your printer You need to select the source only once unless you want to choose another scanner 4 Place the document face DOWN on the document glass or face UP in the ADF 5 Select the File menu and c...

Page 97: ...r Half tone 3 Resolution Choice 50 72 100 144 150 200 300 600 1200 2400 4800 dpi 4 Brightness Adjust the brightness level from 100 to 100 5 Contrast Adjust the contrast level from 100 to 100 6 Further...

Page 98: ...ument from the automatic document feeder ADF Image type 1 Choose B W if your original contains only B W text pencil or ink sketch 2 Halftones are the reproduction of an image that gives the illusion o...

Page 99: ...your previewed image to the maximum of the preview window Inverting and selecting your image 1 Invert The invert command reverses the brightness and the color in the image For color images each pixel...

Page 100: ...inted matter 1 Before 2 After Moire pattern An undesirable pattern in a color printing resulting from incorrect screen angle of overprinting halftone Scanner 5 eps 2 Sharpen Sharpen the scanned image...

Page 101: ...s of the scanned image to optimize the following Using the advanced features 1 Click the Switch button 1 to select the Advanced Settings bar 2 to 7 Advanced settings include Highlight Shadow Hue Satur...

Page 102: ...r allows you to extend the range of color and reveal more details in a gray or color image Shadow 1 The darkest point of an image Gamma 2 The middle tones of the image Highlight 3 The lightest point o...

Page 103: ...tion 103 When the value of highlight and shadow change the image changes as shown below 1 Highlight 255 Shadow 0 Normal 2 Highlight 210 Shadow 10 3 Highlight 200 Shadow 0 4 Highlight 255 Shadow 50 1 2...

Page 104: ...ion lightness Improve an image by changing the level of hue saturation lightness a Hue Adjust the hue by moving the triangle to the right or left Note the level of color intensity will change simultan...

Page 105: ...en has been selected or if known enter the figure in the box at the top The first box refers to the Cyan Red percentage content the second to Magenta Green and the third to Yellow Blue 6 Color drop ou...

Page 106: ...Settings OTHER TOOLS 1 Measuring Unit Indicates the measuring system in use By clicking the button you can change the measuring unit Choice Inch cm Pixel 2 Paper Size Choice Card 4 x 2 5 Photo 5 x 3 5...

Page 107: ...R LOW or if print appears faded first open the top cover and try tapping the cartridge a few times to evenly distribute the toner powder This will enable you to obtain the best yield from your toner c...

Page 108: ...mmendations etc which may be in force concerning waste recycling If you do spill any toner powder lightly brush it off If this is not enough use a cool damp cloth to remove any residue Do not use hot...

Page 109: ...ance 109 1 Gently raise the scanner 2 Press the cover release a and open the MFP s top cover b fully b a WARNING If the MFP has been powered on the fuser may be hot This area is clearly labelled Do no...

Page 110: ...positions of the four cartridges a Pull the colored toner release lever 1 on the cartridge to be replaced fully towards the front of the MFP 1 2 3 4 1 Cyan cartridge 2 Magenta cartridge 3 Yellow cart...

Page 111: ...er from marking your furniture 6 Remove the new cartridge from its box but leave its wrapping material in place for the moment 2 1 CAUTION The green image drum surface is very delicate and light sensi...

Page 112: ...erial and peel off the adhesive tape from the underside of the cartridge 9 Holding the cartridge by its top center with the colored lever to the right lower it into the printer over the image drum uni...

Page 113: ...ing gently down on the cartridge to ensure that it is firmly seated push the colored lever 1 towards the rear of the MFP This will lock the cartridge into place and release toner into the image drum u...

Page 114: ...13 Gently lower the scanner IMAGE DRUM REPLACEMENT The MFP contains four image drums cyan magenta yellow and black 1 Gently raise the scanner CAUTION Antistatic symbol eps Static sensitive devices ha...

Page 115: ...MFP s top cover b fully 3 Note the positions of the four cartridges b a WARNING If the MFP has been powered on the fuser will be hot This area is clearly labelled Do not touch 1 2 3 4 1 Cyan cartridge...

Page 116: ...ght pull the lever towards you This will release the bond between the toner cartridge and the image drum cartridge CAUTION The green image drum surface at the base of the cartridge is very delicate an...

Page 117: ...on the piece of paper where the old cartridge was placed Keep it the same way round as the old unit Pack the old cartridge inside the packaging material for disposal 9 Place the toner cartridge onto t...

Page 118: ...e sides of the MFP cavity ID Lower In eps 12 Close the top cover and press down firmly at both sides so that the cover latches closed 13 Gently lower the scanner Note If you need to return or transpor...

Page 119: ...approximately every 60 000 pages Switch off the MFP and allow the fuser to cool for about 10 minutes before opening the cover 1 Gently raise the scanner 2 Press the cover release a and open the MFP s...

Page 120: ...Maintenance 120 3 Note the positions of the four cartridges It is essential that they go back in the same order 1 2 3 4 1 Cyan cartridge 2 Magenta cartridge 3 Yellow cartridge 4 Black cartridge...

Page 121: ...urface at the base of each cartridge is very delicate and light sensitive Do not touch it and do not expose it to normal room light for more than 5 minutes If the drum unit needs to be out of the MFP...

Page 122: ...front and the drive gear towards the rear of the MFP Locate the drive gear into the gear inside the printer by the rear left corner of the unit and lower the belt unit flat inside the MFP 9 Turn the...

Page 123: ...s Switch off the MFP and allow the fuser to cool for about 10 minutes before opening the cover WARNING If the MFP has recently been powered on some fuser components will be very hot Handle the fuser w...

Page 124: ...Maintenance 124 1 Gently raise the scanner Press the cover release a and open the MFP s top cover b fully 2 Identify the fuser handle 1 on the top of the fuser unit b a...

Page 125: ...up and out of the MFP If the fuser is still warm place it on a flat surface which will not be damaged by heat 5 Remove the new fuser from its packaging and remove the transit material 6 Holding the ne...

Page 126: ...the metal partition which separates the fuser area from the image drums 8 Push the two retaining levers 2 towards the rear of the MFP to lock the fuser in place 9 Close the top cover and press down f...

Page 127: ...leaning procedure below 1 Moisten a cotton swab with isopropyl alcohol 95 2 Carefully pull open the ADF front cover 3 Wipe the feed roller 1 by moving the swab from side to side 4 Rotate the roller fo...

Page 128: ...Moisten a soft clean cloth with isopropyl alcohol 95 3 Gently wipe the document glass 2 and the white sheet 3 on the under side of the document cover to remove dust or any toner particles 4 Close the...

Page 129: ...Maintenance 129 1 Gently raise the scanner 2 Press the cover release a and open the MFP s top cover b fully b a...

Page 130: ...ED lens cleaner or soft tissue 4 Close the top cover and press down firmly at both sides so that the cover latches closed 5 Gently lower the scanner CAUTION Do not use methyl alcohol or other solvents...

Page 131: ...so enables booklet printing which uses even less paper and makes large documents even easier to handle The duplex unit slides straight into the rear of the MFP and requires no tools to install 1 Unpac...

Page 132: ...rt Print menu and press OK 3 once for the menu map c Press OK 3 again to print the menu map d When the menu map is printed press Return 4 to exit the menu system 6 Examine the first page of the menu m...

Page 133: ...nel on the side of the machine 3 Carefully remove the new memory board from its wrapping Try to handle the board only by its short edges avoiding contact with any metal parts as far as possible In par...

Page 134: ...slot until it latches in and will not go any further 8 Close the access panel pressing firmly at top to latch it closed 9 Reconnect the AC power cable and switch the MFP on 10 When the MFP is ready p...

Page 135: ...uration This list contains the figure for total memory size This should indicate the total memory now installed which should be the size of memory board you have installed plus 256MB HARD DISK DRIVE T...

Page 136: ...of the connecting cable 3 into the disk unit connector 4 in the printer 5 Tighten the two thumbscrews 5 6 Close the access panel pressing firmly at the top to latch it closed 7 Reconnect the AC power...

Page 137: ...the first page of the menu map Near the top of the page between the two horizontal lines you will see the current MFP configuration This should now indicate that the hard disk unit is installed All th...

Page 138: ...Installing upgrades 138 3 Observing safety rules for lifting and using locating guides place MFP on top of the additional paper tray 4 Locate securing clip press down and lock into position...

Page 139: ...ferent but the principles are the same PCL DRIVER If you have installed a memory upgrade it is not necessary to change the PCL printer driver and you can ignore this section If you have installed a du...

Page 140: ...in Windows XP via the Start Menu or from the Windows Control Panel 2 Right click the printer icon for this printer and choose Properties from the pop up menu 3 On the Device Settings tab locate the li...

Page 141: ...paper path through the MFP When a jam occurs the printer immediately stops and the Alert LED on the status panel informs you of the event If printing multiple pages or copies do not assume that having...

Page 142: ...ull the paper out of the ADF unit c Close the ADF front cover JAMS IN THE PRINTER 1 If a sheet is well advanced out of the top of the printer simply grip it and pull gently to draw it fully out If it...

Page 143: ...ons of the four cartridges It will be necessary to remove the four image drums to gain access to the paper path WARNING If the MFP has been powered on the fuser will be hot This area is clearly labell...

Page 144: ...to a piece of paper to prevent toner from marking your furniture and to avoid damaging the green drum surface 7 Repeat this removal procedure for each of the remaining image drum units CAUTION The gre...

Page 145: ...t unit a To remove a sheet with its leading edge at the front of the belt 1 carefully lift the sheet from the belt and pull it forwards into the internal drum cavity and withdraw the sheet 2 4 3 1 CAU...

Page 146: ...of the sheet from the belt push the fuser pressure release lever 4 towards the front and down to release the fuser s grip on the sheet and withdraw the sheet through the drum cavity area Then allow th...

Page 147: ...bly by its top center lower it into place in the MFP locating the pegs at each end into their slots in the sides of the MFP cavity 10 Lower the top cover but do not press down to latch it closed yet T...

Page 148: ...found in this area If the sheet is low down in this area and difficult to remove it is probably still gripped by the fuser In this case raise the top cover reach around and press down on the fuser pr...

Page 149: ...If your MFP has a duplex unit installed press the cover release at the center of the unit open the cover and remove any sheets in this area then close the cover 14 Lift the front cover release and pul...

Page 150: ...e the cover 16 Pull out the paper tray and ensure that all paper is stacked properly is undamaged and that the paper guides are properly positioned against the edges of the paper stack When satisfied...

Page 151: ...he power cable and wall outlet Make sure that the telephone line not external telephone or handset is connected to the LINE socket on the back of the machine If an external telephone is installed lift...

Page 152: ...r a dial tone If there are frequent problems communicating with a particular remote machine try programming the telephone number into a speed dial key and then change the parameters for that key See A...

Page 153: ...setting of the machine This MFP will not receive faxes automatically if the manual receive mode is enabled See Manual receive on page 63 DOCUMENTS RECEIVED ARE LIGHT OR HAVE VERTICAL STREAKS ON THEM...

Page 154: ...number dialled or programmed into the MFP See Connecting to a PBX on page 62 MFP ALWAYS ANSWERS BEFORE ITS POSSIBLE TO USE THE EXTERNAL TELEPHONE If an external telephone is connected change the MFP...

Page 155: ...error 2 Check SUM error 3 Printer model No error 4 DModule I F version error 5 FAT version error Restart the machine Turn it off and on again If the code still appears contact your dealer Initializing...

Page 156: ...ho is denied color printing Contact your network administrator for help Normal Cancelling job Buffer full Indicates that a job is being cancelled because the printer area where the logs are stored has...

Page 157: ...only Warning Belt life Notifies the life of the belt This is a warning only Warning color toner empty Toner empty Warning status takes effect at Cover Open Close Allows printing approx 50 pages A4 Le...

Page 158: ...as been cancelled Contact your network administrator for help Press the Online key to remove message from the LCD Warning job_cancel Log buffer full Job rejected Buffer is full job has been cancelled...

Page 159: ...6 File already exists 7 Illegal name 8 Can not delete root 9 Not file 10 Not directory 11 Not same volume 12 Read only 13 Root dir full 14 Dir not empty 15 Bad disk 16 No label 17 Invalid parameter 1...

Page 160: ...media size and media type in the tray does not match the print data Load mmm ppp paper in tray Error 461 Tray 1 Error 462 Tray 2 Error online Download message Processing Indicates that message data to...

Page 161: ...MP tray Load media into tray to allow printing Error 440 Install paper cassette ERRCODE TRAY open Paper tray has been removed Reinstall tray to allow printing Error 430 431 Install paper cassette ERRC...

Page 162: ...554 Y Error 555 M Error 556 C Error 557 K Error 614 615 616 617 Replace toner ERRCODE incompatible COLOR toner OEM channel mismatch Incompatible toner cartridge fitted incorrect signature ID incorrect...

Page 163: ...r sensor error If the code appears contact your dealer Error 401 Open upper cover ERRCODE paper multi feed Inappropriate long paper was fed from a tray Check whether multi feed has happened See Cleari...

Page 164: ...entry Error 385 Around fuser unit Error 389 Printing page lost See Clearing paper jams If the code still appears contact your dealer Error 370 371 373 Open duplex cover ERRCODE paper jam Open the dup...

Page 165: ...ace fuser ERRCODE fuser life The fuser has reached the end of its life and printing will stop Warning status takes effect at cover open close Replace fuser Error 355 Replace belt ERRCODE belt life The...

Page 166: ...e cover ERRCODE cover open Close the cover Error 310 Top cover Error 311 Front cover If the code still appears contact your dealer Error 316 Close cover ERRCODE duplex cover open Close the duplex cove...

Page 167: ...le writing failure 6 CU F W mismatch Error 300 Power OFF ON ERRCODE network error Your printer s network card has an error Restart the machine turn it off and on again If the code still appears contac...

Page 168: ...et cable Check the MFP IP address Check the destination IP address Check Subnet Mask Check Gateway IP Address is invalid Check network settings Network is down Check network settings Network is unreac...

Page 169: ...twork administrator Mail server doesn t support SMFP login extension Contact your network administrator for further help No support SMTP login authentication Contact network administrator Contact your...

Page 170: ...ity or turn off the mail server s authentication and try again Action not taken Check To address Requested action not taken mailbox name not allowed Check To address User not local Check To address Ch...

Page 171: ...ministrator for help Store file error Make sure privilege Make sure you have the privilege to store files in this position server directory Insufficient storage space in system Contact server administ...

Page 172: ...zed but forbidden Unpredicted error Turn on Log File option in ADMIN MANAGEMENT log action to log and observe device actions and contact your server administrator or nearest dealer for further help MK...

Page 173: ...oes not support HTTP That server does not support HTTP version 1 1 contact your server administrator for help Resource not found Contact server administrator That server can t save the files contact y...

Page 174: ...Windows XP If you choose this method any changes you make will become the driver defaults This means they will remain active for all your applications unless you specifically change them from within...

Page 175: ...ne shown is the appropriate one and click Properties PCL SAVED DRIVER SETTINGS This feature unique to the Windows PCL drivers allows you to save the printer driver settings and reuse them later This c...

Page 176: ...l SETTING THE DRIVER DEVICE OPTIONS This section explains how to ensure that your printer driver can utilize all of the hardware features installed in your MFP Accessories such as hard disk duplex uni...

Page 177: ...ng the correct number of paper trays high capacity feeder duplex unit etc 4 Click OK to close the window and save your changes BLACKS AND GRAYS BLACK OVERPRINT Black overprint eliminates the white edg...

Page 178: ...prints the color black in one of two ways Composite Black or True Black COMPOSITE BLACK The cyan magenta yellow and black toners are combined to create composite black This will sometimes give a gloss...

Page 179: ...Black to print photographs dark sections of the photos may appear black Office Color 1 On the driver s Color tab select Office Color 1 and click the Options button 2 On Black Finish 2 make your select...

Page 180: ...hoose your preferred setting FINE LINES ENHANCEMENT This feature can be used to emphasize the pen width of very fine lines minimum line width With some software applications if this feature is turned...

Page 181: ...u select Grayscale the MFP converts all colors into shades of gray and prints using only black toner Use Grayscale to speed up printing of proof copies or when you do not need to print a color documen...

Page 182: ...the PS driver on the Color tab click Grayscale and then click Advanced if you want to adjust brightness and contrast Some applications will attempt to set the halftone screen information for the MFP I...

Page 183: ...n be managed and adjusted 1 Application Color Management 1 Some graphics and desktop publishing programs such as Adobe Photoshop Adobe Illustrator and Quark Xpress have their own built in color manage...

Page 184: ...bout your application program or operating system color management please see the documentation that was supplied with your application software or computer Notes 1 Only use one color management syste...

Page 185: ...but want good results when printing from programs such as Microsoft Office Graphic Pro 3b Graphic pro on page 190 This is a powerful color management system based on ICC color profiles Profiles can be...

Page 186: ...ice of RGB or CMYK color you should assume that it only supports RGB The RGB color model is based on the three primary colors of light Red Green and Blue This model is used by scanners digital cameras...

Page 187: ...is strongly recommended that you use the Graphic Pro options instead If you are printing CMYK data the Graphic Pro options provide more power and flexibility RGB OPTIONS CMYK OPTIONS POSTSCRIPT ONLY M...

Page 188: ...imized for printing photographs Colors are printed with emphasis on saturation Monitor 6500K Vivid Optimized for printing photographs and for office graphics The MFP uses even more saturation than the...

Page 189: ...OR CORRECT UTILITY If the Office Color presets are not sufficient for your needs the Color Correct utility provides a means of further adjustment The Color Correct utility provides two methods for adj...

Page 190: ...profiles of a scanner digital camera or monitor the MFP s color can be matched to the input device Printer simulation Your MFP can be used to simulate the color output of another printer even when pri...

Page 191: ...t was used to capture RGB data e g scanner or digital camera The RGB Input Profile may also be your monitor profile if you are trying to match to your screen CMYK Simulation CMYK input These profiles...

Page 192: ...screen of Profile Assistant displays the profiles resident on the selected MFP s hard disk To download a new profile to the MFP a Click Add b Select an ICC profile from your computer s hard disk PROFI...

Page 193: ...be able to add this to the printer as a CMYK Simulation or Printer output profile e Select a number from 1 to 12 This number is used to identify the profile in the printer driver f Click OK to downlo...

Page 194: ...printer profile optional to the MFP hard disk using Profile Assistant See Step 2 Down loading ICC profiles to the hard disk on page 192 Once the profile s have been down loaded make the appropriate se...

Page 195: ...and click Options 2 Select ICC Profile Color Matching 2 3 Select the ICC profile that corresponds to the device you are trying to match such as your monitor scanner or digital camera 3 Remember that...

Page 196: ...GB source profile 4 Scanner monitor camera etc 5 Printer output profile 6 Leave on Auto or select your custom profile 1 2 5 6 3 4 Notes 1 Be aware that if the device you are trying to simulate has dif...

Page 197: ...ou need to download at least 2 profiles to your MFP using Profile Assistant RGB Source Profile Simulation Target Profile Printer Output Profile optional Once the profile s have been down loaded make t...

Page 198: ...ions 2 Select Printer Simulation 2 3 Select the ICC profile that corresponds to the device used to capture or display your source document this could be a monitor scanner or digital camera 3 4 Remembe...

Page 199: ...file yourself using profile creation software select it here and choose a rendering intent See Rendering intents on page 201 CMYK INK SIMULATIONS CMYK SOURCE DATA The ICC based color matching system c...

Page 200: ...ns as this provides additional controls such as using the Preserve Black feature or specifying an alternative printer output profile If you are using a source CMYK document use the following printer d...

Page 201: ...rofile 4 If Auto is selected the factory default profiles that are embedded in the MFP will be used If you have created a profile yourself using profile creation software select it here If you have se...

Page 202: ...your print as it will also try to simulate the paper white of the target device PURE BLACK TEXT GRAPHICS When your document is printed often the pure black colors will not be printed using 100 black...

Page 203: ...ff all printer color management and also prevents the MFP from restricting toner layer thickness If you are using your application color matching select Use Application Color Matching This option swit...

Page 204: ...ich model you have your system can offer a number of choices For detailed information on these options see Booklet printing imposition on page 205 Collating on page 208 Color separation on page 210 Se...

Page 205: ...16 at a time This is called the signature and will avoid having too thick a stack of paper to fold to make your booklet Your document will then be printed in a series of booklets which can be stacked...

Page 206: ...hoose Booklet from the Pages Per Sheet drop down list PS Booklets_oda jpg 2 Check that the duplex option is set to Flip on Short Edge Note If the Booklet choice is not shown check that the Duplex opti...

Page 207: ...lick Options 3 In the Options window you can set the signature size the number of pages per side of paper and the binding margin if your document is going to be thick The graphic in this window shows...

Page 208: ...options In this case the application performs the document collation and may send the job multiple times to the MFP Generally this method is slower but can be more reliable Printer collate This secti...

Page 209: ...lication s print options instead 1 If using the PCL driver on the Setup tab first choose any saved driver settings that you wish to use See Recalling saved driver settings on page 176 2 In the Job Opt...

Page 210: ...r will be used when printing in full color 1 In the PostScript driver s Color tab click Advanced 2 Select which separations you want to print from the drop down list SEPARATING QUEUED PRINT JOBS When...

Page 211: ...plication program See Changing the driver defaults on page 175 1 In the driver s Advanced tab click the Separator Page button 1 2 Click Browse 2 and navigate to a file containing an image of the separ...

Page 212: ...r tray This feature is not available in the Windows postScript drivers 1 In the Setup tab choose any saved driver settings you wish to use See Recalling saved driver settings on page 176 2 Click Paper...

Page 213: ...inches 76mm to 328mm and its length can be from 3 54 to 47 24 inches 90mm to 1200mm Actual limits vary slightly depending on which printer driver you use and your computer s operating system Some appl...

Page 214: ...f an A4 sheet 11 7 inches 297mm so if your paper is longer than this you will have to feed it short edge first 4 You can also position the page image on the paper to avoid printing too close to the ed...

Page 215: ...ck OK to close the Advanced Options window 7 In the driver s window choose the Multipurpose Tray as the Paper Source Windows PCL 1 In the driver s Setup tab select any previously saved settings you wi...

Page 216: ...for the new size in the Name box and click Add to save it in the list 6 Click OK to accept your chosen size and close the Custom Size window 7 If this is the size of your document but you want to sca...

Page 217: ...d paper stock only e g A4 A3 Letter etc Load the paper print side up Ream wrappers are usually marked with an arrow indicating which is the print side Paper can be fed from standard paper trays includ...

Page 218: ...sided Windows PCL 1 In the driver s Setup tab under 2 Sided Printing select the binding edge you want For portrait tall page layout the usual choice is Long Edge For landscape wide page layout the usu...

Page 219: ...imply want to proof your page layout or distribute your document in a more compact format It saves paper bulk weight and cost If you have a duplex unit installed you can even combine this feature with...

Page 220: ...pages N up you want to print on each sheet 1 up is normal 16 up is maximum 2 Click Options to choose from the available options for this feature From here you can choose the page printing order the p...

Page 221: ...Poster Print is only available with the Windows PCL printer drivers 1 In the driver s Setup tab under Finishing Mode choose Poster Print 2 Click Options to open the Options window a Choose the enlarge...

Page 222: ...ne size page onto a different size page without modifying the print data This feature is only available with the Windows PCL drivers 1 In the driver s Setup tab click the Options button 2 Check the Fi...

Page 223: ...posed on a printed document This can used to indicate that the document is Draft or perhaps Confidential The illustration below shows the Windows PostScript driver The PCL driver is very similar The W...

Page 224: ...viously created watermark In the Watermarks window click the watermark in the list To edit an existing watermark 1 In the Watermarks window click the watermark s name in the list 2 Click Edit 3 Make a...

Page 225: ...x 23 62 x 26 73 inches W x D x H Weight 37Kg approximately 82 lbs approximately Power source Input 220 to 240VAC 50 to 60Hz Power consumption Max operating 1200W Normal operating 490W Stand by 110W P...

Page 226: ...YK 1 bit Monochrome LCD size Text 24 x 2 mono LED indications Power saving Warning Power External connections RJ45 Network USB 2 0 Computer ADF port Network 10 100 Mbit Network workgroup solution for...

Page 227: ...weight thickness 60 to 105 g m 16 to 28 lb Paper feed Face up Capacity 50 sheets of Xerox4024 DP 9 07Kg paper ADF life 240 000 scans or more or 5 years Recommended daily scans Up to 1000 pages a day...

Page 228: ...peed Text Photo Density control 5 levels Enlarge reduce Whole page 98 25 to 400 in 1 and 10 increments Preset Scaling Input tray Tray 1 Tray 2 optional MP Tray Paper supply Letter SEF Short Edge Feedi...

Page 229: ...tion with RJ 45 connector Communications protocol TCP IP SMTP HTTP MIME FTP CIFS DHCP DNS LDAP Supported browsers Microsoft IE 4 1 or higher Netscape Navigator 4 0 to 4 78 Configuration requirement IP...

Page 230: ...Line input level range 19dB to 43dB Coding MH MR MMR JBIG Receiving memory 4 0 Mb Resolution Standard Fine Photo Extra fine 200 x 100dpi 200 x 200dpi 200 x 200dpi 200 x 400dpi Speed dials 200 One touc...

Page 231: ...es Group No of addresses in each group 300 20 50 Multiple recipients allow Yes Security check Yes Mail server authentication SMTP POP3 Supported mail server application Lotus Mail Server 5 0 MS Exchan...

Page 232: ...ion protocol FTP HTTP CIFS File formats B W Gray color PDF TIFF MTIFF PDF TIFF MTIFF JPEG Default file format PDF Resolution 75 100 150 200 300 400 600 dpi Default resolution B W Gray Color 200 dpi 15...

Page 233: ...nal 2nd tray Paper weight Main tray 64 120g m 17 32 lb Multi purpose tray 75 203g m 20 54 lb Optional 2nd tray 64 176g m 17 47 lb Paper output 250 sheets in face down top stacker 80g m 20 lb 100 sheet...

Reviews: