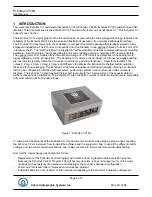


Echotrac CV100
User Manual
Page 19 of 19
Odom Hydrographic Systems, Inc.
May 28, 2008
4.3 How to perform a bar check
This section describes an example of how to perform a bar-check.
1. Setup the equipment and start the Echotrac control program.
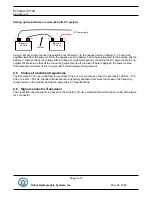
2. Set the Range at 60 feet. Select the bar-depth (start with a shallow depth, typically 5 feet), bar-width (typically
1 foot), Sound velocity, Draft (measured), Index (start with 0), End-of-scale and Scale width. The Echotrac
control program is now in calibration mode because the bar-depth is greater than “0”.
3. Lower the bar into the water column and place it at 5 feet below the water’s surface. The Digitizer in the
Echotrac CV will expect to see a target at that 5.00-foot depth while rejecting all other returns (including those
from the bottom).
4. Adjust the index to the correct depth.
5. Change the bar depth in the Echotrac control program.
6. Adjust the sound velocity up or down until the digitized depth matches the measured bar depth.
7. Repeat steps 3, 4, 5 and 6 to verify the calibration procedure until your reading matches the depth of the bar.
IMPORTANT:
Adjust the
draft
only when the bar is at the shallowest depth, because this is where the sound velocity has little
affect on the calibration.
Adjust the
sound velocity
only when the bar is lowered to greater depths, because this is where the sound
velocity becomes pre-dominant.
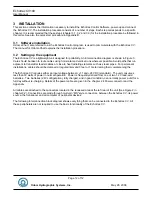
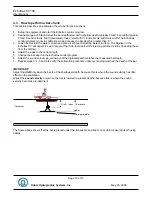
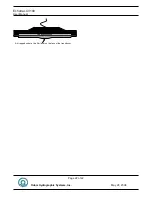
Transducer
Bar gate width
Bar depth
Bar
Draft + Index
The figure above shows that the bar is placed under the transducer and kept at a certain measured depth using
cables.


