background image

15  Technical Data

Instruction Manual SDI® 4 (G/54320/EN 0220 Rev01)

23 / 24

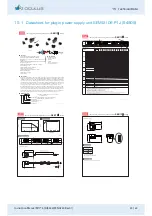
15.1 Datasheet for plug-in power supply unit GEM12I 09-P1J (54905)

G E M 1 2

s e r i e s

I

Features

Model Encoding

-

I

05

GEM

P1J

12

Interchangeable AC plug

Output voltage

DC plug type

C+ tuning fork type

P1J: Plug for standard model, 2.1

5 5

11mm,

ψ×

ψ×

.

USB: USB(type A) for 5V optional model only
Optional plug type available per request

Description 

Interchangeable AC plugs (plug kit sold sperately)

Medical safety approved (2 x MOPP) accroding to 

    AAMI/ANSI ES60601-1/ES60601-1-11,EN60601-1/EN60601-1-11
    and IEC60601-1

Suitable for BF application with appropriate system consideration

Low leakage current <100  A

No load power consumption< 0.075W

(<

0.1W for 18V/48V)

Energy efficiency Level

Comply with EISA 2007/DoE and EU ErP

Class  power (without earth pin)


Protections: Short circuit / Overload / Over voltage

Fully enclosed plastic case

Optional lock type DC plug

3 years warranty

GEM12  is a highly reliable, 12W wall-mounted style single-output green medical adaptor series, which 

I

is compact and convenient for carry. This product is equipped with an interchangeable AC plug (4 types, 
including European type, USA type, U.K. type and Australian type) that makes it very suitable for businessmen 
to use in the major countries around the globe. GEM12  is a class   power unit (without FG), accepting 

I

the input range from 80VAC to 264VAC that it can satisfy the demands for various types of medical electrical 
devices. The circuitry design meets the international medical standards (2*MOPP), having an ultra low 
leakage current (<100  A), fitting the medical devices in direct electrical contact with the patients.


With the working efficiency up to 87% and the extremely low no-load power consumption below 0.075W, 
GEM12  is compliant with the latest USA energy regulation EISA 2007/DoE(Level  ) and EU ErP. The 

I

supreme feature allows the adaptor to save the energy when it is under either the operating mode or the 
standby mode. The entire series is approved for international safety regulations; moreover, it adopts the 
94V-0 flame retardant plastic case that it can effectively prevent users from electric hazard.

12W AC-DC High Reliability Interchangeable Medical Adaptor

{

EN 60601-1

IEC 60601-1

8

μ

Blood glucose meter

Blood pressure meter

Nebulizer

Inhaler

Portable medical device

Sleep apnea devices

Applications 

(Optional)

(Standard)

+

+

IP21

File Name:GEM12 -SPEC   2017-01-03

I

Series name

Output wattage

μ

AAMI/ANSI ES60601-1

ES60601-1-11

EN60601-1

EN60601-1-11

TYPE

ORDER NO.

Australian type

U.K type

European type

US type

Mix four type

AC plug-AU2

AC plug-UK2

AC plug-EU2

AC plug-US2

AC plug-MIX2

Interchangeable AC plug Specifically for GEM12 ~40

I

I

PUSH

OP
E

N

LOCK

PUSH

OP
E

N

LOCK

PUSH

OP
E

N

LOCK

LOCK

O

PEN

LOCK

PUSH

OP
E

N

PUSH

PUSH

O

PEN

LOCK

PUSH

O

PEN

LOCK

PUSH

O

PEN

LOCK

LOCK

OP
E

N

LOCK

PUSH

OP
E

N

PUSH

SPECIFICATION

G E M 1 2

s e r i e s

I

File Name:GEM12 -SPEC

I

2017-01-03

ORDER NO.

SAFETY MODEL NO.

DC VOLTAGE

Note.2

RATED CURRENT

CURRENT RANGE

RATED POWER (max.)

RIPPLE & NOISE (max.) Note.3

OUTPUT

SETUP, RISE, HOLD UP TIME

VOLTAGE RANGE

Note.7

FREQUENCY RANGE

EFFICIENCY (Typ.)

AC CURRENT

INPUT

ENVIRONMENT

INRUSH CURRENT (max.)

LEAKAGE CURRENT(max.)

SAFETY STANDARDS

SAFETY &

EMC
(Note. 8)

WORKING TEMP.

WORKING HUMIDITY

STORAGE TEMP., HUMIDITY

TEMP. COEFFICIENT

VIBRATION

LIFE

MTBF

DIMENSION

OTHERS

NOTE

PACKING

PROTECTION

5V

9V

7.5V

12V

15V

18V

24V

48V

GEM12 05

I

GEM12 09

I

GEM12 07

I

GEM12 12

I

GEM12 15

I

GEM12 18

I

GEM12 24

I

GEM12 48

I

GEM12 05-

I

=P1J(Standard)

USB(Optional)

GEM12 09-P1J

I

GEM12 07-P1J

I

GEM12 12-P1J

I

GEM12 15-P1J

I

GEM12 18-P1J

I

GEM12 24-P1J

I

GEM12 48-P1J

I

2.4A

1.33A

1.6A

1A

0.8A

0.66A

0.5A

0.25A

0 ~ 2.4A

0 ~ 1.33A

0 ~ 1.6A

0 ~ 1A

0 ~ 0.8A

0 ~ 0.66A

0 ~ 0.5A

60mVp-p

60mVp-p

60mVp-p

80mVp-p

80mVp-p

80mVp-p

80mVp-p

100mVp-p

VOLTAGE TOLERANCE Note.4

LINE REGULATION

Note.5

LOAD REGULATION

Note.6

±

5.0%

±

4.0%

±

5.0%

±

3.0%

±

3.0%

±

3.0%

±

2.0%

±

2.0%

±

1.0%

±

1.0%

±

1.0%

±

1.0%

±

1.0%

±

1.0%

±

1.0%

±

1.0%

±

5.0%

±

4.0%

±

5.0%

±

3.0%

±

3.0%

±

3.0%

±

2.0%

±

2.0%

80 ~ 264VAC          113 ~ 370VDC

47 ~ 63Hz

0.4A / 115VAC          0.2A / 230VAC

30A / 115VAC          60A / 230VAC

WITHSTAND VOLTAGE

ISOLATION RESISTANCE

I/P-O/P:5656VDC

TUV EN60601-1/EN60601-1-11, AAMI/ANSI ES60601-1/ES60601-1-11(3.1 version), CAN/CSA-C22 3 edition approved

rd

I/P-O/P:100M Ohms / 500VDC / 25

/ 70% RH

3 years : 100% load 40

, 12hours / day

400Khrs min.  MIL-HDBK-217F(25

)

-20 ~ +70

(Refer to "Derating Curve")

20% ~ 90% RH non-condensing

-20 ~ +85

, 10 ~ 95% RH non-condensing

±

0.03%  /

(0 ~ 40

)

10 ~ 500Hz, 2G 10min./1cycle, period for 60min. each along X, Y, Z axes

73.9*39*48.5mm (L*W*H)

Standard model: 118g ; 72pcs / 9.5kg / CARTON for cable connection; Optional model 100g ; 110pcs / 12kg / CARTON for USB connection

CONNECTOR

PLUG

CABLE

12W

12W

12W

12W

12W

12W

12W

12W

0 ~ 0.25A

 1.All parameters are specified at 230VAC input, rated load, 25  70% RH ambient. 

 2.DC voltage: The output voltage set at point measure by plug terminal & 50% load.

 3.Ripple & noise are measured at 20MHz by using a 12" twisted pair terminated with a 0.1uf & 47uf capacitor. 

 4.Tolerance: includes set up tolerance, line regulation, load regulation. 

 5.Line regulation is measured from low line to high line at rated load. 

 6.Load regulation is measured from 10% to 100% rated load.

 7.Derating may be needed under low input voltage. Please check the derating curve for more details. 

 8.The power supply is considered as an independent unit, but the final equipment still need to re-confirm that the whole system complies with the 

    EMC directives. For guidance on how to perform these EMC tests, please refer to “EMI testing of component power supplies.”

    (as available on http://www.meanwell.com)


OVERLOAD

OVER VOLTAGE

110 ~ 200%  rated output power

Protection type : Hiccup mode, recovers automatically after fault condition is removed

110 ~ 140% rated output voltage

Protection type : Clamp by zener diode, output short

Compliance to EN55011 class B, EN61000-3-2,3, FCC PART 15 / CISPR22 class B

Compliance to EN61000-4,-2,3,4,5,6,8,11, light industry level,  criteria A

500ms, 30ms, 16ms/230VAC          500ms, 30ms, 16ms/115VAC  at full load

80%

82%

82%

82.5%

84%

85%

85%

87%

EMC EMISSION

EMC IMMUNITY

See page 3

See page 3

12W AC-DC High Reliability Interchangeable Medical Adaptor

Touch current <

0 A/264VAC

10

μ

Derating Curve

Static Characteristics

Mechanical Specification

Ta (

)

LOAD

 (%

)

-20

10

20

30

40

50

100

LOAD

 (%)

50

70

INPUT VOLTAGE

80

115

100

130

120

160

140

200

180

240

220

264

90

100

80

70

60

50

40

Unit:mm

TYPE

Australian type

U.K type

European type

US type

PUSH

O

PEN

LOCK

PUSH

O

PEN

LOCK

PUSH

O

PEN

LOCK

LOCK

OP
E

N

LOCK

PUSH

OP
E

N

PUSH

Cable connection (standard)

G E M 1 2

s e r i e s

I

12W AC-DC High Reliability Interchangeable Medical Adaptor

73.9

39

48.5

Inside

Outside

ID 2.1 x OD 5.5

11 0.5mm

±

C"+"

UL2468 18AWG 1000

for 5V~7.5V

+

/-

150 0mm

UL2468 22AWG 1200

for 9V

+

/-

150 0mm

UL2468 24AWG 1800

for 12V~48V

+

/-

150 0mm

File Name:GEM12 -SPEC

I

2017-01-03

Installation Manual

Please refer to :

http://www.meanwell.com/manual.html

Plug Assignment

Standard plug: P1J

USB connection (optional)

Optional lock type plug: P2S

SWITCHCRAFT S761K plug equivalent

P/N

OUTPUT

P1J

CENTER

+

G E M 1 2

s e r i e s

I

12W AC-DC High Reliability Interchangeable Medical Adaptor

File Name:GEM12 -SPEC

I

2017-01-03

73.9

39

48.5

-

+

USB Type A

1

2

3

4

+V

D-

D+

-V

Summary of Contents for 54300

Page 1: ...OCULUS SDI 4 INSTRUCTION MANUAL Stereoscopic Diagonal Inverter ...

Page 2: ...structions This operating manual describes the following SDI 4 models SDI 4c SDI 4e SDI 4m Due to ongoing development the diagrams shown in the instruction manual may depict minor changes to the actual device delivered If you have any questions or would like additional information about your device please do not hesitate to call us or to contact us by mail or fax Our service team will gladly assis...

Page 3: ...the SDI 4 to an Operation Microscope 10 8 Operation 13 8 1 Prior to each Use 13 8 2 Practical Tips for Use 13 9 Care and Maintenance 14 9 1 Removing the Accessories 14 9 2 Cleaning 14 9 3 Sterilization of the Rubber Cap 15 10 Transport and Storage 15 11 Troubleshooting 15 12 Guarantee and Service 17 12 1 Assumption of Liability for Functions and Damage 17 12 2 Manufacturer s and Service Addresses ...

Page 4: ...Table of Contents iii iii Instruction Manual SDI 4 G 54320 EN 0220 Rev01 ...

Page 5: ...SDI 4c with two protective dust covers and transportation lock 54320 SDI 4c Leica Version with two protective dust covers and transportation lock 54330 Accessories for each SDI 4 Sterilisable rubber cap 54335 Hexagon screw driver 05490061 Plastic carrying case with liners Instruction Manual G 54320 EN Conditioning Instructions G 55185 xxxx en Accessories for SDI 4c and SDI 4e For SDI 4c only Cable...

Page 6: ...DI 4 Pictograms on the packaging 1 Company logo manufacturer 8 Power supply 2 CE marking 9 Date of manufacture 3 5 UDI number 10 Serial number of the device 4 Matrix 11 Reference number 6 Disposal in household trash is prohibited SDI 4c and SDI 4e only 12 Name of device 7 Protection class SDI 4c and SDI 4e only 13 Heed Instruction Manual Fig 2 1 Example Graphic Symbols SDI 4e 1 5 6 12 7 9 10 11 2 ...

Page 7: ...he Instruction Manual Make sure to keep the instruction manual in a safe place and available to operating personnel at all times Observe the legal regulations with regard to accident prevention 3 1 1 Used Graphic Symbols Attention Denotes a potentially hazardous situation which can easily result in minor physical injury or property damage Note Denotes situations which could result in incorrect fin...

Page 8: ... personnel Transport and storage instructions Refer to the notes in sect 10 page 15 Instructions for setup and connection Only OCULUS an authorized dealer or trained personnel are allowed to setup and connect the SDI 4 Comply with the legal provisions in force in your country and with the hygiene and waste disposal regulations of the hospital or clinic Set up the SDI 4 so that the power plug is ea...

Page 9: ...ing knob of the SDI 4 must be sterilised before the first and before each subsequent use It is imperative that you heed the cleaning disinfection and sterilisation instructions given in the Conditioning Manual A sterilisation of the SDI 4 is not possible Instructions for disassembly and disposal When disconnecting electrical connections pull on the respective plug and not on the cable itself Take ...

Page 10: ...the power supply you must heed the following information Use a multiple socket extension cord that complies with the requirements of DIN EN 60601 1 2005 section 16 Do not place the multiple socket extension cord on the floor Do not use more than one multiple socket extension cord Plug only the SDI 4 into this multiple socket extension cord If you use a multiple socket extension cord it must be sup...

Page 11: ...cians and operating theatre personnel who due to their training or their knowledge and practical experience can guarantee proper handling of the device Only OCULUS or an authorized dealer is allowed to train the personnel The SDI 4 is designed for use in hospitals and clinics in conjunction with the appropriate operation microscopes These operation microscopes must have been designated as adaptabl...

Page 12: ...tor lamp 3 Star knob 7 Connection for a foot switch optional 4 SDI 4e 8 Power supply connection Fig 5 1 Unit Components SDI 4e 1 Top dustcover 6 Indicator lamp Transporting lock for star knob 7 Connection for a foot switch 3 Star knob 8 Power supply connection 4 SDI 4c 9 BIOM 5c connection pivotable 5 Bottom dust cover Fig 5 2 Unit Components SDI 4c 1 5 2 7 8 3 4 6 1 5 7 8 2 9 3 4 6 ...

Page 13: ...ick into position The indicator lights up shortly before the final position is reached For SDI 4c only If you are using the SDI 4c in conjunction with the BIOM 5c the image inversion function is controlled by the position of the BIOM 5c When the BIOM 5c is swung into the vertical working position a position switch on the BIOM 5c activates the SDI 4c The SDI 4c is automatically deactivated when the...

Page 14: ...f you want to transport it or if you have to return it for service or repair this can only be optimally done in the plastic case with special insert and with the transport lock for the star knob Like the operation microscope the SDI 4 is part of an optical unit Handle the equipment with care Do not expose the equipment to vibrations knocks soiling and high temperatures above 35 C Before assembling...

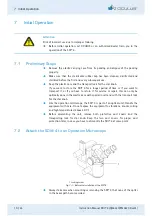
Page 15: ...ng the other microscope components Proceed in the same manner when mounting the beam splitter the binocular eyepiece and other components of the microscope Carefully tighten the hexagon socket set screw of the SDI 4 Fig 7 2 page 12 pos 2 in the same way with the included hexagon screw driver and then make sure that each component is correctly seated Before connecting the electrical versions of the...

Page 16: ... 3 pole jack 4 After plugging in the plug secure it by turning the screw connectors knurled bushings If you want to connect the SDI 4 to a BIOM 5c Plug the BIOM 5c plug into one of the rotating 4 pole jacks 2 Caution The SDI 4c is connected to the BIOM 5c solely via the 4 pole jacks 2 1 Set screw of the SDI 4 3 Plug for the combination foot switch 2 Connection jack for the BIOM 5 4 Connection jack...

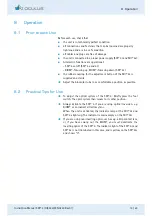
Page 17: ...DI 4c is supplied and sterile Adjust the binocular tube to as comfortable a position as possible 8 2 Practical Tips for Use To adjust the optical system of the SDI 4 Briefly press the foot switch The optic system then moves to its other position Always activate the SDI 4 if you are using optical inversion e g BIOM or an indirect vitrectomy lens When the unit is activated the indicator lamp at the ...

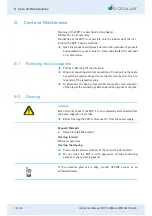
Page 18: ...ble but pull the respective plug or loosen the screw connectors To do so take hold of the respective plug To disconnect the hand or foot switch Loosen the screw connector of the plug at the connecting cable and pull the plug out of the jack 9 2 Cleaning Attention Risk of electric shock if the SDI 4 is not completely disconnected from the power supply for these jobs Before cleaning the SDI 4 discon...

Page 19: ...rt and storage conditions the national regulations and the regulations of your hospital Also see sect 15 page 20 Avoid impacts when moving the SDI 4 to another location since this can have an adverse affect on the adjustments With the use of the transporting lock for star knob you position the optical system of the SDI 4 in the rest position Only then the position is fixed Check the unit and its a...

Page 20: ...istance The image is cropped The SDI 4 or other components are incorrectly mounted at an angle The optics of the SDI 4 are not in operating position locking position Correct the assembly Turn it on or off again with the switch Unclear image The SDI 4 or the optic of the BIOM 5 are dirty Clean the glass surface of the BIOM 5 loupe If the SDI 4 optics are dirty contact OCULUS Service or your authori...

Page 21: ...Assumption of Liability for Functions and Damage OCULUS will only accept responsibility for the safety reliability and serviceability of the SDI 4 if the unit is used in compliance with the following terms Only use the equipment in conformance with this instruction manual There are no parts on the SDI 4 that require maintenance or repair by the user If assembly work modifications adjustments repai...

Page 22: ...34986 USA Tel 1 772 236 2622 outside of U S Tel 1 855 SDIBIOM Toll free in U S Fax 1 772 336 1984 E Mail info oculussurgical com 13 Disposal of Used Devices Dispose of the SDI 4 in compliance with the applicable legal requirements Comply with the hygiene and disposal regulations of the hospital or clinic SDI 4 electric In accordance with Guideline 2012 19 EU of the European Parliament and also the...

Page 23: ...a version 54310 SDI 4c 54320 SDI 4c Leica version 54330 Accessories Order Number Rubber covering for star knob 5 pack 54335 Footswitch for SDI 4e 54883 Extension cable to SDI 4e foot switch 54885 Plug in power supply unit for SDI 4e SDI 4c 230V 6V 54905 Extension cable for voltage power supply plug approx 5 m 54899 Cable standard for power supply SDI e 54800 09 001 transporting lock for star knob ...

Page 24: ...echnical Data Fig 15 1 Dimensions SDI 4c SDI 4e and SDI 4m dimensions Classification according to IEC 60601 1 Serviceable life expectancy 6 Years Width 96 mm Depth 91 4 mm Height 38 9 mm Type of protection against electric shock Protection class 2 Housing protection class IP20 ...

Page 25: ...se in potentially explosive atmospheres or in the vicinity of potentially explosive mixtures of anaesthetics or laughing gas and oxygen Ambient conditions Transport conditions Storage conditions Temperature 10 C to 35 C 40 C to 95 C 10 C to 55 C Humidity 30 to 75 10 to 95 10 to 95 Air pressure 700 hPa to 1060 hPa 500 hPa to 1060 hPa 700 hPa to 1060 hPa Power supply 6 15 V AC DC 0 5 A SDI 4c approx...

Page 26: ...o the following microscopes Zeiss Leica Moeller Takagi Topcon Kaps Alcon CE in accordance with directive 93 42 EWG for Medical Devices The unit is a Class I product Conformity assessment Directive 93 42 EEC annex VII Combination foot switch electric plugged into a 5 pole jack at the SDI 4e Star knob manual Star knob manual Combination foot switch Wipe down disinfection Rubber cap for star knob Ste...

Page 27: ...GEM12 18 I GEM12 24 I GEM12 48 I GEM12 05 I P1J Standard USB Optional GEM12 09 P1J I GEM12 07 P1J I GEM12 12 P1J I GEM12 15 P1J I GEM12 18 P1J I GEM12 24 P1J I GEM12 48 P1J I 2 4A 1 33A 1 6A 1A 0 8A 0 66A 0 5A 0 25A 0 2 4A 0 1 33A 0 1 6A 0 1A 0 0 8A 0 0 66A 0 0 5A 60mVp p 60mVp p 60mVp p 80mVp p 80mVp p 80mVp p 80mVp p 100mVp p VOLTAGE TOLERANCE Note 4 LINE REGULATION Note 5 LOAD REGULATION Note 6...

Page 28: ...el 49 641 2005 0 Fax 49 641 2005 299 E mail support oculussurgical de www oculus de USA OCULUS Surgical Inc 562 NW Mercantile Place Ste 104 Port St Lucie FL 34986 USA Tel 1 772 236 2622 outside of U S Tel 1 855 SDIBIOM Toll free in U S Fax 1 772 336 1984 E Mail info oculussurgical com G 54320 EN Charge 20220003 ...

Reviews: