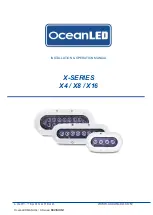
background image

L I G H T. Y E A R S   A H E A D .                                                     WWW.OCEANLED.COM 

OceanLED MANUAL / X-Series/ 

REVISION 1


INSTALLATION & OPERATION MANUAL 


X-SERIES  

X4 / X8 / X16 


Summary of Contents for X Series

Page 1: ...LIGHT YEARS AHEAD WWW OCEANLED COM OceanLED MANUAL X Series REVISION 1 INSTALLATION OPERATION MANUAL X SERIES X4 X8 X16...

Page 2: ...ate the warranty X Series light is for mounting directly to a flat surface with the cable passing through a 12 5mm hole Do not submerse your cable ends in water cable and connections exposed to underw...

Page 3: ...hooting Problems And Their Solutions 18 7 Appendix 21 7 1 Overall Dimensions 21 7 2 Light Setup 22 7 3 Cable Gauge Chart 12V 24 7 4 Cable Gauge Chart 24V 25 8 Warranty 27 PRE TEST Always test the ligh...

Page 4: ...the DMX standard 4 Preparing the hull 6 Correct marine sealant applied evenly around the cable and around the perimeter of the light unit 7 Correct hardware used for fixing of light fixture onto hull...

Page 5: ...to ensure your lights are always receiving the proper voltage and to ensure the power supply is not overworked causing premature failure Use the chart below to determine the power supply requirements...

Page 6: ...steel If the lights with plastic bezel are to be fitted to a conductive hull or any other metal surface outboard jet bracket Isolating Mounting Kit must be used Please contact OceanLED for additional...

Page 7: ...8 s look better than 2x X16 s When lights are pointing downwards the light can reflect off a sandy seabed giving a mirrored effect and light will bounce back creating even more illumination If positio...

Page 8: ...location is flat and check internally for ease of access or if there is a rib strut stringer or other hull irregularity that may interfere with the installation OceanLED recommends dry fitting all pr...

Page 9: ...X SERIES X4 X8 X16 INSTALL OPERATION MANUAL 8 Installation Overview Exploded view of the standard assembly Exploded view of the assembly with Isolating Mounting Kit...

Page 10: ...he light hard into the hull and twist slightly to spread the sealant around behind the light to ensure good adhesion 5 Cover the screws threads with the sealant and screw into the pre drilled pilot ho...

Page 11: ...codes and ordinates for DC connections Where multiple lights are fitted and especially on 12V systems it is advised to use a relay system to supply the switched power to the lights to reduce load on...

Page 12: ...ver leave the bare cables unprotected Take care to not leave the bare wire ends in bilge water before making the waterproof connections Water deposits in the connectors and cables will cause corrosion...

Page 13: ...X SERIES X4 X8 X16 INSTALL OPERATION MANUAL 12 Fuse Kit wiring assembly diagram Example of the DC Installation X Series with the OceanLED Junction Box...

Page 14: ...ected in one chain If installation requires more lights than this please contact OceanLED for advice For the X Series installation do not extend the 3m cable length to the DMX junction box for longer...

Page 15: ...etails see Chapter 7 2 To enable the DMX Control of all lights OceanLED DMX Junction Box must be used One junction box can be used to power and control maximum of four X Series Colour DMX lights If th...

Page 16: ...TEST YOURINSTALLATION Always test the lights BEFORE the vessel goes back into the water At this final stage make sure all of the system is operational If you have any issues please contact your local...

Page 17: ...2 Strobe mode to enter this mode turn off the light for less than 1 second then back on again The light will flash in a pseudo random pattern the colour will be the same as that in single colour mode...

Page 18: ...ll OceanLED lights have been coated with a specialized Tritonium coating which helps to prevent marine growth from adhering to the glass Lights should be cleaned with a boat brush or similar bi weekly...

Page 19: ...should not be illuminated The table below summarizes the detected fault modes X Series X4 Colours Orange LED Main LEDs CHECK On Off Input voltage is too low less than 9V Check voltage of power source...

Page 20: ...source and cabling for bad connections and rectify Off Flashing Input voltage is too high above 32V Check voltage of the power source and rectify Flashing Flashing Unit has detected a fault with the...

Page 21: ...t your dealer Check cable connections for corrosion Corrosion is present Contact your dealer for a replacement This is NOT covered by the warranty Light does not light up Check that there is power sup...

Page 22: ...X SERIES X4 X8 X16 INSTALL OPERATION MANUAL 21 7 Appendix 7 1 OVERALL DIMENSIONS X4 X8 X16...

Page 23: ...X SERIES X4 X8 X16 INSTALL OPERATION MANUAL 22 7 2 LIGHT SETUP The Explore Light Choice Diagram is also available at www oceanled com...

Page 24: ...X SERIES X4 X8 X16 INSTALL OPERATION MANUAL 23...

Page 25: ...AWG 8 AWG 6 AWG 6 AWG 4 AWG 2 AWG 2 AWG 1 AWG 0 AWG 2 0 AWG 40 45 12 AWG 10 AWG 8 AWG 6 AWG 4 AWG 4 AWG 2 AWG 2 AWG 1 AWG 0 AWG 2 0 AWG 45 50 12 AWG 8 AWG 6 AWG 6 AWG 4 AWG 2 AWG 2 AWG 1 AWG 0 AWG 2 0...

Page 26: ...WG 10 AWG 10 AWG 8 AWG 6 AWG 6 AWG 4 AWG 4 AWG 2 AWG 2 AWG 40 45 14 AWG 12 AWG 10 AWG 10 AWG 8 AWG 6 AWG 4 AWG 4 AWG 4 AWG 2 AWG 2 AWG 45 50 14 AWG 12 AWG 10 AWG 8 AWG 8 AWG 6 AWG 4 AWG 4 AWG 2 AWG 2...

Page 27: ...X SERIES X4 X8 X16 INSTALL OPERATION MANUAL 26...

Page 28: ...eserved Specifications are subject to change without notice Trademarks are the property of Ocean LED Marine LTD www oceanled com Ocean LED Marine LTD Ocean LED USA LLC Unit 1 Jacknell Road Dodwells Br...

Reviews: