background image

6

2. Set-up

2-3

Network (TCP/IP) settings

When the optional Network Card is installed and this machine is to
be used as a network printer, it is necessary to set the corresponding
IP address for the printer.
* To perform this setting for the 20 ppm copier, proceed to page 7.

Notes

• The IP address that should be registered here will differ depending

upon your network environment. Check with your network
administrator BEFORE performing this setting.

• If you are using a DHCP server to automatically configure the IP

address, this setting will not be necessary because DHCP server
configuration is already enabled as the factory default setting.

<15 ppm copier>

* To cancel the setting midway through it, press the Stop/Clear key.

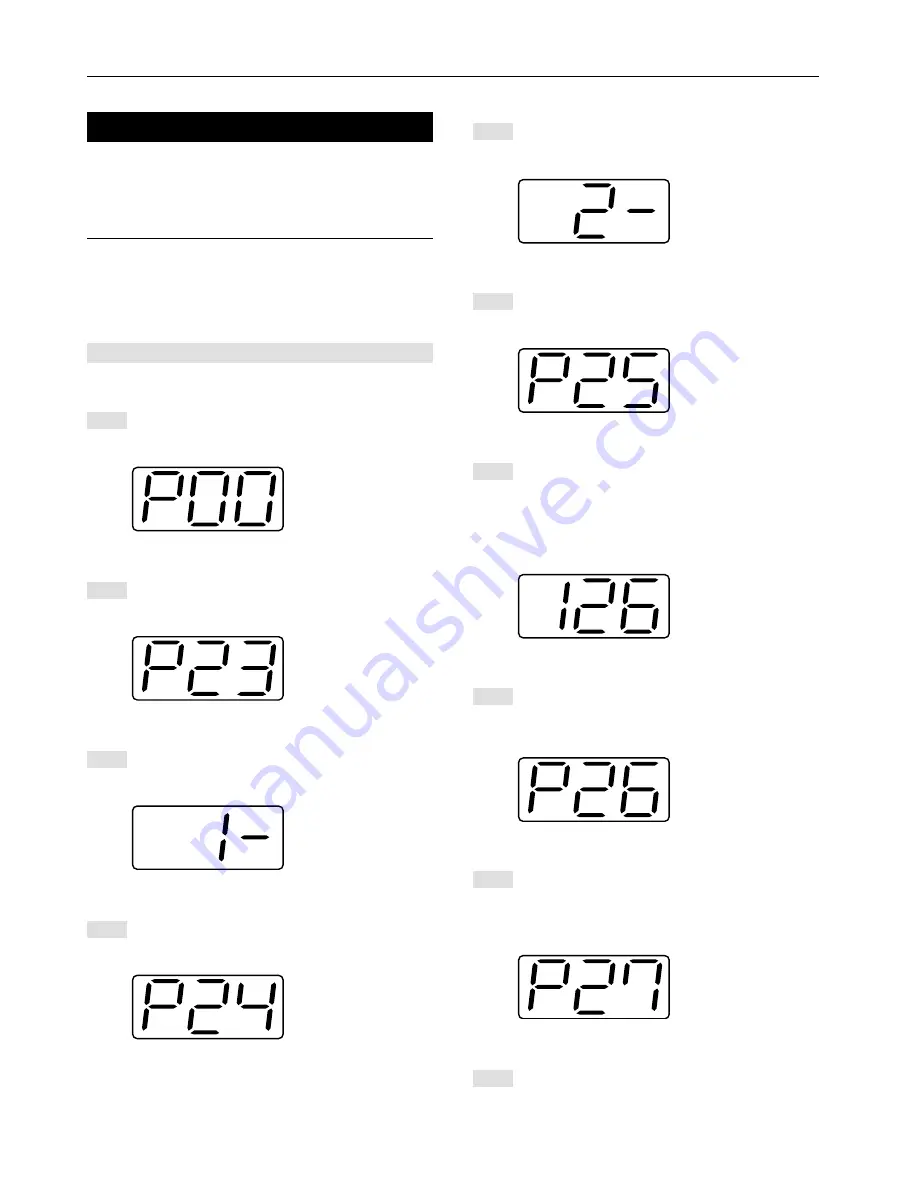
Press the Printer key. The machine will switch to the printer
mode and “P00” will appear in the copy quality/magnification
display.

Use the numeric keys to enter “2” then “3”, and then press
the Enter key. The display will change to “P23” (the TCP/IP
ON/OFF setting).

Use the 

M

 and 

N

 keys to select “1” (On) and then press the

Enter key. The selected setting will flash twice and will then
be registered.

Use the numeric keys to enter “2” then “4”, and then press
the Enter key. The display will change to “P24” (the DHCP
ON/OFF setting).

1

2

3

4

5

Use the 

M

 and 

N

 keys to select “2” (Off) and then press the

Enter key. The selected setting will flash twice and will then
be registered.

Use the numeric keys to enter “2” then “5”, and then press
the Enter key. The display will change to “P25” (the IP
address setting).

The numeric keys will be used to enter the 12-digit IP
address in blocks of 3 digits each:
First, enter the appropriate 3 digits for the first block and
then press the Enter key. Repeat this same procedure for
the 3 remaining blocks of the address (4 blocks in all). Once
the Enter key is pressed for the final 3-digit block, the
display will flash twice and the IP address will be registered.

Use the numeric keys to enter “2” then “6”, and then press
the Enter key. The display will change to “P26” (the Subnet
Mask setting). Enter the 12-digit Subnet Mask using the
same procedure that you did for entering the IP address.

Use the numeric keys to enter “2” then “7”, and then press
the Enter key. The display will change to “P27” (the
Gateway address setting). Enter the 12-digit Gateway
address using the same procedure that you did for entering
the IP address.

Once you are finished making all of the network settings,
press the Printer key. The machine will switch back to the
copier mode.

6

7

8

9

10

Summary of Contents for OP20

Page 1: ...1 1 1 Oc OP20 Printing System Set up Operations Guide Education Services Oc Operations Guide English version...

Page 2: ...tion Handbook are trademarks or registered trademarks of their respective companies The designations and will not be used in this handbook All rights reserved No part of this material may be reproduce...

Page 3: ...ITNESS FOR A PARTICULAR PURPOSE Some jurisdictions do not allow the exclusion of implied warranties so the above exclusion may not apply to you SUPPLEMENT TO AGREEMENT FOR SOFTWARE BUNDLING AND DISTRI...

Page 4: ...ded CD ROM That On Line Manual contains explanations on printing performing certain settings and configurations and the procedures required at your computer When there is a reference in this Instructi...

Page 5: ...to your computer Refer to the On Line Manual When connecting the printer to a network the optional Network Card must be installed Example connection CD ROM CD ROM PC PC 1 Connecting a network cable 10...

Page 6: ...ody 2 1 4 Name of parts operation panel 3 2 Set up 5 2 1 Connecting the printer cable 5 2 2 Installing the software 5 2 3 Network TCP IP settings 6 3 Troubleshooting 9 3 1 Canceling printing 9 3 2 Whe...

Page 7: ...allel cable here 2 Memory Card CompactFlash slot Insert the optional Memory Card CompactFlash here 3 Main switch Turn this switch ON first prior to using the printer Always turn this switch OFF O when...

Page 8: ...ion display Press the Printer key and check the cause of the error For more detailed information refer to 3 2 When an error code or error messages appears on page 10 The copy quality magnification dis...

Page 9: ...s when you want to enter a desired value directly 8 Stop Clear key Press this key when you want to cancel a setting midway through it 9 Message display Indicates the status of the printer as well as o...

Page 10: ...inter connect the printer cable 100BASE TX etc and perform the appropriate network settings Refer to 2 3 Network TCP IP settings on page 6 2 Connect the other end of the printer cable to the parallel...

Page 11: ...then 4 and then press the Enter key The display will change to P24 the DHCP ON OFF setting 1 2 3 4 5 Use the M and N keys to select 2 Off and then press the Enter key The selected setting will flash t...

Page 12: ...N cursor keys to select Option and then press the Enter key Use the M and N cursor keys to select TCP IP and then press the Enter key 1 2 3 4 5 Use the M and N cursor keys to select On and then press...

Page 13: ...s been entered press the Enter key Use the M and N cursor keys to select Subnet Mask and then press the Enter key Repeat steps 11 13 in order to enter the Subnet Mask using the same procedure that you...

Page 14: ...inted Always cancel the print job at your computer first If the print job is not canceled in your computer the data will be sent once again to the printer 15 ppm copier Press the Printer key The machi...

Page 15: ...the printer Insert both drawers securely The size of paper selected for printing does not match the size of paper in the drawer Replace the paper in the drawer with that of the correct size If you wa...

Page 16: ...the Enter key The amount of paper stacked in the optional Job Separator has exceeded the acceptable capacity Remove all paper from the Job Separator Trouble has occurred within the printer Contact yo...

Page 17: ...recommended that you install additional memory into the printer For more detailed information on adding memory contact your service representative or an authorized service center If you want to force...

Page 18: ...ay message 20 ppm copier RAM error Procedure An error has been detected during operation Turn the main switch to the printer OFF O and then back ON again If the same error message remains contact your...

Page 19: ...ble appropriate and is it connected properly Is the setting configuration in your computer correct Procedure Connect the power cord securely to a power source Turn the main switch to the printer ON Be...

Page 20: ...r 20 pages min A4 8 1 2 x 11 Printing Resolution With smoothing OFF 600 dpi x 600 dpi With smoothing ON interpolated 2400 dpi x 600 dpi Maximum Printing Size A3 11 x 17 RAM Memory Capacity Installed 8...

Page 21: ...MW...

Page 22: ......

Reviews: