Scanner installation
13
7
For the SCSI driver installation under Windows 95/98 and Windows NT,
please refer to the documentation delivered with your SCSI package.
Connection of the scanner to the computer
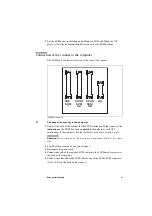
The SCSI cable connector is located at the rear of the scanner.
[3] SCSI connectors
▼
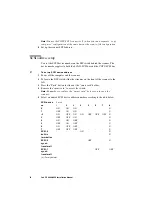
To connect the scanner to the computer
1
Check at the back of the scanner for the SCSI termination. If the scanner is the
last device
on the SCSI bus, turn on
switch 4
, the built-in active SCSI
termination. If the scanner is not the last device, make sure switch 4 is off.
Attention:
Do not turn on switch 4 and use a terminator block at the same
time.
2
Switch off your computer and your scanner.
3
Disconnect the power cord.
4
Connect one end of the supplied SCSI cable into the SCSI board connector at
the back of the computer.
5
Connect the other end of the SCSI cable to one of the SCAN-SCSI connectors
(0-A or 0-B) on the back of the scanner.
COP
SCSI
1
SCAN
SCSI
0-A
SCAN
SCSI
0-B
AU
Summary of Contents for CS 4050
Page 1: ...Oc CS 4040 4050 Installation Manual...
Page 37: ...37 Oc CS 4040 4050 Installation Manual Appendix A Technical references...
Page 39: ...39 Oc CS 4040 4050 Installation Manual Appendix B Safety information...
Page 44: ...44 Oc CS 4040 4050 Installation Manual...
Page 45: ...45 Oc CS 4040 4050 Installation Manual Appendix C Miscellaneous...


