


28
SECTION 4: USING THE OSD MENUS
a.
Move the cursor to
BLANK NUM
and click
IRIS+
to enter the editing mode.
b.
Click the up and down direction buttons to select a mask number for configuration.
c.
Click
IRIS+
again to confirm and exit the editing mode.
3.
Configure the position and size of the privacy mask.
a.
Move the cursor to
SET BLANK
and click
IRIS+
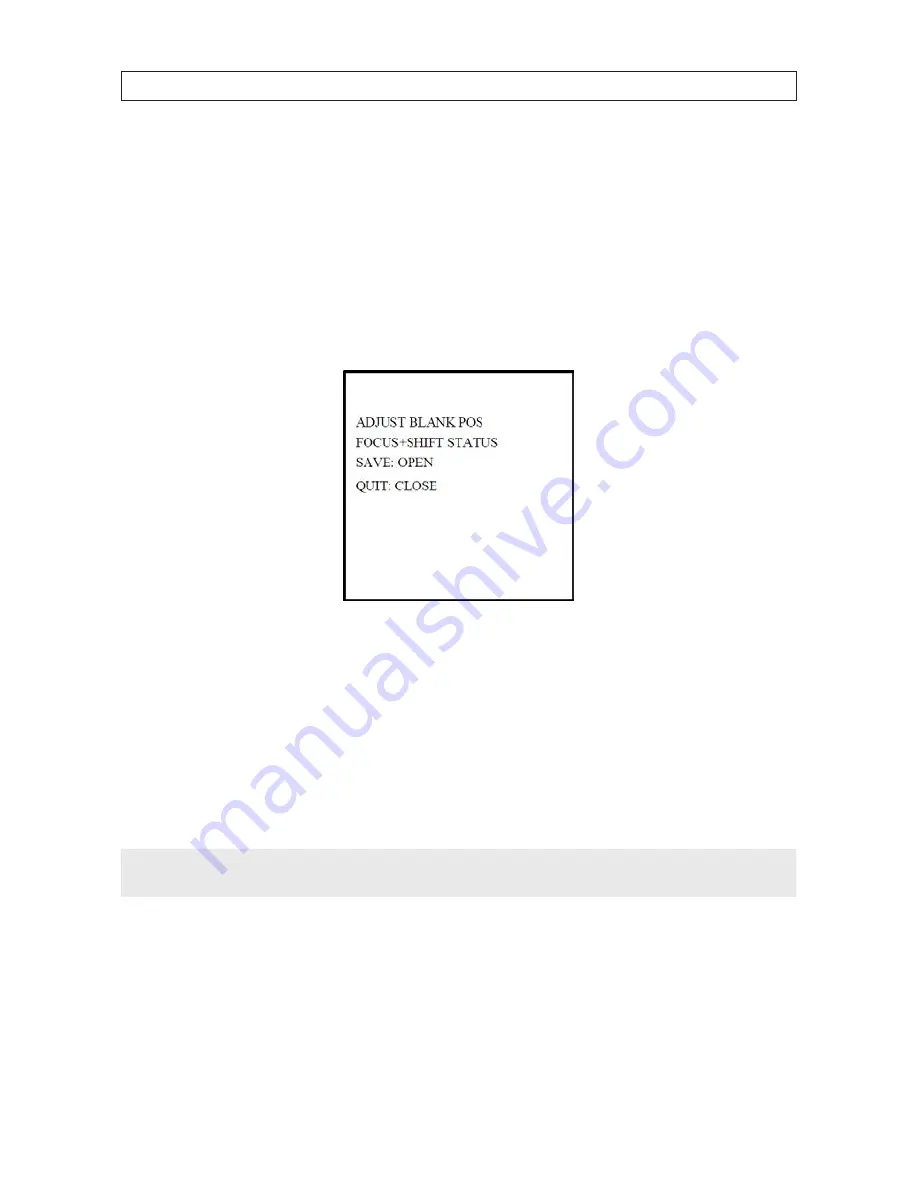
button to enter the editing mode as shown in the following figure.
You can see a privacy mask on the live window.
Set the Privacy Mask
b.
When the
ADJUST BLANK POS
message appears, use the direction buttons to shift the position of the privacy mask.
c.
When you click the
FOCUS+
button, the
ADJUST BLANK SIZE
message will appear. Click the up/down buttons to
increase/decrease the height of the mask, and click right/left buttons to increase/decrease the width of the mask. Click
IRIS+
button to save the settings and return to the previous menu and you can see the mask turn to gray.
d.
To modify the mask, click
IRIS+
button to enter the
SET BLANK
menu, then click
IRIS+
button again to reconfigure
the mask.
NOTE
The tilt range for configuring the privacy masks is from 0° to 70°.
4.
Enable or disable the privacy mask function
: Open the
BLANK STATUS
submenu, then click the up and down
direction buttons to set it ON or OFF. If no privacy mask is configured, you cannot set the status as ON.
5.
Delete the privacy mask
: You can enter the
DELE BLANK
menu to delete the current privacy mask.
Summary of Contents for The BLACK Line BLK-PTZ36X
Page 8: ...viii TABLE OF CONTENTS...


