


Operating & Maintaining the Eden 3-D Printer
7–30
DOC-00260 Rev. A1
Installing the
New Head
16. Inspect
the
replacement
head,
and
make
sure
that
the
O
‐
ring
seals
are
in
place
(see
figure 7
‐
43).
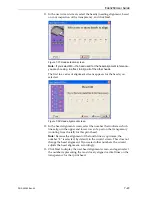
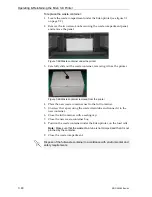
17. Gently
insert
the
replacement
head
into
the
vacant
slot
in
the
block,
and
push
the
printing
‐
head
driver
card
into
its
socket.
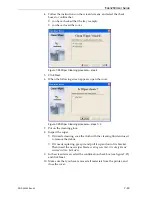
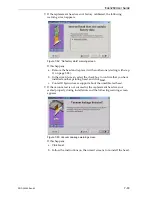
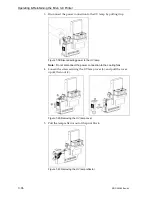
Note:
Make sure to insert the head with driver card facing its socket, in the
rear of the print block.
Figure 7-45:Inserting the printing-head driver card into its socket
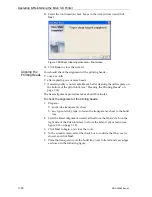
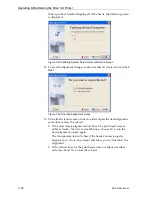
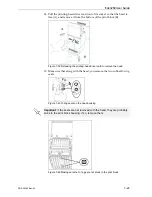
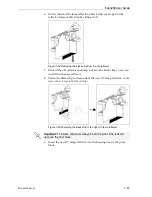
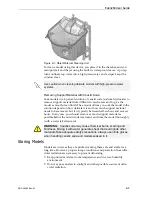
18. Push
the
head
up
until
you
hear
it
click
into
place,
in
both
front
and
rear
holders.
Figure 7-46:Clicking the head into place in the print block
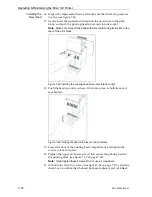
19. Lower
the
door
of
the
printing
head
compartment,
and
tighten
the
screws
to
lock
it
in
20. Tighten
the
upper
and
lower
screws
that
secure
the
printing
head
in
the
printing
block
(see
figure 7
‐
39
Note:
Hand-tighten these screws. Do
not
use a screwdriver.
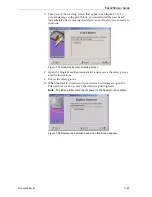
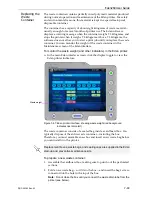
21. In
the
Replace
Head
Now
screen
(see
figure 7
‐
38
on
page 7
‐
27),
select
the
check
box
to
confirm
that
the
head
has
been
replaced,
and
click
Next
.


