6
- English
-
Don’ts
−
Don’t
use the pump when there are people in the water.
−
Don’t
cut the cord or remove the plug from the cord.
−
Don’t
remove the grounding pin from the plug.
−
Don’t
carry or pull the pump by the electrical cord.
−
Don’t
use extension cords.
−
Don’t
attempt to open the pump/motor enclosure.
−
Don’t
remove any labels from the pump or electrical cord.
−
Don’t
pinch, twist or damage the electrical cord. A minor cut even if only in the outer shell could allow
water to reach the motor enclosure and damage the pump. If you notice any damage to the cord remove
the pump and store in a dry place. Consult your local OASE Dealer for further instructions. Please note
that any damage to the electrical cord will void all warranties and could cause serious electrical shock
hazard.
Pos: 12 /Pumpen/Schlammsauger/AquaAir 250 LM USA/Anleitung AquaAir 250 LM englisch USA @ 6\mod_1182170266219_15631.doc @ 35444
Assembly and installation (A-D)
Unit assembly (A)
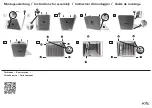
Screw the injector (3) on the pump outlet (4). Push the hose clips (6) over the injector hose (2) and slide the hose ends
on the connection sockets of the injector (3) and on the floating body (1) respectively. Fasten both hose clips (6) at the
hose ends over the connection sockets.
Drum adjustment (B)
Turn out the grip screw (7) to arrest the drum (5). Turn the drum (5) until the injector (3) is in the desired position.
Tighten the grip screw (7).
Adjustment hints (8): Adhere to the specified minimum distances from the bottom of the pond to ensure the proper
function of the injector. When the injector is directed downwards towards to the bottom of the pond, it generates deep
aeration thereby biologically activating the pond sludge. When the injector is directed at a flatter angle, it generates a
stronger water flow.
Unit installation (C,D)
The unit floats on the water. To keep it in position, the enclosed wire cables are fastened to the unit and either to the
bank or to the pond bottom.
Anchoring the unit at the bank ( C ): Shorten the two wire cables to the desired length. Form loops at the cable ends
and fasten with the cable clamps (11). Hook the cables into the eyebolts (12) at the floating body by means of bayonet
hooks (9). Knock the two tent pegs (10) into the bank ground. Important: Adhere to the specified span angles (14) to
prevent the unit from moving. Set the unit in the water and hook the cables to the tent pegs (10) using the bayonet
hooks (9). Attention: Pull relieve the connection cable (13) and protect the power plug from moisture!
Anchoring the unit to the pond bottom (D): Shorten the two wire cables to the desired length (minimum 15ft / 5 m).
Form loops at the cable ends and fasten with the cable clamps (11). Hook the cables into the eyebolts (12) at the
floating body by means of bayonet hooks (9). For anchoring to the pond bottom, screw the enclosed threaded
hooks (15) including the dowel, for instance, into two sufficiently heavy stones. Hook both cables with bayonet hooks
(9) in the threaded hook (15), lower the stones to the bottom of the pond and set the unit on the water. Attention: Pull
relieve the connection cable (13) and protect the power plug from moisture!
Switching on, switching off (Figure E)
Attention! Dangerous electrical voltage.
Possible consequences:
Death or severe injury.
Protective measures:
Disconnect the power plug prior to reaching into the water and commencing work.
The unit switches on automatically when power connection is established.
Switching on:
Plug the power plug (16) into the socket.
Switching off:
Disconnect the power plug (16).
Cleaning
Disconnect the power plug (16) prior to starting cleaning work!
If necessary, clean the filter housing under clear water using a soft brush.
Downloaded from www.watergardeningdirect.com


