background image

Chapter 4 

User’s Guide 

13

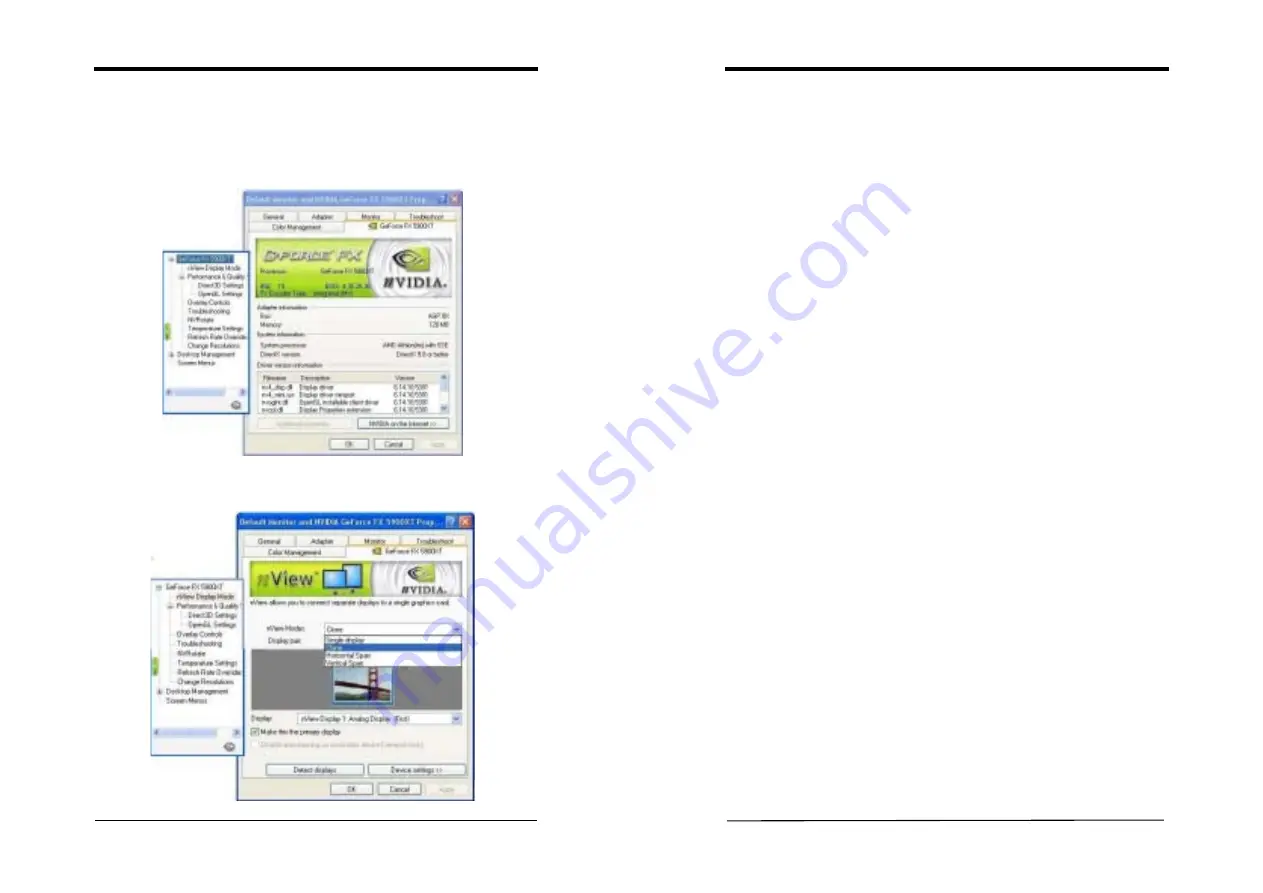
nView Display Setup 

In order to open 

Display Properties 

window, select from [

Start

] ->[

Settings

] -> 

[

Control Panel

] -> [

Display Properties

] to open the submenu. From [

Display 

Properties

] -> [

Settings

] -> [

Advanced

] -> [

GeForce FX5900XT

] tab we can 

select the various functions of this VGA card. 


Please click on 

nView Display Mode

 to enter its submenu that allows you to setup 

the various nView options. 


Chapter 4 

User’s Guide 

14

1) 

nView Modes 

a) 

Single display 

Selects the standard, single display mode. Use this mode if you have only one 
display device attached to your NVIDIA graphics adapter. 

b) 

Clone 

This mode outputs an exact copy of the primary display on the secondary device.   

c) 

Horizontal Span 

This mode allows you to extend the Windows desktop across two display devices 
horizontally. In this mode the two displays combine to form a wide, spanned display 
surface, which is useful when viewing items that are wider than a single display. 

d) 

Vertical Span 

This mode allows you to extend the Windows desktop across two display devices 
vertically. In this mode the two displays combine to form a tall, spanned display 
surface, which is useful when viewing items that are larger than a single display. 

2) 

Current Display 

If more than one device is connected and you have switched to a mode other than the 
Standard one, you can select the current display of your choice. 

You can also click on the monitor image directly above the display control to select 
it as the current display. 

Notes: 

nView Display Devices select: 

First Display   

 D-Sub 

Connector 

Second Display 

 DVI-I 

Connector 

Third Display   

  TV-out 

3) 

Make this the primary display 

Use this option to select which display contains the top left corner of the desktop. 
The most obvious effect of this option is that it swaps the positions of the monitor 
images. 

4) 

Disable auto-panning on secondary device (viewport lock) 

Turning on this feature locks the current pan position on the secondary clone display. 
This lets you effectively freeze the virtual desktop at a certain position, which is 
useful for presentations or fine-detailed work in applications. 


Summary of Contents for GeForce FX 5900 XT Series

Page 1: ...GeForce FX 5900 XT Series VGA Card User s Guide...

Page 2: ...nterference will not occur in a particular installation If this equipment does cause interference to radio or television equipment reception which can be determined by turning the equipment off and on...

Page 3: ...ion flat panel displays with resolutions greater than 1600x1200 without the need for reduced blanking Full Software Support Microsoft DirectX optimizations and support Full OpenGL 1 4 and lower suppor...

Page 4: ...electricity by touching the metal area of the computer each time before touching both the old and new VGA cards 3 Remove the old card if it exists 4 Grasp the edge or bracket of the card align your ca...

Page 5: ...uvre l emplacement du connecteur AGP 4 Alignez le c t de votre carte o se trouvent les connecteurs avec l emplacement du connecteur AGP et appuyez fermement jusqu ce qu elle soit compl tement mise ne...

Page 6: ...ts 4 Grasp the edge or bracket of the card align your card with an empty AGP expansion slot and slide it into place 5 Replace the screw to fasten the card onto the chassis and replace the computer cha...

Page 7: ...plete the setup process Chapter 3 User s Guide 10 Display Drivers Setup For Driver setup in Win98se ME 2000 XP mode please follow the steps below 1 Insert VGA Driver Package CD into CD ROM driver 2 Cl...

Page 8: ...rties window select from Start Settings Control Panel Display Properties Otherwise you may simply right click the blank Windows desktop area and choose Properties in the pop up menu The Display Proper...

Page 9: ...Span This mode allows you to extend the Windows desktop across two display devices vertically In this mode the two displays combine to form a tall spanned display surface which is useful when viewing...

Page 10: ...you to adjust the brightness contrast or gamma values for the selected color channel The color correction controls help you to compensate for variations in luminance between a source image and its ou...

Page 11: ...Chapter 4 User s Guide 18 Performance and Quality Settings 1 Performance Drag the slider to select the performance setting as described below for quality enhancements in Direct3D and OpenGL applicatio...

Page 12: ...rease the performance However this option does not work on display adapter using an AGP bus 4 Custom Direct3D Settings This option allows you to save your settings for future reference Chapter 4 User...

Page 13: ...ide 22 TroubleShooting 1 Display the Media Center icon in the taskbar Adds the NVIDIA Media icon to the Windows taskbar by checking the appropriate box on the screen The icon allows you to apply any o...

Page 14: ...original state 2 Portrait 90 degree rotation This will rotate the display screen 90 degrees to the right Chapter 4 User s Guide 24 3 Inverted Landscape 180 degree rotation This will rotate the display...

Page 15: ...esh rates by clicking Add or Remove button When checking the Only show custom modes box only custom modes are shown Chapter 4 User s Guide 26 Desktop Management Enables the NVIDIA Desktop Manager The...

Page 16: ...select all the products in this case WINDVD WinDVDCreator and WINRIP and Clear All to deselect them Click Next to proceed Appendix User s Guide 28 1 WinDVD It is a simple to use software DVD player co...

Page 17: ...ess 2 After reading the license agreement please click Yes to continue Appendix User s Guide 30 3 Please select a folder where the program will be installed and click Next to proceed 4 Please select o...

Page 18: ...sh to complete the installation process Appendix User s Guide 32 2 WinDVD Creator Setup WinDVD Creator s storyboard interface makes the entire DVD making process as easy as moving pictures around on y...

Page 19: ...3 Please select a folder where the program will be installed and click Next to proceed Appendix User s Guide 34 4 Please select one folder name from existing list of folders and click Next to proceed...

Page 20: ...and enjoy you music collection on your PC CD player and portable player WinRip s IDI technology adds synchronized lyrics to your songs then use the Karaoke and other DSP effects for a great party App...

Page 21: ...and click Next to proceed 4 Please select one folder name from existing list of folders and click Next to proceed Appendix User s Guide 38 5 Click on Start to begin WinRip Configuration Wizard 6 Choos...

Page 22: ...e 39 7 Click on Next to continue 8 Select the type of recording format and click Next to continue Appendix User s Guide 40 9 Click on Finish to complete the configuration process 10 Click on Finish to...

Page 23: ...rs the precise imagery that the developer spent months working to achieve 1 Please click Next to continue 2 After reading the license agreement please click Yes to continue Appendix User s Guide 42 3...

Page 24: ...zard TM This process allows the colors to stabilize 2 If you have a third party monitor calibration system installed e g EFIcolor AGFA FotoTune or another use either that system or 3Deep Do not use bo...

Page 25: ...ontinue installing WinProducer3 2 Please click Yes to continue installing WinProducer3 Appendix User s Guide 46 3 Enter personal information on spaces below to register the product 4 Please select a f...

Page 26: ...lete the WinProducer 3 installation program WinProducer 3 CD or WinProducer 3 DVD These InterVideo applications let you combine your personal video digital images and audio into exciting professional...

Page 27: ...3 CD and WinProducer 2 DVD support this feature Save your finished movie in a variety of formats As the following table indicates the format you can use to save your movie depends on which WinProducer...

Reviews: