NVR-7716P16-
H2 User’s manual (Short) ver.1.0
All rights reserved © AAT Holding S.A.
7
STARTING THE DEVICE
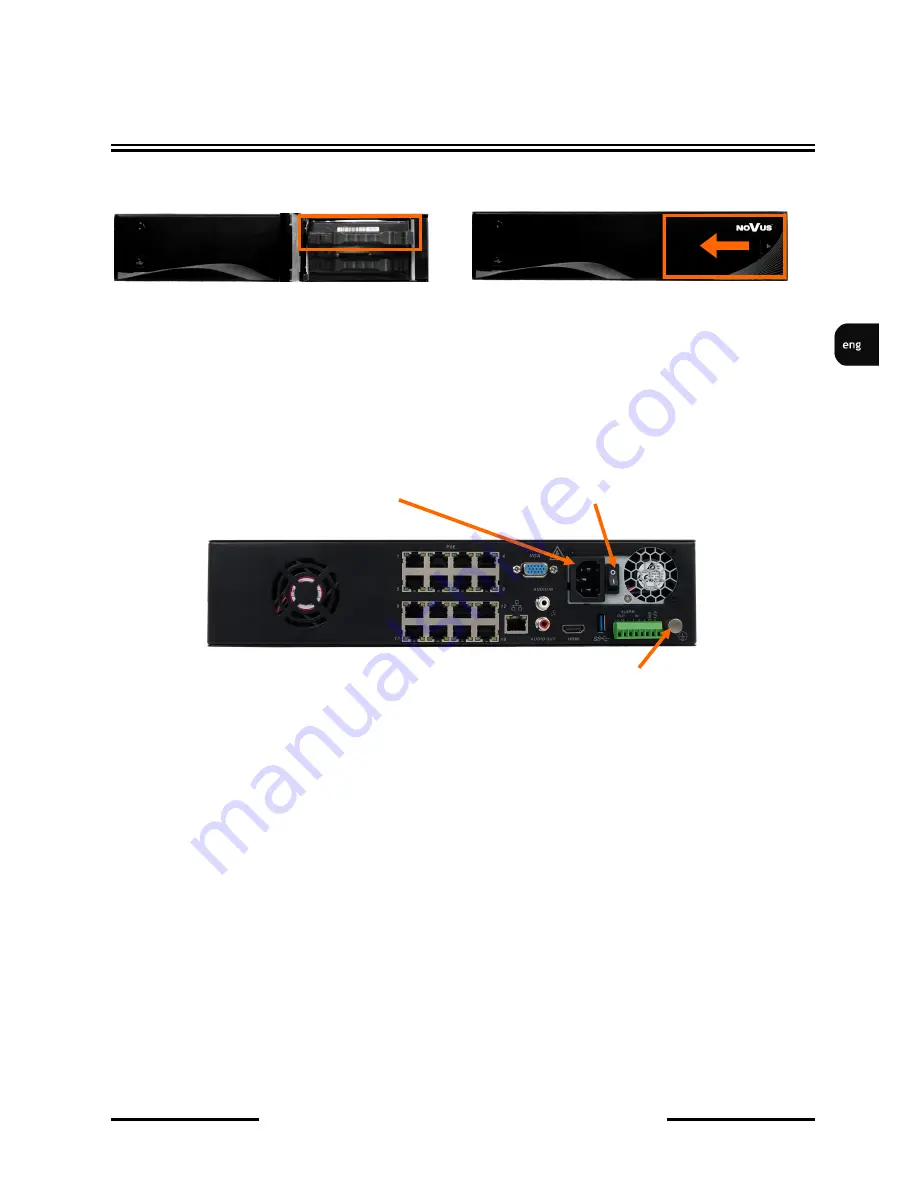
Next put bracket with HDD on it’s place, and carefully push it into NVR socket. The same way install
HDD2 if necessary. After installing all HDD close the front cover.
2.3. Connecting the power supply.
Please connect provided power cord in the rear power port of the NVR like depicted below.
To start the unit turn on the power switch on back panel. Initialization lasts approximately 60 seconds.
During this time executing any device functions and pressing any buttons is prohibited. To shut down
the device please use the appropriate function of menu.
CAUTION:
Make connection when the power is not applied and the power switch is turned off.
Do not place the power cord under the carpet or rug. The power cord is usually earth-grounded.
However, even if it's not earth-grounded, never modify it on your own for earth-grounding.
Make sure that power adapter is placed near of NVR and secured from accidental disconnection.
If the device was brought from a location with lower temperature, please wait until it reaches the
temperature of location it is currently in. Turning the device on immediately after bringing it
from a location with lower ambient temperature is forbidden, as the condensing water vapour
may cause short-circuits and damage the device as a result.
Before starting the device familiarize yourself with the description and the role of particular
inputs, outputs and adjusting elements that the device is equipped with.
If the electrical system does not provide grounding in the power cord, connect the ground wire to
ground terminal.
POWER CORD
POWER SWITCH
EARTH TERMINAL


