background image

NVC-

DN6118SD/IR User’s manual, ver. 1.0 


All rights reserved © AAT Holding sp. z o.o. 


13 

6.  CONTROLLING THE CAMERA 

N-Control is the recommended control protocol for the Novus PTZ cameras and allows to fully utilise 
their  abilities.  Cameras  may  be  also  PELCO-D/PELCO-P  controlled,  however  methods  of 
programming and control differ. 

To establish proper connection between camera and keyboard following conditions must be met: 

 

an unique camera address for the whole system 

 

the same baud rate (speed setting) in the camera and in the keyboard (2400/4800/9600/19200)  


Details regarding camera control settings are described in proper manual of the keyboard.  


6.1.  Controlling the camera via the N-Control  

In 

NV-KBD50

 functions depend on button pushing method:


- Push the button; 
 
- Push the button and hold for three seconds; 


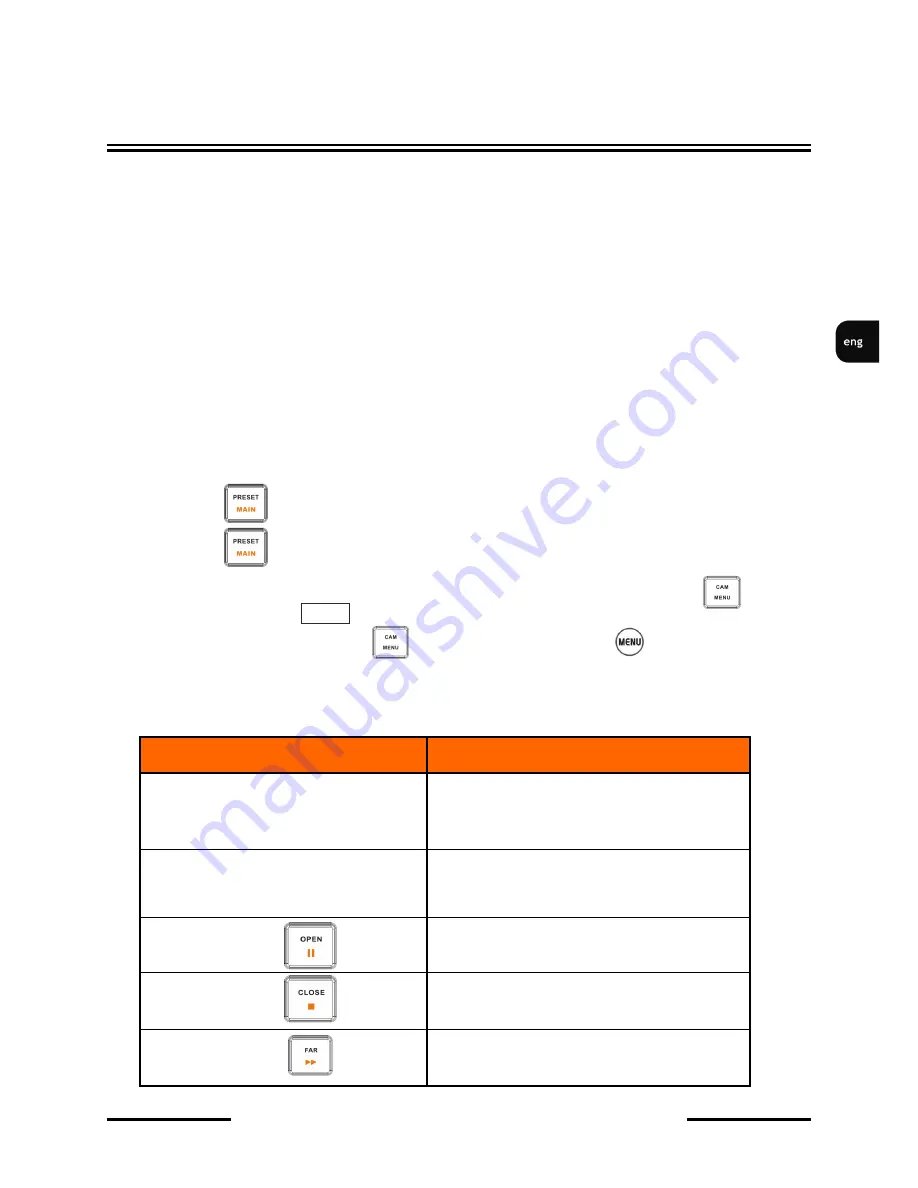
In order to start camera control please enter its number via numpad and confirm with           (for 
NV-KBD50 keyboard) or                (for  NV-KBD70) key.  

To  open  camera  menu  please  press 

(3s)  (for  NV-KBD50)  or 

(for NV-KBD70).  


Navigation through camera’s OSD menu:


CONTROLLING THE CAMERA 

Action 

Function 

Joystick up or down 

Navigation through menu 

Joystick left or right 

Navigation through text fields 
Editing field value 
Changing parameter values 

Iris OPEN 

Execution of a command 
Editing field value 

Iris CLOSE  

Save and return to a higher-level menu 

focus control - far   

Cancelling a command 

CAM 

(3s) 

http://www.e-camere.ro/camere-supraveghere/Novus/NVC-DN6118SD-IR

Summary of Contents for NVC-DN6118SD/IR

Page 1: ...User s manual NVC DN6118SD IR h t t p w w w e c a m e r e r o c a m e r e s u p r a v e g h e r e N o v u s N V C D N 6 1 1 8 S D I R ...

Page 2: ...able collection point for the waste electrical and electronic equipment for recycling purpose For more information about recycling of this product please contact your local authorities your household waste disposal service or the shop where you purchased the product RoHS Directive 2002 95 EC Information concerning limitation of the use of dangerous substances in the electrical and electronic appli...

Page 3: ...from the power before starting maintenance procedures 6 Please use only attachments accessories specified by the manufacturer 7 Do not install the camera near any steam sources or near water any wet area like pools bath tubs etc 8 Mounting the device in places where proper ventilation cannot be provided e g closed lockers etc is not recommended since it may lead to heat build up and damaging the d...

Page 4: ...strong mechanical shock Device behaves in a way not described in the manual and all adjustments approved by the manufacturer and possible to apply by user himself seem not to have any effect Camera is damaged Atypical behaviour of the camera components may be seen heard 17 In case of repairs please pay attention to using only original replacement parts with their parameters in accordance to those ...

Page 5: ...ator 7 tours 1 scan 6 patterns 175 presets 18x optical zoom Home function Auto flip automatic 180 camera rotation after reaching tilt limit Global function Password protected menu Full configuration user friendly multi lingual OSD from the NV KBD70 NV KBD50 keyboards directly from the front panel of selected NOVUS DVRs Features pan tilt and zoom control via NV KBD70 NV KBD50 keyboards and directly...

Page 6: ... Scans 1 Patterns 6 up to 2 min per pattern Tilt Pan 0 90 360 continuous rotation Tilt Pan Speed Up to 240 s proportional to zoom Protocols N Control Pelco D Pelco P ADDITIONAL FUNCTIONS Camera OSD English Polish Russian Password Protection 6 characters letters and numbers Back light compensation BLC Yes Effects Mirror IR LED Number 8 High Power LED Range 100m Angle up to 30 proportional to zoom I...

Page 7: ...nual ver 1 0 All rights reserved AAT Holding sp z o o 7 3 1 Camera dimensions All dimenstions in mm TECHNICALSPECIFICATION h t t p w w w e c a m e r e r o c a m e r e s u p r a v e g h e r e N o v u s N V C D N 6 1 1 8 S D I R ...

Page 8: ...bracket to the wall in a desired mounting place with cable hole Taking the bracket s base screw holes 1 as a pattern mark future drilling holes for screws using a punch Drill 4 holes in accordance with previously done markings and base hole placement when mounting the camera to concrete surfaces please purchase appropriate mounting accessories Put required cables through the bracket arm Mount the ...

Page 9: ...ra s menu and reboot it after finishing installation 5 START UP AND INITIAL CONFIGURATION 5 1 Connections Warning Device should be supplied only from power sources whose parameters are in accordance with those specified by the producer in the technical datasheet of the camera Therefore it is forbidden to supply the camera from power sources with their parameters unknown unstable or not meeting the...

Page 10: ...s 1 200 m For RS 485 connections RS485 and RS485 wires should be used They should be connected to respective TX and TX connectors of the controller e g NV KBD70 keyboard Next camera in the cascade is connected also using same RS485 and RS485 connectors When conecting telemetry cables into a star a serial data distributor should be used e g NOVUS NVRS 016DD START UPAND INITIAL CONFIGURATION Wire co...

Page 11: ...r assigning an address When building a system containing a single DVR assign addresses in accordance with their respective video inputs numbering Number visible on the DIP switch and their values are described in table below Sum of the values determines the physical ID address of the camera ATTENTION Each camera has its address set to 1 by default START UPAND INITIAL CONFIGURATION Switch no 1 2 3 ...

Page 12: ...onfigurations Selecting transmission speed Switches 3 and 4 are related with transmission speed Table below depicts available switch configurations Please pay attention to setting identical transmission parameters for controllers keyboard DVR PC START UPAND INITIAL CONFIGURATION Transmission speed Switch no 3 4 2400 bps OFF OFF 4800 bps ON OFF 9600 bps OFF ON 19200 bps ON ON Protocol Switch no 1 2...

Page 13: ...yboard 6 1 Controlling the camera via the N Control In NV KBD50 functions depend on button pushing method Push the button Push the button and hold for three seconds In order to start camera control please enter its number via numpad and confirm with for NV KBD50 keyboard or for NV KBD70 key To open camera menu please press 3s for NV KBD50 or for NV KBD70 Navigation through camera s OSD menu CONTRO...

Page 14: ...mming IRIS CLOSE iris control closing end of programming FOCUS FAR focus control far FOCUS NEAR focus control near PRESET MOVE preset calling GLOBAL PRESET MOVE preset calling for all connected cameras PRESET SET 3s preset saving SCAN auto scan SCAN SET 3s auto scan programming TOUR tour function TOUR SET 3s tour programming PATTERN pattern function PATTERN SET 3s pattern programming MENU 3s opens...

Page 15: ... 9 Changes night shot to auto 10 Turns on turn off infrared filter 11 Turns on turn off back light compensation 12 Turns digital zoom on off 13 Turn camera status information on off 104 Turn wide dynamic range on off 105 Turn picture stabilization on off NV KBD70 Keyboard NV KBD40 Keyboard Function Turning on additional functions List of additional functions is described below To turn on a demande...

Page 16: ...numpad and confirm with f o r NV KBD50 keyboard or for NV KBD70 key To open camera menu please press 3s for NV KBD50 or for NV KBD70 Navigation through camera s OSD menu INFORMATION Opening the camera MENU may be also performed via calling preset 95 by pressing 95 and PRESET MOVE or PRESET SET CONTROLLING THE CAMERA Action Function Joystick up or down Navigation through menu Joystick left or right...

Page 17: ...cja IRIS OPEN iris control opening IRIS CLOSE iris control closing FOCUS FAR focus control far FOCUS NEAR focus control near PRESET MOVE preset calling PRESET SET 3s preset saving SCAN 11 18 141 148 11 18 141 148 auto scan function TOUR 21 28 151 158 21 28 151 158 tour function PATTERN 1 4 131 134 1 4 131 134 pattern function MENU 3s entering camera menu Additional functions are presented in the t...

Page 18: ...forcing the tilt or pan movement or by confirming alarm ATTENTION Default language is set to English To change the language in main menu choose the 7 Language move joystick right left and select requested language Main menu is depicted below Exemplary submenu for editing the name or number is shown below Move joystick left right to indicate the position for editing then press OPEN It display the s...

Page 19: ...o set the desired scene then save it as the preset CALL PRESET moves the camera to selected preset DELETE PRESET deletes the selected preset from camera memory NAME allows to create the particular names for each preset f e CORRIDOR1 ROOM2 They are displayed on the screen after calling the preset NAME DISPLAY ON OFF turn on off the name displaying on the screen CAMERA OSD MENU _ A _ _ _ _ _ _ _ _ _...

Page 20: ...y NAME allows to create the particular names for each pattern f e CORRIDOR1 ROOM2 They are displayed on the screen during the pattern NAME DISPLAY ON OFF turn on off the name displaying on the screen 7 1 3 TOUR submenu Allows to set up Tours i e lists of consecutively executed surveillance functions presets patterns and scans up to 16 functions per tour During tour camera stops at presets for a de...

Page 21: ... slowest 9 the fastest TIME defines time which camera stay in preset or the time after the pattern before show next function Programmed tour could look like below Tour 1 consists Preset1 10sec Preset2 10sec Pattern1 5sec RUN starts the selected tour DELETE deletes the selected tour from camera memory Program Tour1 Function No V Time 1 P 1 1 10 2 P 2 1 10 3 T 1 5 4 _ _ _ _ 5 _ _ _ _ 6 _ _ _ _ 7 _ _...

Page 22: ...era scan larger circle section larger angle RUN starts the scan 7 1 5 AUTO PAN submenu The menu allows you to configure Auto Pan It is automatic full pan rotation It causes omnidirectional scan from the selected camera position START POINT selects the starting preset SPEED allows to set the speed of rotation 1 the slowest 6 the fastest DIRECTION Define the direction of the movement RUN starts the ...

Page 23: ...horizontal 0 360 T tilt vertical 0 90 AREA TITLE function allows to assign name to the particular area Maximum number of the named area is 8 Size of the zone is defined as a rectangle by specifying the coordinates of two opposite corners The submenu allows to edit NUMBER selects the area number for editing from 1 to 8 PAN START POS Vertical coordinate of the first corner PAN END POS Vertical coord...

Page 24: ...nformation on camera model firmware and hardware version as well as protocol Dome Hard ID address used in data transmision HW hardware selected by DIP switch SW software selected in System Settings menu Baudrate speed of data transmission Protocoł used data transmission protocol f e N Control PELCO Version firmware version S N serial number of the camera Camera camera model CAMERA OSD MENU Area Ti...

Page 25: ...nder the camera After reaching the 90 vertical camera rotate 180 horizontal and decrease vertical degree to 80 Continuation of the movement requires another joystick up move AUTO FOCUS PTZ OFF Z selects auto focus adjustment mode PTZ auto focus during PTZ functions and camera movement OFF camera operates in manual mode both during scene change and when pointing at a scene FAR NEAR on the keyboard ...

Page 26: ...ttes located in the foreground with strongly illuminated background WHITE BALANCE Allows to select white balance mode AUTO auto white balance in 1800 K 10500 K temperature range is recommended for most applications MANUAL allows to adjust white balance manually using RED GAIN 0 255 range and BLUE GAIN 0 255 range INDOOR Sets white balance level suitable for indoor illumination conditions OUTDOOR S...

Page 27: ... ID address used in data transmision HW hardware selected by DIP switch SW software selected in System Settings menu Baudrate speed of data transmission Protocoł used data transmission protocol f e N Control PelcoD Version firmware version S N serial number of the camera Camera camera model SOFT HARD ID SETTING submenu contains address options ID mode selecting the address type HW hardware selecte...

Page 28: ...otection for the camera MENU Password could contain 6 characters letters and numbers OPERATION ON OFF enable disable password protection allows to check password before entering the menu CHANGE opens the edit window where you can enter a new password It requires confirmation 7 7 LANGUAGE menu This menu allows to set the OSD language between English Polish Russian English is default language Soft H...

Reviews: