


www.nordsonefd.com [email protected]
800-556-3484 Sales and service of Nordson EFD dispensing systems are available worldwide.
EV Series Automated Dispensing Systems
53
How to Create a Mark
Refer to “About Marks” on page 24 for an explanation of marks. If you want to use fiducial marks in a program to
check workpiece orientation, create at least two marks.
PREREQUISITES
The system is properly set up. Refer to “Setting Up and Calibrating the System (Required)” on page 37.
If the tip was changed, run Needle Z Detect (systems with a tip detector) or Needle XY Adjust (no tip detector).
The system is in the CCD Mode.
#
Click
Step
Reference Image
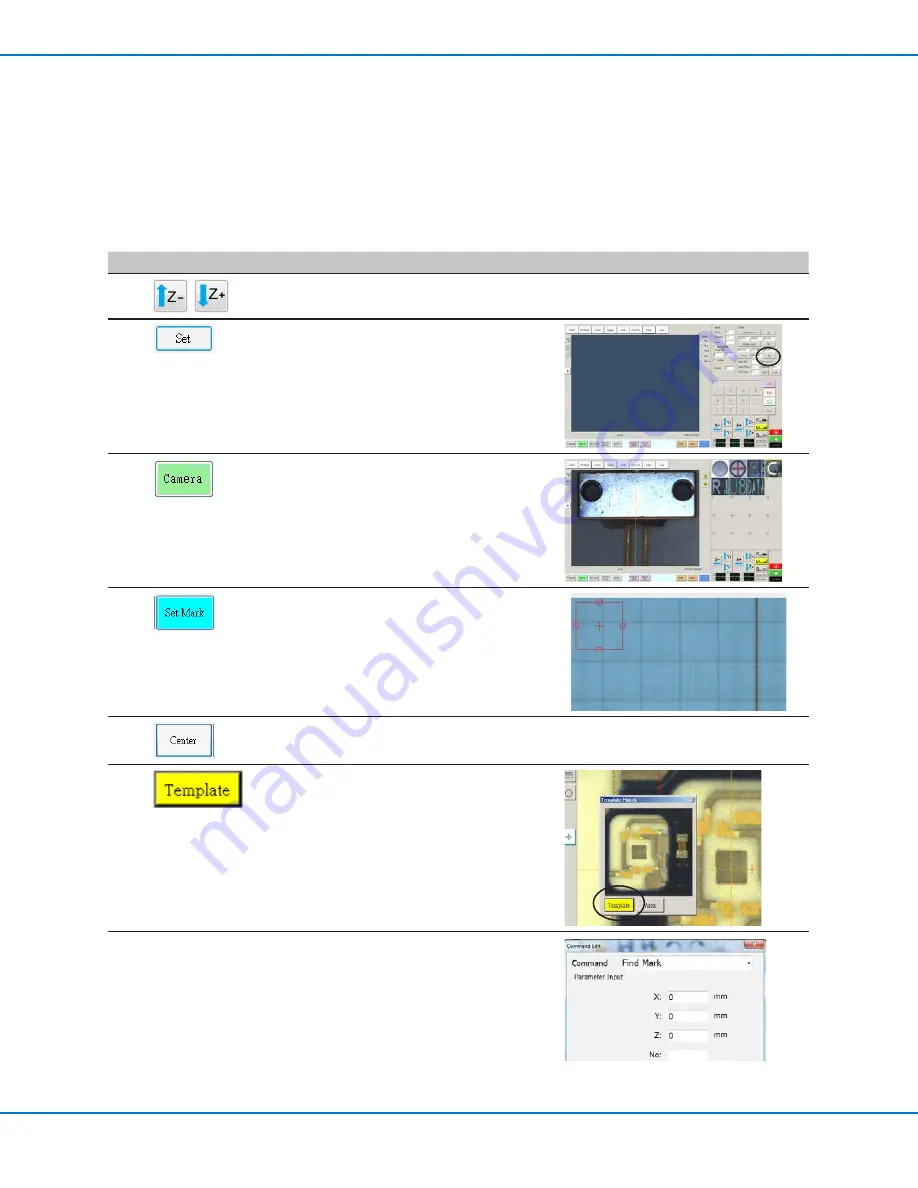
1
,
• Click Z- and Z+ to focus the camera.
2
• Click SET next to Focus in the Offset portion
of the Camera Setup screen.
3
• Click the CAMERA tab.
The actual camera view appears in the
Primary View screen and the Mark Library
appears in the Secondary View screen.
4
• Click SET MARK, click and drag the
crosshairs of the red square over the target,
and click and drag the red square borders to
position the square around the target.
5
• Click CENTER to center the red cross mark on
the target.
6
• Click a socket in the Mark Library to save
the mark, then click TEMPLATE when the
Template Match window appears.
The mark is now set.
You can specify any mark in the Mark Library
within a Find Mark or Fiducial Mark command by
entering the mark number (No.) in the Parameter
Input window. Refer to “How to Use Marks or
Fiducial Marks in a Program” on page 54.


