background image

GB 28

Navi Bars

Create list

This allows you to create your own favourite lists, containing the
channels that you watch most frequently. You must give each list
a specific name

*

, for example, “Sport” or “Movies”. The new

lists that you create will appear as a new folder in the horizontal
part of the Navi Bars.

When you have given the list a name press 

ok. 

Then select “Add/

Delete Channels” from the menu to start adding channels to the
list.

You can create up to eight separate favourite lists.

* How to enter a specific name

This procedure is the same whether you enter a name for the first
time or change an existing name.

Enter the name as follows:

• Press the numerical button that corresponds to the character

that you want: once for the first character, twice for the sec-
ond, and so on.

• Move the cursor to a new character position using the      but-

ton.

• If you make a mistake, you can remove characters to the left

of the cursor by pressing 

opt 

as many times as needed. >>>

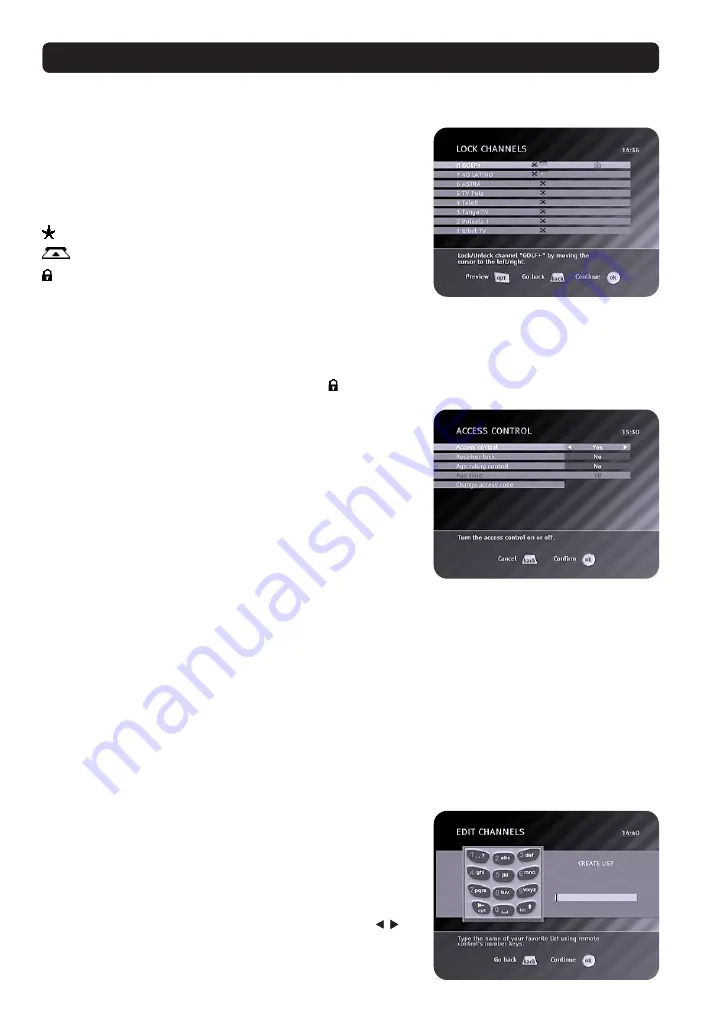
Lock channels

To open this menu, you will be asked to enter your access code.

The access code is set to 1234 at the factory.

You can lock (and later unlock) channels on any of the lists in
order to prevent, for example, your children from watching.
Three different symbols can be shown beside the channel
name.

 =  A channel you not yet have been watching.

 = the channel is scrambled.

 = the channel is locked by the user.

Select the channel that you want to lock or unlock and press 

info

.

Repeat the procedure for each channel that you want to lock.
When you lock a channel on any list, the channel will automati-
cally be locked on all other lists.

• Press 

opt

 if you want to preview the channel.

A locked channel will be indicated by a padlock   symbol.

• Press 

ok 

to confirm.

NOTE: If you select “No” on the first line in the “Access Con-
trol” menu, the lock procedure will be ignored. In that case
it  will be able to watch locked channels without entering any
access code.

Summary of Contents for Mediamaster 310 S

Page 1: ...User Guide ...

Page 2: ...er herved at denne digitale mottakeren Mediamaster 310 S er i overenstemmelse med vesentlige krav og andre relevante bestemmelser i EU direktivet 1999 5 EC Dette terminalutstyret er beregnet på tilkobling til Det offentlige tilgjengelige telenettet PSTN hvor nettverksadressering hvis tilgjengelig utføres ved hjelp av Avanserte funksjoner for toneoppringing DTMF NL Hierbij verklaart Nokia dat deze ...

Page 3: ...o the satellites Mount the satellite dish according to the fitting instructions In case you already have a satellite dish mounted note that you need a Universal LNB which works on the frequencies 10 70 12 75 GHz to be able to handle digital signals Regional settings Select the desired menu language using the buttons This will also become the main language for audio and sub titling On the second li...

Page 4: ... could be too low to change the polarisation You can increase the voltage to the LNB by 0 5 V Satellite Astra is the default setting Select one of the other pre pro grammed satellites if you do not intend to watch channels from Astra Predefined channel Select one of the predefined channels and adjust the antenna until a TV picture from the predefined channel is visible in the background Please not...

Page 5: ...ng the Mediamaster to the dish 12 General 13 Connecting to the TV 13 Connecting a TV and VCR 13 Connecting an analogue satellite receiver and a VCR 13 Connecting a HiFi system 14 Connecting to the built in phone modem 14 First time installation 15 General information 15 Regional settings 15 Antenna type selection 16 DiSEqC 2 Input Switch 17 DiSEqC 4 Input Switch 18 Mini DiSEqC Switch 18 Motor ante...

Page 6: ... translate reproduce or transfer the right to use the Software or copy the Software except as expressly provided in this Agreement c You may not resell except as set forth in clause 3 a sublicense rent lease or lend the Software d You may not reverse engineer decompile dis assemble or otherwise attempt to discover the source code of the Software except to the extent that this restriction is expres...

Page 7: ... in Part 772 of the EAR as any foreign central re gional or local government department agency or other entity performing governmental functions in cluding governmental research institutions govern mental corporations or their separate business units as defined in part 772 of the EAR which are engaged in the manufacture or distribution of items or services controlled on the Wassenaar Munitions Lis...

Page 8: ...uch as lighted candles on the Mediamaster Use a soft cloth and a mild solution of washing up liquid to clean the casing Do not expose the Mediamaster to dripping or splashing liquids Do not place any objects filled with liquids such as vases on the Mediamaster To give your Mediamaster an extra protection e g at a thunderstorm we rec ommend that you connect it via an external surge protection devic...

Page 9: ...n in the menus Change settings in menus P P Change channels up and down one at the time Select other pages in menus with sub pages back Step back one level at a time within menus without changing any settings To toggle between present and previous TV Radio channel in viewing mode Return to TV mode from some application menus Adjust the volume The Mediamaster s maximum level is con trolled by the T...

Page 10: ...cator 2 Green Red Single flash Alternatly green flashing Continuous red flashing to put the Mediamaster in and out of standby mode to change channels and to move in menus Indica tor 1 Indica tor 2 Slot for inserting of a Conax smart card Slot for a CA module with a smart card Button push the button to release an inserted CA module Lid open the lid in order to insert the CA module and the smart car...

Page 11: ...module Please note that a smart card may only be valid for a single Serv ice Provider and due to this a specific range of channels The smart card and the CA module may cause special menus not described in this manual to appear Follow the instructions from the Service Provider Note CA modules and smart cards are only distributed by serv ice providers and special distributors not by Nokia After inse...

Page 12: ...the bottom of the remote control Insert the 2 AAA 1 5 V batteries as shown in the diagram taking care to observe the and markings indicated inside Replace the cover Installing the satellite dish See the Fitting instructions provided with your satellite dish on how to install the dish Connect the coaxial cable with F connectors fitted from the LNB on the satellite dish to the socket marked ANTENNA ...

Page 13: ...R to the TV aerial input on the TV Connect an RF cable from the RF output on the analogue re ceiver to the RF input socket on the VCR Connect the TV aerial to the RF input socket on the analogue receiver In order to switch the signal from the dish between the ana logue and digital receivers you need a Nokia smart switch at A B in the diagram or a Universal Twin LNB With Nokia smart switch Analogue...

Page 14: ...g input Connecting to the built in phone modem The built in phone modem makes it possible for you to use inter active services Refer to page 35 Connect a telephone cable between the socket marked Telephone on the rear of the Mediamaster and your ordinary telephone socket in the wall HiFi system Installation of the Mediamaster Nokia smart switch Nokia smart switch Connect a coaxial cable between ou...

Page 15: ...rm a First time installation During this procedure helpful information is displayed at the bottom of the menus Please note The ok button on the remote control always confirms a selec tion within these menus and pressing it will take you to the next step in the installation process However and this is important often more than one value has to be entered in a menu First per form all necessary setti...

Page 16: ... You can increase the voltage to the LNB by 0 5 V Satellite Astra is the default setting Select one of the other pre pro grammed satellites if you do not intend to watch channels from Astra Predefined channel Select one of the predefined channels and adjust the antenna until a TV picture from the predefined channel is visible in the background Please note that you must press the opt button on the ...

Page 17: ...nput in the rear of the Mediamaster For each LNB you connect to the DiSEqC switch the fol lowing configuration has to be performed As an example we will describe how a LNB intended for Thor will be configured to the DiSEqC input 1 A on the switch and a LNB intended for Astra to DiSEqC input 2 B DiSEqC switch with 2 inputs Switch port Here you select the input for each LNB that will be connected In...

Page 18: ... selection of the different LNBs must be controlled by an external switch Refer to page 17 The procedure is the same as for two LNBs but you have to configure four LNBs Connection of a four port DiSEqC switch The following is an example of how you can connect 4 LNBs if you want to watch channels from Astra Hotbird Sirius and Thor Connect the LNBs to the switch the following way the LNB intended fo...

Page 19: ...the motor for Astra Hotbird To continue the installation you must now determine the angle to Astra 1 when you use a SatScan motor or Hotbird when you use a DiSEqC motor The motor and the antenna must be adjusted towards the Astra 1 sat ellites at 19 2 East or Hotbird satellites at 13 East as this is the reference setting All other pre programmed sat ellite positions are oriented relative to Astra ...

Page 20: ...nel search The information that must be entered in this menu is available in satellite TV magazines or on the Internet You can use this menu if you are looking for some special chan nels i e non DVB standard channels which can only be found when you have entered the necessary settings here Transponder frequency Specify the frequency in MHz Polarisation Select Horizontal Vertical Circular left or r...

Page 21: ...e a few minutes You can cancel the search at any time by pressing ok Finish the first time installation The channels found during the search procedure will now be saved A message indicating that the installation procedure is complete will be shown on the screen Press ok in order to start watching channels from the box When the search procedure has ended a message will tell how many TV and radio ch...

Page 22: ...e are some other useful functions which will be explained in this part of the manual You can always leave a menu at any time you want without af fecting any settings by pressing back If you are listening to radio and don t press any buttons on the remote control the picture gets dark after 2 minutes Programme information Every time you change channels you will receive programme in formation for a ...

Page 23: ... the buttons to continue reading on the next info page Press info or back to return to TV radio mode The options menu By pressing the opt button you open a menu in which it is possi ble to enter temporary settings Settings changed in this options menu are only valid for the channel you are currently watching If you leave the channel and return to it later the temporary set tings will be deleted Su...

Page 24: ...alogue and digital satellite TV signals Teletext Normally pressing txt will open a teletext page However if a Teletext Type Application is transmitted it will be opened in stead Select teletext pages with the numeric buttons on the remote control You can also quickly go to the different page alternatives shown in any page by pressing the buttons Press ok on a highlighted page number to go to that ...

Page 25: ...s To confirm the se lection press ok Below the folder bar in the information box some information about the bookmark in focus is presented When a TV or radio channel bookmark is in focus this box can contain three differ ent symbols after the channel name A channel you not yet have been watching The channel is scrambled The channel is locked by the user With a TV or radio programme bookmark in foc...

Page 26: ...ormation are automatically downloaded on channels from some Service Providers When a channel contains an application or more a new folder named MHP is created in the Navi Bars See figure to the right Manually You select to start an application manually by select ing the MHP folder in the Navi Bars and press ok Automatically When you select a channel containing an autostart application it will auto...

Page 27: ... list you add channels from the All TV or All radio lists A channel is added to or removed from the list by pressing or The square on the right hand side of a line will be empty to de note a removed channel and will contain an x for added chan nels Three different symbols can be shown beside the channel name A channel you not yet have been watching The channel is scrambled The channel is locked by...

Page 28: ...ake a mistake you can remove characters to the left of the cursor by pressing opt as many times as needed Lock channels To open this menu you will be asked to enter your access code The access code is set to 1234 at the factory You can lock and later unlock channels on any of the lists in order to prevent for example your children from watching Three different symbols can be shown beside the chann...

Page 29: ...ite list select the list using the button and press ok Rename list You can give an existing list a new name by following the instruc tions in the How to enter a specific name on the previous page Rearrange lists If you have created several Favourite lists you can determine the sequence in which the lists will appear Using the button mark the list that you want to move to a new position Move the li...

Page 30: ...y works from standby mode A timer setting will not start when the box is already turned on Navi Bars Set the Timer First select the Channel List were the channel you want to watch or record is located Then step to Channel to select desired TV Radio channel Set the Date for the timer using the numerical buttons on the remote control If you enter a wrong digit erase it with the button The different ...

Page 31: ... and Modify antenna settings will get you to the same settings as explained in the pages 16 18 First give the satellite a name When you have typed the name step to next line position using the button How to enter the name please see page 28 Write the position by entering two digits for the whole number of degrees and one digit for the decimal degree Select the East West satellite position Press ok...

Page 32: ...he upper audio out put on the rear of the Mediamaster AC 3 when the sound is transmitted in Dolby Digital format PCM for ordinary digital sound Please note when you select AC 3 there will be no sound output from the analogue audio connections Looking for new channels TV and radio channels are continously added moved or deleted on the different satellites Make a new channel search now and then to k...

Page 33: ... select No If you select Yes you may block programmes unsuitable for chil dren Age Limit Select an age limit between 3 and 18 years on the line that ap pears However you should be aware that not all Service Providers have the necessary codes for these functions implemented in their transmissions Change access code From here you can change the access code from the stand ard 1234 DO NOT FORGET IT Wi...

Page 34: ...r up to date it will be possible to download new versions of the system software via satellite New software may include new or improved features for exist ing menus To see if there is any new software available for downloading please visit www nokia com Home Products Support on the Internet If a new version is available and you continue with the update all your previous settings access code and fa...

Page 35: ... name Enter the user name you normally use when you connect to Internet Default ISP password Enter the password you normally use when you connect to Internet Blind dial On Off Select On when the connection has to pass a switch board You must also select On when the call is transfered via a mobile phone In these cases the modem does not recognize the dialing tone as it differs from the default one ...

Page 36: ...older when you have a smart card from Conax inserted in the right hand card slot Common Interface When you use a CA module and a smart card in the left hand slot you may get a new bookmark in the Navi Bars The name and con tents of that bookmark is dependent of the service provider ...

Page 37: ...box is located This will also affect the time and the modem settings Menu language Here you may select in which language the menus will be shown Main subtitle language Select the preferred language for subtitling If the selected lan guage is not available the default language will be shown Main audio language Select the preferred language for audio If this language is not available the first avail...

Page 38: ...x mega means million and Hertz means cycles per second MPEG Moving Picture Experts Group Established by the Inter national Standards Organisation to provide the basis for a picture coding and compression system Glossary of terms Network A number of digital channels transmitted from one source Grouped under separate headings in the channel list PCM Pulse Code Modulation Non compressed digital audio...

Page 39: ...Check that the mains cable is plugged into the power socket Press the standby button to bring the Mediamaster out of standby mode Adjust the dish Check the signal level indicator in one of the channel search submenus Check the cable connections LNB and other equipment connected between the LNB and the receiver or adjust the dish Replace the LNB Increase the LNB voltage with 0 5 V from the Antenna ...

Page 40: ...ndicator not connected Telephone return channel on the phone line Contact modular 6 pin jack Protocol V 32 bis Front panel 2 LEDs Buttons standby progr number up and down Conditional Access system Embedded Conax One PCMCIA Interface for a DVB Common Interface CA module General data The model code variant and serial number are located on a label on the underside of the housing Supply voltage 110 24...

Page 41: ...Nokia is a registered trademark of Nokia Corporation www nokia com 667790210 00 ...

Reviews: