


VRA53801-R.3609.A
-
A40
・
-
LS-50
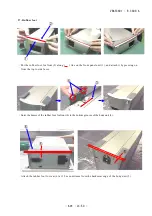
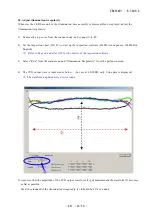
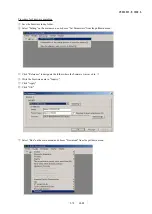
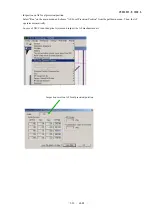
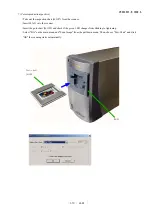
5) Mechanical precision inspection
・
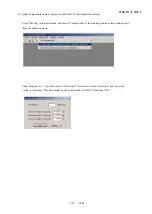
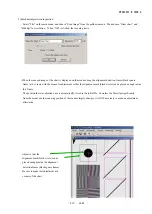
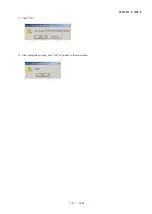
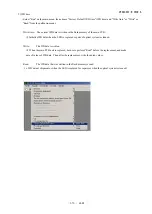
Select "File" on the main menu, and choose "Scan Image" from the pulldown menu. Then choose “Glass chart” and
"4000dpi" for resolution . When "OK" is clicked, the scanning starts.
・
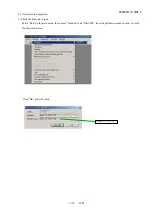
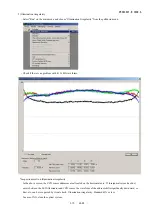
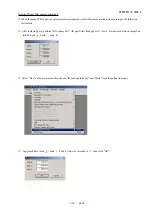
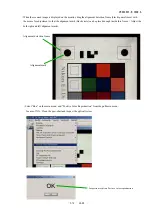
When the scanned image of the chart is displayed on the monitor, drag the alignment detection frame (black square
frame) at 4 corners with the mouse for adjustment so that the alignment mark (black circle) can be placed enough inside
this frame.
The position that was adjusted once is automatically stored in the initial file. So unless the film slips significantly
from the mount nor the scanning position of the scanner largely changes, it is NOT necessary to make an adjustment
afterwards.
Adjust so that the
alignment mark (black circle) can be
placed enough inside the alignment
detection frame (black square frame).
Be sure to make this adjustment at 4
corners of the chart.
Summary of Contents for COOLSCAN V ED
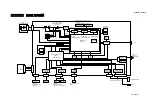
Page 77: ...VRA53801 R 3609 A ー E3 LS 50 ー メイン基板 1 Main PCB 1 ...
Page 78: ...VRA53801 R 3609 A ー E4 LS 50 ー メイン基板 2 Main PCB 2 ...
Page 79: ...VRA53801 R 3609 A ー E5 LS 50 ー メイン基板 3 Main PCB 3 ...
Page 80: ...VRA53801 R 3609 A ー E6 LS 50 ー メイン基板 4 Main PCB 4 ...
Page 81: ...VRA53801 R 3609 A ー E7 LS 50 ー メイン基板 5 Main PCB 5 ...