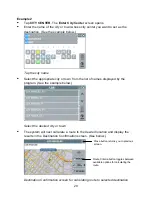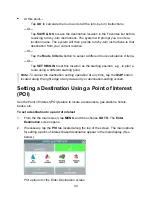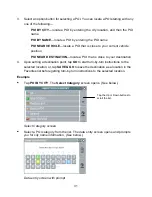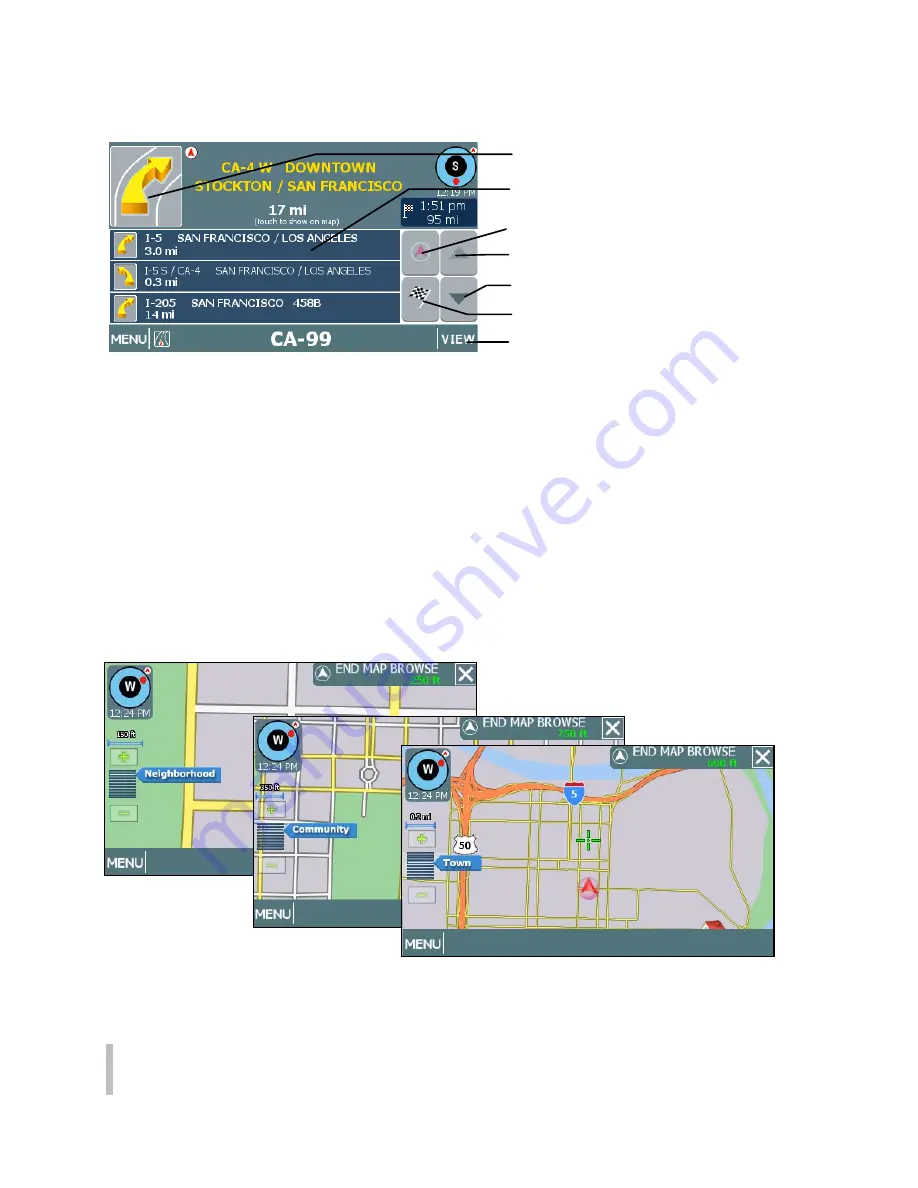
background image


21

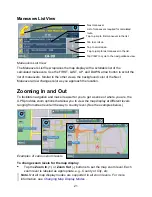
Maneuvers List View

Maneuvers List View 

The Maneuvers List View replaces the map display with a scrollable list of the 

calculated maneuvers. Use the FIRST, LAST, UP, and DOWN arrow button to scroll the 

list of maneuvers. Similar to the other views, the background color of the Next 

Maneuver arrow changes color as you approach the location.  

Zooming In and Out

To facilitate navigation and make it easier for you to get a sense of where you are, the 
GPS provides zoom options that allow you to view the map display at different levels 
ranging from street level all the way to country level. (See the examples below.)  

Examples of various zoom levels 

To change zoom levels for the map display 

Tap the 

Zoom In

 (+) or 

Zoom Out

 (-) buttons to set the map zoom level. Each 

zoom level is labeled as appropriate, e.g., County or City, etc. 

Note.

 Not all map display modes are supported in all zoom levels. For more 

information, see 

Changing Map Display Modes

 . 

Tap to scroll up.

Tap to scroll down. 

Tap to jump to first maneuver in the list.

Tap to jump to last maneuver in the list. 

Next maneuver. 

List of maneuvers required for calculated 
route.

Tap VIEW to cycle to the next guidance view.

Summary of Contents for Q4-01

Page 1: ...8 U ITEM Q4 01 z olit r u J a r V z a UJ a o nextar a AUTOMOTIVE NAVIGATION SYSTEM GPS C I...

Page 2: ...or servicing instructions To reduce the risk of fire or electric shock do not expose this apparatus to rain or moisture CAUTION TO REDUCE THE RISK OF ELECTRIC SHOCK DO NOT REMOVE COVER OR BACK NO USE...

Page 3: ...power cord from being walked on or pinched particularly at plugs convenience receptacles and the point where they exit from the apparatus 11 Only use attachments accessories specified by the manufact...

Page 4: ...osed to excessive heat such as sunshine fire or the like Underwriters Laboratories Inc UL has not tested the performance or reliability of the Global Positioning System GPS hardware operating software...

Page 5: ...rference to radio or television reception which can be determined by turning the equipment off and on the user is encouraged to try to correct the interference by one or more of the following measures...

Page 6: ...AC Adaptor 1 Car Adaptor 1 Mounting Bracket 1 USB Cable 1 Mounting cradle 1 Touch Pen 1 Dashboard mount disk 1 SD Card 1 Pouch 1 NOTE Accessories and their part number are subject to modification wit...

Page 7: ...12 16 18 20 21 23 Important Safety Instructions Accessories View of Main Unit System Connections Power Supply Preparation Use of the Mount Accessories Troubleshooting Specifications General Setup MP3...

Page 8: ...e listening When the earphone is connected to this jack the speaker will be turned off automatically 4 USB Port Connect to the supplied adapter to charge the unit Used to connect to the USB device 5 L...

Page 9: ...p updating See the below figure for details System requirements Windows 98SE ME 2000 and XP Driver required for Windows 98SE DVD Rom Drive for map upgrade purposes Intel Pentium II 233 Mhz 64 MB RAM 5...

Page 10: ...rd unlocks and protrudes slightly Then remove the card Connecting to Earphones Connect the earphones to the right side of the unit for private listening When earphone is connected the speakers will au...

Page 11: ...iving a vehicle Place the unit in a proper position for viewing Disconnect the unit from the Car Adaptor when starting the vehicle Your portable GPS unit comes with a built in rechargeable battery Ple...

Page 12: ...lly charged before initial use Battery should only be used and charged when temperatures are between 32q 100qF Maintain well ventilated conditions around the product to avoid overheating Don t put the...

Page 13: ...eturn to the system main menu as shown below In the main menu there are four items for selecting Touch the corresponding item to enter Tap to enter navigation mode tap to enter the MP3 player tap to e...

Page 14: ...st the sleep time There are 6 choices for sleep time 5 10 30 60 120 The system will keep backlight always on and will not enter sleep mode 5 The system will keep backlight on for 5 minutes and then en...

Page 15: ...ct the proper Time Zone Tap the buttons of Date group to change the corresponding date and tap the buttons of Time group to change the corresponding time Tap to return Power Tap in the settings menu t...

Page 16: ...e it will disappear after having moved through a cycle center top left corner bottom left corner bottom right corner top right corner Tap the screen to return to the settings menu Note If doesn t disa...

Page 17: ...ttempt to open the Flash storage may result in the map data missing and lost Warning For your own safety do not use the earphones when driving Take the following steps to play Loading MP3 and WMA form...

Page 18: ...the button changes to orange the player will play the songs in the list randomly Tap or in the top left corner of the play list menu to return to the MP3 main screen On the playback screen as shown be...

Page 19: ...missing and lost It lags when reading high resolution JPEG files in SD Card We suggest low resolution within 640 480 pictures playback Playing JPEG Files Insert SD card with JPEG files into the card s...

Page 20: ...le tap a picture to play it on screen as shown below On the playback screen the Photo Viewer has following playback features Tap to rotate the picture Tap to back to previous picture tap to switch to...

Page 21: ...he mount cradle To remove the unit push the tap at the top of the mount cradle in arrow 1 opposite direction 3 Lift the suction cup lever and then press the suction cup to the windshield Then press do...

Page 22: ...turned down or mute Turn up the volume or turn on the sound output The unit can t receive satellite signals or can t orient The unit may be obstructed by buildings or metal block Make sure to use the...

Page 23: ...r service center or the qualified technician The unit can receive signals now but can t then or signals received are not stable The built in rechargeable battery is weak Use the adaptor to supply powe...

Page 24: ...g Limited TFT screen size 4 3 inches Frequency Response 20Hz 20kHz Audio Signal to noise Rate 65dB Audio distortion noise 20dB 1kHz Channel Separation 70dB 1kHz Dynamic Range 80dB 1kHz Power AC 100 24...

Page 25: ......

Page 26: ......

Page 27: ...8 U ITEM Q4 01 z oIn I U 0 I V Z UJ 0 I nextar u AUTOMOTIVE NAVIGATION SYSTEM GPS 0 V...

Page 28: ...ggestion made by the software instructs you to perform an unsafe or illegal maneuver places you in an unsafe situation or routes you into an area that you consider unsafe do not follow the instruction...

Page 29: ...y guide you on your route or may inaccurately estimate the time needed to reach your destination Please use your judgment in these cases Renewing your subscription to the database will aid in keeping...

Page 30: ...l over in a safe manner observing all traffic regulations When your vehicle is moving keep your eyes on the road instead of looking at the screen Listen to the voice prompts for guidance instructions...

Page 31: ...ing Destinations 18 Selecting and Working with Turn By Turn Views 19 Main Turn by Turn View 20 Split Map View 20 Maneuvers List View 21 Zooming In and Out 21 Canceling a Route 22 Automatic Route Recal...

Page 32: ...tus 41 Setting Default Route Calculation Criteria 42 Setting Origin 43 Previewing a Route Using Demo Mode 44 Viewing Program Version Information 45 Exiting the Application 46 Chapter 6 Technical Refer...

Page 33: ...ation s voice guidance system announces each maneuver that you need to make while the main screen displays turn directions compass heading distance to next maneuver and street names If you leave your...

Page 34: ...to configure the GPS set preferences cancel a route in progress exit the application and more Chapter 6 Command Reference provides detailed reference information regarding the GPS menus controls and i...

Page 35: ...ME to set a destination using a street and address in the last used city This option displays only if a city has previously been entered CITY CENTER to set a destination to the center of a city or tow...

Page 36: ...p the POI tab 3 Select an option to locate a POI as follows POI BY CITY to locate a POI by entering the city location and then the POI name POI BY NAME to locate a POI by entering the POI name POI NEA...

Page 37: ...the displayed list The system next shows the Destination Confirmation for the selected destination 8 Next Tap GO to calculate the route and start the turn by turn instructions OR Tap SAVE GO to save...

Page 38: ...y Modes Browsing the Map Display Selecting Options and Entering Data Setting Destinations Selecting and Working Turn By Turn Views Zooming In and Out Canceling a Route Automatic Route Recalculation Se...

Page 39: ...U button provides access to all of the main functions in the GPS via command buttons and the GO TO button provides one touch access to the destination setting screens In the blue bar along the bottom...

Page 40: ...structions For more information see Selecting and Working with Turn By Turn Views on page 19 The Map Display Changing Map Display Modes Tapping on the Map Display Mode button cycles the map through th...

Page 41: ...elow Map Display Mode Heading Up In North Up mode the map scrolls so that North on the map is oriented to the top of the display The vehicle icon faces in the direction of travel while the compass dis...

Page 42: ...ngs screen to set the default startup map display mode For more information see Configuring Map Display Settings Browsing the Map Display Browsing the map involves scrolling i e moving the map in the...

Page 43: ...oosing a location from the favorites or point of interest database Following the prompts on the screen you begin spelling out the item by tapping on each letter on the data entry screen As you make se...

Page 44: ...the main map display tap MAP As you enter more characters the program lists possible matches for you to choose the desired item When entering street names the system works the same as when you enter c...

Page 45: ...ow Enter Destination screen From this screen select the method you want to use to set a destination ADDRESS POI CROSSROAD or FAVORITES The subsequent screens will prompt you to enter or select items a...

Page 46: ...n of the screen See below Tap the Route View button in the lower right to cycle through three different display modes Tapping on the VIEW button cycles you through three different guidance view displa...

Page 47: ...divides the screen into two panes The left pane displays travel progress on the map in the selected Map Display mode The right pane displays a close up view of the approaching maneuver The street nam...

Page 48: ...allow you to view the map display at different levels ranging from street level all the way to country level See the examples below Examples of various zoom levels To change zoom levels for the map d...

Page 49: ...Automatic Route Recalculation Occasionally you may deviate from a calculated route due to a street detour or because you missed a turn When you stray from the calculated route the system will automat...

Page 50: ...oose SET FAVORITE AS HOME In the Select Favorite to Set as Home screen select a location listed Once you select and save a location as HOME the menu button changes from SET AS HOME to GO HOME To calcu...

Page 51: ...n Or Tap MENU GO TO DESTINATION and set a destination to a particular location In the Destination Confirmation screen tap SET ORIGIN See the example below Tap SET ORIGIN to define the selected destina...

Page 52: ...RITE In the Select Favorite to Route To screen select a location At the confirmation screen tap GO To set a location or destination as Home Tap SET FAVORITE AS HOME In the Select Favorite to Set as Ho...

Page 53: ...estination using an address 1 From the main screen tap MENU and then GO TO The Enter Destination screen opens See below Enter Destination screen 2 Tap ADDRESS The main options for setting an address b...

Page 54: ...ation Example 1 In the Enter Destination screen tap START WITH CITY As prompted enter the name of the city or simply tap on a city name that appears in the mini list at the top of the display See belo...

Page 55: ...ions Or Tap SAVE GO to save the destination location in the Favorites list before receiving turn by turn instructions The system will prompt you to enter a location name The system will then provide t...

Page 56: ...e list of names displayed by the program See the example below Select the desired city or town The system will next calculate a route to the desired location and display the results in the Destination...

Page 57: ...to plan a route using a different starting point Note To cancel the destination setting operation at any time tap the MAP button located along the right edge of any data entry or destination setting...

Page 58: ...s close to your destination 4 Upon setting a destination point tap GO to start turn by turn instructions to the selected location or tap SAVE GO to save the destination as a location in the Favorites...

Page 59: ...haracter you may have entered incorrectly tap the Backspace button Within a few characters the system lists possible matches for city names and displays them on the screen Tap on the city name that ma...

Page 60: ...ition Setting a Destination Using Crossroads The crossroads method of setting a destination involves knowing and entering the name of two streets that intersect in order to have the system calculate a...

Page 61: ...n as a location in the Favorites list before getting turn by turn instructions to the selected location Example Tap START WITH CITY The data entry screen opens and prompts you for city information See...

Page 62: ...ames within the first few characters Select the appropriate street name from the list The system next prompts you to enter the secondary street Enter Intersecting Street As prompted enter the intersec...

Page 63: ...screen opens 2 If necessary tap the FAVORITES tab located at the top of the screen The main options for setting and managing location information appear in the main display See below FAVORITES option...

Page 64: ...he system saves the last 50 unique positions to this list You may use this list to set a destination as described next To set a destination using the History list 1 From the main screen tap MENU and t...

Page 65: ...lculation Criteria Setting Origin Selecting a Map Region Previewing a Route Using Demo Mode Viewing Program Version Information Exiting the Application Configuring Map Display Settings The Map Setting...

Page 66: ...00 ft scale and higher The program will not allow you to change the map display mode to 3D at the 500 ft scale and higher The map display mode will automatically return to 3D mode once you zoom in to...

Page 67: ...Settings screen opens See below Settings screen 2 Tap the LANGUAGE button The Language Voice settings screen opens See below Language Voice screen 3 Select a language setting and then tap OK Optional...

Page 68: ...connection settings for your device 1 Choose MENU and then SETTINGS The Settings screen opens See below Settings screen 2 Tap the GPS STATUS button The GPS Status screen opens See below GPS Status sc...

Page 69: ...on criteria 1 Tap MENU and then SETTINGS The Settings screen opens Settings screen 2 Tap the ROUTE SETTINGS button The Route Calc Settings screen opens Route Calc Settings screen 3 Choose the desired...

Page 70: ...the display in Browse mode find the location you want to use as the starting point and then choose MENU SETTINGS SET ORIGIN See below Settings screen Alternatively Tap GO TO from the main screen and...

Page 71: ...ys DEMO on the lower portion of the screen to indicate that Demo mode is on 5 Tap MENU GO TO DESTINATION and set a destination to a particular location In the Destination Confirmation screen tap GO to...

Page 72: ...ght information To view program version information 1 Tap MENU and then SETTINGS The Settings screen opens See below Settings screen 2 Tap ABOUT The About screen opens and displays copyright and versi...

Page 73: ...and then choose SETTINGS The Settings screen opens See below Settings screen 2 In the Settings screen tap EXIT APP A confirmation message opens See below Exit App confirmation message 3 Tap Exit Tap...

Page 74: ...isplay the list of recently used destinations NEAREST POI Tap to open the forms to select a Point of Interest POI closest to the location at the center of the map ROUTE GO TO HERE Tap to calculate a r...

Page 75: ...he display The vehicle indicator icon faces in the direction of travel while the compass displays the direction of travel 3 D Map Mode Switches the map display from 2D to 3D The map can display 3D at...

Page 76: ...ted by the cursor Tap to exit Browse mode and return to the current GPS determined position Current Street Next Cross Street Toggle Toggle to display the current street or the next cross street along...

Page 77: ...ighted keyboard letters Displays the full keyboard with the valid next characters highlighted List Button Lists all possible selections based on the characters entered thus far Empty When available al...

Page 78: ...ected location SAVE GO Save the selected location in the Favorites list and then compute route and start voice and visual guidance to the selected location Route Calculation Criteria button Toggles ro...

Page 79: ...riate Next Maneuver closing in The arrow points left or right as appropriate Next Maneuver imminent The arrow points left or right as appropriate The street name on which you will be turning next appe...

Page 80: ...ion information Q Is there a quick and easy way to view and select recently used destinations Yes Choose MENU HISTORY The system will display a list of previously set destinations Tap on any item in t...

Page 81: ...out any prior notice All specifications and features are subject to change without notice All screen shots shown are simulated and may not represent the actual screen on production unit sold to consum...

Page 82: ......

Page 83: ......

Page 84: ...DO NOT RETURN PRODUCT TO STORE pleasevisit us at http www nextar com sulWort or Call nr x arM al USA Canada 1 888 849 0846 UK 0800 047 0126 for Technical Assistance and Customer Service...

Page 85: ...ownership in the event of product loss or theft 3 Customer Service ThiS will allow us to serve you In the most effiCient manner You may register by Visiting www nextar com Preferred method Mailing thi...

Page 86: ...n a PRODUCT REGISTRATION 1661 FAIRPLEX DRIVE LA VERNE CA 91750 USA Place Postage Here...

Page 87: ...ENT OF THE COMPANY S LIABILITY UNDER THIS WARRANTY IS LIMITED TO THE REPAIR OR REPLACEMENT PROVIDED ABOVE AND IN NO EVENT SHALL THE COMPANY S LIABILITY EXCEED THE PURCHASE PRICE PAID BY PURCHASER FOR...

Reviews: