background image

5

Brütsch/Rüegger Werkzeuge AG, Heinrich Stutz-Strasse 20, Postfach, CH-8902 Urdorf, Tel. +41 44 736 63 63, Fax +41 44 736 63 00, www.neriox.tools, [email protected] 

Focusing 

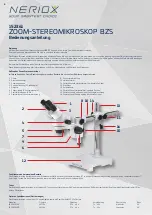
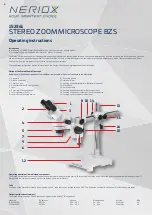
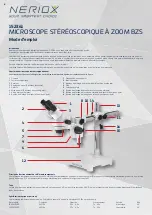
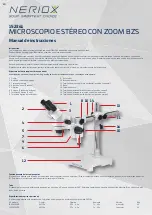
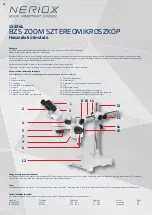
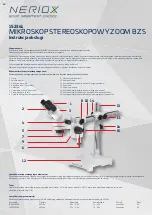
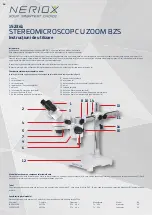
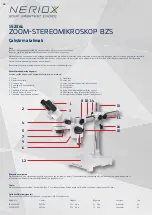
The focusing kobs (6) are used to bring the image of the object into focus.

Adjusting the magnification  

The Stereo Microscope has 2 achromatic zoom lenses. The magnification is continuously adjusted by turning the zoom adjustment knob (4).

Preparing the Stereo Microscope for use 

Remove the microscope from its packaging and place it on a stable table. Make sure that the horizontal arm (10) is only pulled out to the extent that the stereo microscope 

always stands securely and cannot tip over. Then slide the eyecups over the eyepieces. Now sit comfortably in front of the microscope and look through the eyepieces (1). 

Working with the Stereo Microscope


•  Set the focus (6) to a neutral position (carriage in mid-position and not at the stop). 

•  Place an object on the work surface and adjust the vertical position of the horizontal arm (10) until you see a reasonably sharp image,  


then fix the vertical position of the horizontal arm (10) with the locking knob (14). 

•  Move the dioptre correction (2) to the neutral position (marking groove on the tube). 

•  Adjust the pupil distance by moving the prism housings (3) towards or away from each other until you see only a round image with both eyes.

Adjusting the eyepieces to get a sharp image over the entire zoom range


•  Set the magnification to the largest value using the zoom knobs (4). Now focus on a specimen that is as flat as possible (e.g. a text). 

•  Set the magnification to the smallest value. 

•  Now correct the sharpness of the left eye by closing the right eye and adjusting the dioptre correction (2).  


Do the same with the right eye.

Maintenance and cleaning 

Always cover the microscope with a dust cover after use. Keep the eyepieces mounted in the microscope tube at all times, to prevent dust from getting into the device.

Cleaning the optics 

If the lenses of the eyepiece are dirty, they can be wiped with a piece of lens paper (circular movements). If this does not bring an improvement, moisten the lens paper with a 

drop of xylene or alcohol. Never apply xylene or alcohol directly on the lenses!
If dirt is clearly visible in the field of view, this is located on the lowest lens of the eyepiece. The eyepiece can simply be pulled out of the tube. Now clean the outside of the 

lens. If dust is still visible, make certain that the dust is really in the eyepiece by rotating the eyepiece. If this is definitely the case, carefully unscrew the bottom lens from the 

housing and clean it.

 Warning: 


Cloths with plastic fibres can damage the coating of the lenses! 

Cleaning the stand 

Dust can be removed with a brush. If the stand is very dirty, the surface can be cleaned with a non-aggressive cleaning agent. 

Optional accessories 

152371.0010  Eyepiece (pair)   WF15x / 15 

152371.0020  Eyepiece (pair)  WF20x / 10 

152371.0030  Eyepiece (pair)   with reticle (1 piece) WF10x 

152371.0040  Attachment lens   only with long column 0.5x 

152371.0050  Attachment lens  2.0x

Repairs 

If your microscope needs to be repaired, please contact our  

Service Center → [email protected] 

Periodic maintenance 

If you require periodic maintenance of your microscope by  

Brütsch Rüegger Werkzeuge AG, please contact our service technician  

→ [email protected] 

MAN_BR

W

 _vers. 

July. 1

9_art. BR

W

 152 361

Summary of Contents for 152361

Page 1: ...ode d emploi 6 Microscopio steroscopico Zoom BZS Manuale d uso 8 Microscopio est reo con zoom BZS Manual de instrucciones 10 BZS zoom sztereomikroszk p Haszn lati tmutat 12 Mikroskop stereoskopowy zoo...

Page 2: ...mengeh use 4 Zoomverstellung 2 Drehkn pfe 5 Objektiv 6 Fokussierung 2 Fokussierkn pfe 7 Feststellschrauben 3 Stk 8 Feststellknopf Fokussiereinrichtung 9 Fokussiereinrichtung 10 Horizontalarm 11 Festst...

Page 3: ...ie nun die Sch rfe des linken Auges indem Sie das rechte Auge schlie en und die Dioptrienkorrektur 2 verstellen Verfahren Sie entsprechend mit dem rechten Auge Wartung und Reinigung Decken Sie das Mik...

Page 4: ...om adjustment 2 rotary knobs 5 Lens 6 Focusing 2 focusing knobs 7 Locking screws 3 pcs 8 Locking knob focusing device 9 Focusing device 10 Horizontal arm 11 Locking knobs horizontal arm horizontal pos...

Page 5: ...lest value Now correct the sharpness of the left eye by closing the right eye and adjusting the dioptre correction 2 Do the same with the right eye Maintenance and cleaning Always cover the microscope...

Page 6: ...rnants 5 Objectif 6 Mise au point 2 boutons de mise au point 7 Vis de blocage 3 pi ces 8 Bouton de blocage du dispositif de mise au point 9 Dispositif de mise au point 10 Bras horizontal 11 Boutons de...

Page 7: ...it et en ajustant la correction dioptrique 2 Proc dez de la m me mani re avec l il droit Entretien et nettoyage Apr s l utilisation recouvrez toujours le microscope avec la housse antipoussi re Laisse...

Page 8: ...di bloccaggio 3 pezzi 8 Manopola a stella per fissare il dispositivo di messa a fuoco 9 Dispositivo di messa a fuoco 10 Braccio orizzontale 11 Manopole di regolazione braccio orizzontale posizione or...

Page 9: ...l occhio destro regolare la nitidezza del sinistro e impostare la correzione diottrica 2 Procedere allo stesso modo con l occhio destro Manutenzione e pulizia Coprire sempre il microscopio dopo l uso...

Page 10: ...arcasa del prisma 4 Ajuste del zoom 2 ruedas 5 Objetivo 6 Enfoque 2 ruedas de enfoque 7 T ornillos de fijaci n 3 uds 8 T ornillo de fijaci n del enfocador 9 Enfocador 10 Brazo horizontal 11 T ornillos...

Page 11: ...ez del ojo izquierdo Para ello cierre el ojo derecho y ajuste el anillo de correcci n di ptrica 2 Proceda de la misma manera para el ojo derecho Mantenimiento y limpieza Cuando termine de usar el micr...

Page 12: ...5 Objekt v 6 F kusz l 2 f kusz l gomb 7 R gz t csavarok 3 db 8 F kusz l berendez s r gz t gombja 9 F kusz l berendez s 10 V zszintes kar 11 V zszintes kar r gz t gombjai v zszintes helyzet 12 L b 13...

Page 13: ...el ll t s val J rjon el hasonl an a jobb szemmel Karbantart s s tiszt t s A haszn latot k vet en mindig takarja le a mikroszk pot a porv d vel A por bejut s nak elker l se rdek ben hagyja az okul rok...

Page 14: ...Obiektyw 6 Ustawianie ostro ci 2 pokr t a 7 ruby blokuj ce 3 szt 8 Pokr t o blokuj ce uk ad regulacji ostro ci 9 Uk ad regulacji ostro ci 10 Rami poziome 11 Pokr t a blokuj ce rami poziome pozycja po...

Page 15: ...ednio korekt dioptrii 2 Wykona te same czynno ci dla prawego oka Konserwacja i czyszczenie Mikroskop nale y zawsze po u yciu przykrywa os on przeciwpy ow Okulary nale y zawsze pozostawia zamontowane w...

Page 16: ...3 carcasa prismei 4 reglare zoom 2 butoane rotative 5 obiectiv 6 focalizare 2 butoane de focalizare 7 uruburi de fixare 3 buc 8 buton de fixare dispozitiv de focalizare 9 dispozitiv de focalizare 10...

Page 17: ...ept i regl nd corec ia dioptriilor 2 Proceda i la fel i cu ochiul drept ntre inerea i cur area Dup ce utiliza i microscopul s l acoperi i ntotdeauna cu o hus de protec ie mpotriva prafului S l sa i nt...

Page 18: ...m ayar 2 d ner d me 5 Objektif 6 Odaklama 2 odaklama d mesi 7 Kilitleme vidalar 3 adet 8 Odaklama cihaz kilitleme d mesi 9 Odaklama 10 Yatay kol 11 Yatay kol kilitleme d meleri yatay konum 12 Stand ta...

Page 19: ...in bir metin imdi b y tmeyi en k k de ere ayarlay n imdi sa g z kapatarak ve diyoptri ayar n 2 ayarlayarak sol g z n netli ini d zeltin Ayn s n sa g zle yap n Bak m ve temizlik Kullan mdan sonra daima...

Reviews: