background image


68

5. APPENDIX 


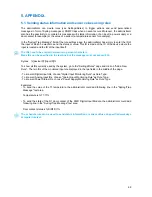
5.1. Sending status information and sensor values using rules 

 
The administrator can create rules (see Settings/Rules) to trigger actions and send personalized 
messages in form of Syslog messages or SNMP traps when an event occurs. Moreover, the administrator 
also has the possibility to complete his messages with status information of an input (a power supply or a 
door contact for example) or the value of a sensor (a temperature sensor for example).  
 
In the "Syslog/Trap Message" field of the rule settings page, the administrator has simply to enter the ID of 
the input of which he wants to send the status or value. This ID is made of the ID of the device where the 
input is located and the ID of the input itself.  
 

The IDs have to be entered between two percent characters. 
Many IDs can be specified in the text box but the message must not exceed 255. 

 
Syntax:   %[device ID]:[input ID]% 


To know all IDs currently used by the system, go to the "Settings/Rules" page and click on "Add a New 
Rule".  The two IDs of the monitored input are displayed in the two fields in the middle of the page. 
 
- To know all Digital Input IDs, choose "Digital Input Monitoring Rule" as Rule Type. 
- To know all Analog Input IDs, choose "Analog Input Monitoring Rule" as Rule Type. 
- To know all Power Status IDs, choose "Power Supply Monitoring Rule" as Rule Type.  
 
Examples: 
-  To send the value of the T1 temperature, the administrator could add following line in the "Syslog/Trap 

Message" text area:  


Temperature is %T1:T1% 


To send the state of the D1 door contact of the DIM1 Digital Input Module, the administrator could add 
following line in the "Syslog/Trap Message" text area:


Door contact status is %DIM1:DI1% 


The schedule rule can be used to send status information or sensor values on specified weekdays 
at regular interval.  


Summary of Contents for ePowerSwitch 8M+R2

Page 1: ...ePowerSwitch 8M R2 User guide Version 02 2011 www neol com...

Page 2: ...L S A S This documentation the ePowerSwitch 8M R2 its peripherals accessories and accompanying software were produced with great care yet errors are possible NEOL S A S assumes no responsibility for e...

Page 3: ...ght sensors 29 3 3 7 3 2 AC Current probe 32 3 3 7 3 3 EnergyMeter 34 3 3 7 4 Settings Peripherals Digital Inputs 36 3 3 7 4 1 Digital Input Modules 36 3 3 7 4 2 Temperature and proximity sensors 39 3...

Page 4: ...plug the ePowerSwitch devices into properly grounded power sockets two poles plus ground Never exceed 10 Amp total load for each group of 4 power outlets of an ePowerSwitch device The ePowerSwitch de...

Page 5: ...evice monitoring with automatic reboot function in case of lock up It supports up to 4 peripherals temperature humidity ambient light sensors currrent probes I O modules Power Switches Supported proto...

Page 6: ...utlet 6 On Off 7 Red Status of power outlet 7 On Off 8 Red Status of power outlet 8 On Off The back of the ePowerSwitch 8M R2 1 2 Package list The following items are included 1 ePowerSwitch 8M R2 2 p...

Page 7: ...e network 2 Use appropriated three wire power cords two poles plus ground to connect your electrical devices to the ePowerSwitch 8M R2 unit 3 Plug each power cable into a grounded socket The power sup...

Page 8: ...s are not compatible with those of your PC 1 Start the Finder exe program contained on the CD ROM 2 Open the File menu and choose SCAN or click on the first left button in the tool bar to discover the...

Page 9: ...the address of your router default is blank DNS 1 Primary DNS Domain Name Server default is blank DNS 2 Secondary DNS default is blank Port Number Port number default is 80 HTTP Version Firmware vers...

Page 10: ...LAN is 192 168 100 200 LAN interface s subnet mask is 255 255 255 0 IP address of default gateway to other networks is 0 0 0 0 IP address of primary DNS server is 0 0 0 0 IP address of secondary DNS s...

Page 11: ...nk Primary DNS Address Primary DNS Domain Name Server default is blank Secondary DNS Address Secondary DNS default is blank Finder Program enabled The Network parameters of the ePowerSwitch 8M R2 can...

Page 12: ...er the IP address of the timeserver you wish to use in the Primary field The address of a second timeserver can be specified in the Secondary field The secondary timeserver is optional and is used onl...

Page 13: ...from 1 to 64 characters long and can contain alphanumeric characters Default name is location Read Community In this field enter the name you want to give to the Read Community field The name can be...

Page 14: ...ur PC Save Click this button to save the current system settings onto your local hard drive Load Click this button and select a settings file you want to download to the ePowerSwitch 8M R2 Restore Cli...

Page 15: ...racters long and can contain alphanumeric characters Do not use quotes or special characters in labels Password In this field enter the password you want to give to the user The password can be from 4...

Page 16: ...ed in the previous field The selected Inputs Outputs are marked dark blue and their IDs are listed at the right side of the Input Output field The ePowerSwitch 8M R2 supports number of peripherals whi...

Page 17: ...enables to deactivate temporarily this account while keeping all its settings for a later use The Hidden Page Account cannot be deleted User Name In this field enter the name you want to give to the...

Page 18: ...s or Outputs to from the current account To add an Input or Output to the current account select the Input Output you want to add in the left field and click on the Arrow button the selected Input Out...

Page 19: ...concatenated using the character Commands can be specified in upper case lower case or mixed case The Hidden Page functionality also allows to control peripherals connected to the A xBus all sensors D...

Page 20: ...deactivate temporarily a group of Power outlets while keeping all its settings for a later use Group Id The ePowerSwitch 8M R2 automatically creates an ID Code to clearly identify each group of power...

Page 21: ...page to exit the session without saving changes DISCARD CHANGES Click Discard Changes at the bottom of the page to discard all the changes you have made on this page APPLY CHANGES Click Apply Changes...

Page 22: ...ure and humidity sensor TRH Sensor temperature and ambient light sensor TL Sensor temperature and proximity sensor TP Sensor temperature sensor Tiny T Sensor liquid detector KIT LIQ DET Controlled IEC...

Page 23: ...the ePowerSwitch 8M R2 it will be automatically recognized and displayed on this page after a delay of 1 to 60 seconds In this case the colour of the corresponding Edit and Info symbol is red The Per...

Page 24: ...ed to the ePowerSwitch 8M R2 it will no longer be accessible by its authorized users The ePowerSwitch 8M R2 cannot be deactivated To remove a peripheral click on the corresponding Delete button A peri...

Page 25: ...tes an ID Code to clearly identify each device M0 identifies the ePowerSwitch 8M R2 device Name In these fields enter the name you want to give to the selected device The name can be from 1 to 32 char...

Page 26: ...efine for each power outlet Power up delay means the delay before the power outlet will take the defined status after power up The delay can be set between 1 and 65535 seconds the value 0 means that n...

Page 27: ...werSwitch already installed see user s guide of the corresponding ePowerSwitch Do NOT connect the xBus cable and the power cable before setting its DIP switches Do NOT use the same address for two dif...

Page 28: ...ed all connected ePowerSwitches will now appear on the Peripherals page and their Edit and Info Symbol will be red y The Peripheral page is not automatically refreshed so you need to refresh it by cli...

Page 29: ...wed by a number identifies each Power outlet Create new rule Click on this button to create a new rule Name In these fields enter the name you want to give to the each Power Outlet of the ePowerSwitch...

Page 30: ...same address for two different sensors 2 Using a standard RJ45 network cable connect the sensor to the RJ45 xBus connector on the ePowerSwitch 8M R2 or behind another xBus peripheral already connected...

Page 31: ...identify each connected sensor T followed by a number identifies each temperature sensor TDE followed by a number identifies each temperature sensor with 1 digital input TDT followed by a number iden...

Page 32: ...gital Input EOL followed by a number identifies the End Of Line input Create new rule Click on this button to create a new rule Name In this field enter the name you want to give to the digital input...

Page 33: ...2 168 100 200 sysadmin htm 2 Enter the administrator name and password default for both admin The home page appears 3 Click on the Settings and then on the Peripherals Tab If the AC Current probe is p...

Page 34: ...for a later use Analog Inputs ID The ePowerSwitch 8M R2 automatically creates an ID Code to clearly identify each analog input I1 identifies the current analog input Create new rule Click on this but...

Page 35: ...and log in to the Administrator s Configuration Page ex http 192 168 100 200 sysadmin htm 2 Enter the administrator name and password default for both admin The home page appears 3 Click on the Settin...

Page 36: ...its settings for a later use Analog Inputs ID The ePowerSwitch 8M R2 automatically creates an ID Code to clearly identify each Analog input E followed by a number identifies each Real Energy value I...

Page 37: ...its DIP switches Do NOT use the same address for two different Digital Input Modules 2 Using a standard RJ45 network cable connect the Digital Input Module to the RJ45 A xBus connector on the ePowerSw...

Page 38: ...licking the peripheral TAB again or push F5 or press CTRL R on your keyboard if you use Internet Explorer or Mozilla Firefox To configure or modify the settings of the Digital inputs click on the corr...

Page 39: ...Switch 8M R2 automatically creates an ID Code to clearly identify each d input DI followed by a number between 1 and 16 identifies each digital input of the module Create new rule Click on this button...

Page 40: ...2 Enter the administrator name and password default for both admin The home page appears 3 Click on the Settings and then on the Peripherals Tab If the sensor is properly connected to the ePowerSwitc...

Page 41: ...g input T followed by a number identifies each temperature value Create new rule Click on this button to create a new rule Name In this field enter the name you want to give to the analog inputs Do no...

Page 42: ...dmin The home page appears 3 Click on the Settings and then on the Peripherals Tab If the Push button is properly connected to the ePowerSwitch 8M R2 it will be automatically recognized and displayed...

Page 43: ...the push button and enables to deactivate it temporarily while keeping all its settings for a later use Digital Inputs Sensor ID The ePowerSwitch 8M R2 automatically creates an ID Code to clearly ide...

Page 44: ...rs allowing you to set all the parameters of the rule A total of 32 rules can be created and there are 7 different types of rules 1 Schedule Rule This rule is used to trigger user specified actions ac...

Page 45: ...an automatically restart the powered device 4 Scan Monitoring Rule This rule is used to control actions according to the response to a Scan command This rule can be used to check if a specific protoco...

Page 46: ...ber of this rule will only be used again if no other rule is available Rule Name In this field enter the name you want to give to the rule The name can be from 1 to 32 characters long and can contain...

Page 47: ...utput Check this box and in the first corresponding drop down list choose the device from which one you want to switch a digital output In the second drop down list choose the digital output the rule...

Page 48: ...page to exit the session without saving changes DISCARD CHANGES Click Discard Changes at the bottom of the page to discard all the changes you have made on this page APPLY CHANGES Click Apply Changes...

Page 49: ...can be from 1 to 32 characters long and can contain alphanumeric characters Do not use quotes or special characters in labels Rule Color In this field select one of the 48 standard colours you want t...

Page 50: ...r pulse close If you choose pulse you will also be able to define a pulse delay between 0 and 65535 seconds If you choose 0 second the delay will be the delay defined in the ePowerSwitch digital outpu...

Page 51: ...and can contain alphanumeric characters Do not use quotes or special characters in labels Rule Color In this field select one of the 48 standard colours you want to use to highlight the rule when exe...

Page 52: ...this box and in the first corresponding drop down list choose the device from which one you want to switch a digital output In the second drop down list choose the digital output the rule will apply...

Page 53: ...name you want to give to the rule The name can be from 1 to 32 characters long and can contain alphanumeric characters Do not use quotes or special characters in labels Rule Color In this field selec...

Page 54: ...replace the delay defined in the ePowerSwitch power outlets settings Set Digital Output Check this box and in the first corresponding drop down list choose the device from which one you want to switc...

Page 55: ...To use own colours just type in the Hex value of the colour you want The Rule highlighting allows to quickly identify the triggered rule when displayed in the Rule Panel page or in a special users pa...

Page 56: ...lose pulse open or pulse close If you choose pulse you will also be able to define a pulse delay between 0 and 65535 seconds If you choose 0 second the delay will be the delay defined in the digital o...

Page 57: ...48 standard colours you want to use to highlight the rule when executed To use own colours just type in the Hex value of the colour you want The Rule highlighting allows to quickly identify the trigge...

Page 58: ...pply to In the next corresponding drop down list choose the action to execute Each digital output can be open close pulse open or pulse close If you choose pulse you will also be able to define a puls...

Page 59: ...ight the rule when executed To use own colours just type in the Hex value of the colour you want The Rule highlighting allows to quickly identify the triggered rule when displayed in the Rule Panel pa...

Page 60: ...rent from 0 the delay will replace the delay defined in the ePowerSwitch power outlets settings Set Power Outlet Check this box and in the corresponding drop down list choose the power outlet the rule...

Page 61: ...5 characters may be entered in this free text field The text will appear in the Syslog and the Trap The message can be completed with the status of an input a power supply or door contact for example...

Page 62: ...ing all its settings for a later use Shutdown Association ID The Power Switch automatically creates ID codes to clearly identify each rule The codes used to indentify Shutdown Rules start with the let...

Page 63: ...in the right field and click on the Arrow button the group will then appear in the left field Device In this Drop Down list choose the device of which the power outlet will be used to trigger the Shut...

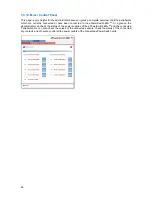
Page 64: ...ted or have been connected to the ePowerSwitch 8M R2 At a glance the administrator can check the status of the power supplies of the ePowerSwitch 8M R2 and the connected Peripherals He can also check...

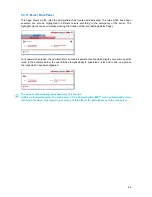
Page 65: ...ngs Rules Page For supervision purpose the administrator can create special accounts which display only some specific rules In the example below the user Bill has the possibility to supervise 2 rules...

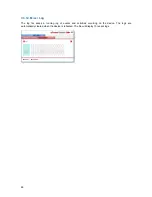
Page 66: ...65 3 3 12 Misc Log The log file keeps a running log of events and activities occurring on the device The logs are automatically cleared when the device is rebooted The file will display 10 recent logs...

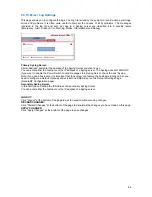
Page 67: ...port 443 UDP If you want to enable the Power Switch to send messages to a Syslog Server check the box Syslog Note if you use a hostname it is important that the system can resolve the hostname locally...

Page 68: ...t light display the status of all digital inputs If you log in as a user ePowerSwitch 8M R2 handles up to 40 accounts you will be able to control individually all the power outlets and all the power o...

Page 69: ...Ds can be specified in the text box but the message must not exceed 255 Syntax device ID input ID To know all IDs currently used by the system go to the Settings Rules page and click on Add a New Rule...

Page 70: ...c server port If the connection is possible ePowerSwitch 8M R2 knows that a server program is running there If the connection is not possible ePowerSwitch 8M R2 can automatically switch the device off...

Page 71: ...ature 0 C to 40 C Operating humidity 10 to 80 RH not condensing Dimensions LxDxH 437 x 107 x 42 mm Weight 2 kg Approvals CE EN55022 EN55024 5 4 Commonly used Ports TCP 80 This port is used for http co...

Page 72: ...ritical The following messages appear at severity 2 file config corrupted restoring default values Severity Level 3 Error ePowerSwitch 8M R2 doesn t generate Severity Level 3 Severity Level 4 Warning...

Page 73: ...ame Outlet number of Master M0 has been switched ON User name Group number has been switched ON Dry Contact Input number has been opened Dry Contact Input number has been closed Dry Contact Output num...

Page 74: ...EEC 73 23 EEC 93 68 EEC Standards to Which Conformity declared EN 60950 EN 55022 EN 55024 Manufacturer s Name and Address NEOL S A S 4 Rue Nationale 67800 BISCHHEIM FRANCE Type of Equipment Power dist...

Reviews: