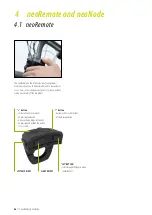
4 neoRemote & neoNode
//
27
4 n
eo
Re
m
ot
e & n
eo
No
de
• Main task: communication interface between
battery/motor and display
• In the down tube or in the vicinity of the bottom
bracket
• Small, robust plugs for quick disassembly
neoTwistlock plug connection
4.2 neoNode
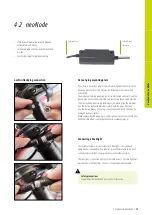
Cable to display
(Twistlock)
Cable to battery
Note on plug mounting plate
If you have to open the 2 plugs of the cable leading from the neoTwistlock
mounting plate to the frame, observe the following instructions when
assembling.
The male plug from the mounting plate (see illustration above left) and the
female plug on the connecting cable (see illustration above right) must be
correctly aligned when joining. Both plugs are marked. Align the markings
(see illustration in the middle) and carefully push the plugs together
(see illustration below). If the plugs are not aligned correctly, they may be
damaged during assembly.
When unplugging and plugging in, only grip the plugs, not the cable. Do not
bend the cable when assembling the plugs to avoid damaging it!
Connecting a headlight
The system provides a current output for e-bike lights. Only approved
lights may be connected to the neodrives system. Please refer to the list of
currently approved lights at www.neodrives.com/en/dealer-login/.
The front light is connected directly to the cable harness. The rear light must
be supplied via the front light. The list is constantly being expanded.
Safety precautions
Connecting other headlights may lead to system errors.


