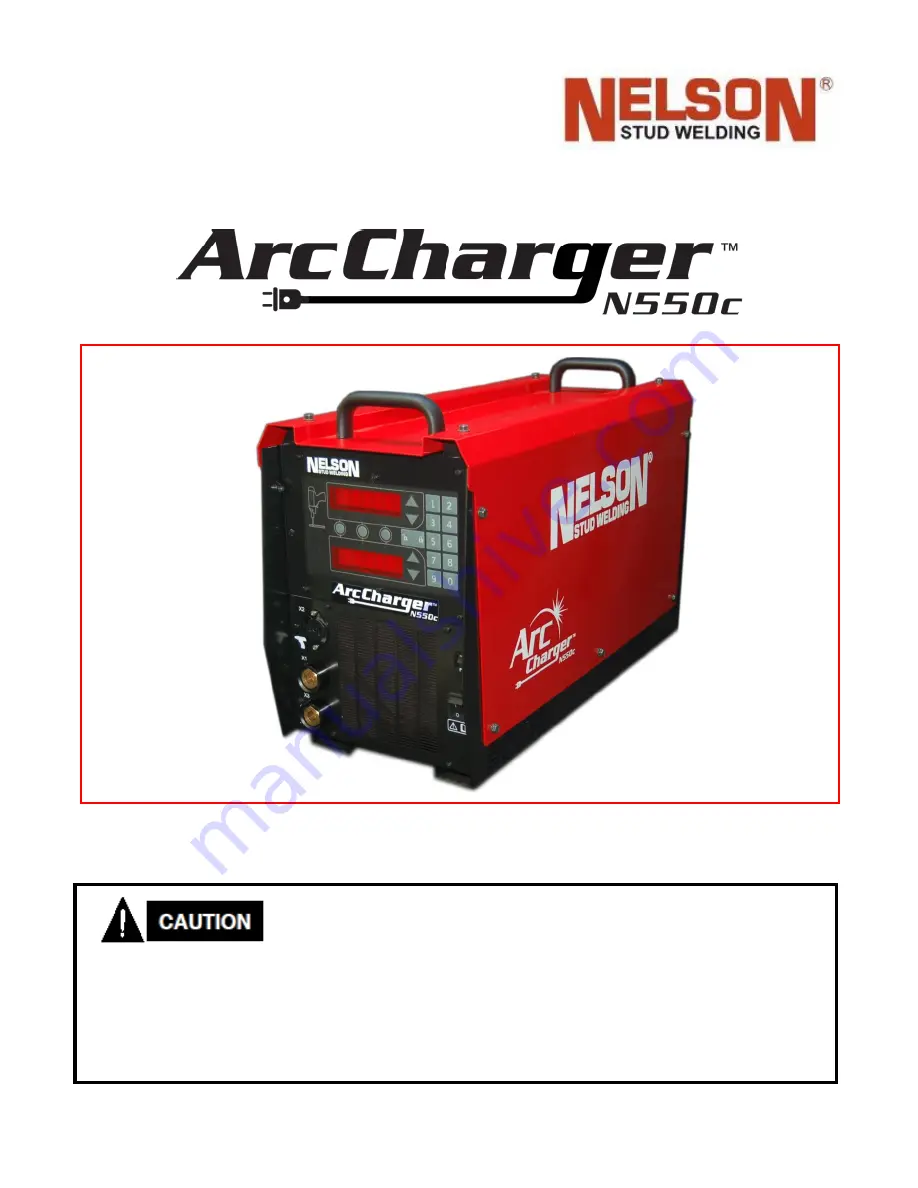
background image


Part No. 729-110-040 Rev. 1.41 | June 2016 


© 2016 Nelson Stud Welding, Inc. All Rights Reserved. 


OPERATING THE 


DOMESTIC & EXPORT 


Operations Manual  

For Software Version 1.03 


These  instructions  are for experienced  operators. 

If you are not fully 

familiar with the principles of operation and safe practices for arc welding 
equipment, we urge you to read AWS SP -

“Safe Practices” available from the 

American Welding Society.

 Do not permit  untrained  persons  to install, 

operate  or maintain  this  equipment.  Do not attempt  to install  or 
operate  this  equipment  until  you  have  read  and  fully  understand 

these  instructions. 

If you do not fully understand these instructions, contact 

your supplier for further information. Be sure to read the Safety section before 
utilizing this equipment. 

Summary of Contents for ArcCharger N550C DOMESTIC

Page 1: ...safe practices for arc welding equipment we urge you to read AWS SP Safe Practices available from the American Welding Society Do not permit untrained persons to install operate or maintain this equipment Do not attempt to install or operate this equipment until you have read and fully understand these instructions If you do not fully understand these instructions contact your supplier for further...

Page 2: ...personnel a reasonable opportunity to inspect and repair said equipment at buyer s facility or such other location as is mutually agreeable Notice to NELSON must be given within 30 days of such defect or failure and within one year or 500 000 welds from the date the equipment was delivered whichever comes first No compensation or reimbursement for transportation costs of any kind will be allowed P...

Page 3: ...fs or pockets Sleeves and collars should be kept buttoned and open pockets eliminated from the front of clothing 5 Protect other personnel from arc rays and hot sparks with suitable nonflammable partitions or curtains 6 Use goggles over safety glasses when chipping slag or grinding Chipped slag may be hot and can fly far Bystanders should also wear goggles over safety glasses ELECTRICAL AND MAGNET...

Page 4: ...om the compressed gas cylinder Do not use adaptors Maintain hoses and fittings in good condition 2 Always secure cylinders in an upright position by chain or strap to suitable hand trucks undercarriages benches walls post or racks Never secure cylinders to work tables or fixtures where they may become part of an electrical circuit 3 When not in use keep cylinder valves closed Have valve protection...

Page 5: ...tallation Precautions 14 3 2 Connection 15 3 3 Input Power Connection 16 3 3 1 Connection of Welding Cable 18 3 3 2 Connection of Gun Control Cable 18 3 3 3 Dual Connection of Work piece Ground Cable 18 3 3 4 Connection of Work piece 19 3 4 Arc Blow Effect 19 3 5 Short Cycle Drawn Arc Welding Connection Diagram 21 4 Control Display Elements 23 4 1 Front Panel Controls Displays 24 5 Operation 26 5 ...

Page 6: ...Signals 40 5 8 2 Setup Good Weld Target 40 5 9 Understanding Lock Modes 40 6 Operational Function Codes Error Codes 41 6 1 Function Codes 41 6 2 Diagnostic Error Codes 44 6 2 1 Additional Warning Rebooting Tripping of GFCI 47 6 2 2 Additional Warning Front Panel Gun Coil Indicator Blinks RED As If No Gun Connected But Gun is Connected 47 6 2 3 Additional Warning F32 Actual Weld Time 47 6 2 4 Addit...

Page 7: ...1 June 2016 2016 Nelson Stud Welding Inc All Rights Reserved 8 1 Domestic Wiring Diagram 58 8 2 Export Wiring Diagram 58 8 3 Domestic Short Cycle Wiring Diagram 60 8 4 Export Short Cycle Wiring Diagram 62 9 Contact Information 64 ...

Page 8: ...weld times and is capable of welding studs with up to a 3 8 9 5 mm diameter weld base 1 2 Welding Method The Arc Charger is a stud welding system designed to use both the drawn arc and short cycle weld process The drawn arc method utilizes fasteners with integrated flux balls in conjunction with ceramic ferrules The flux ball on the tip of the stud acts as a deoxidizing agent during the weld The c...

Page 9: ...ff the stud is plunged into the base metal 7 Pull the gun up off the stud 8 Remove the ferrule if required from the cooled stud 1 4 Ceramic Ferrules Ceramic ferrules are used with the drawn arc method They form a chamber around the weld which encompasses the arc and shields the user from the weld spatter The ferrules also help to reduce the weld cooling rate and to produce an even shaped weld flas...

Page 10: ...t Cycle Note Arc Charger SC Units Only These power units allow higher current for a shorter time They lower time setting accordingly as current is increased per unit s capabilities 1000A 100ms 1100A 90ms 1200A 80ms 1300A 70ms 1400A 60ms 1500A 50ms Power Cord 9 ft 2 75 m Input Power Connection Standard 120 220 VAC 3 Prong Grounded IEC Type E Plug 3 Conductor Grounded Idle Power W 25 Max Display Tou...

Page 11: ...Part No 729 110 040 Rev 1 41 June 2016 2016 Nelson Stud Welding Inc All Rights Reserved 10 1 5 1 Dimensions ...

Page 12: ...ll as for the completeness of the parts within the extent of delivery Any possible transport damage and or missing parts must be immediately made known to the manufacturer or the authorized forwarding company 2 3 Storage If the welding unit is not operated upon delivery it must be stored immediately in a secured place The Arc Charger must be sufficiently protected against dust and or moisture The ...

Page 13: ...ear NOTE Do not use the input power cable as a handle In order to prevent back injury do not attempt to lift the Nelweld N550c unit alone Seek the assistance of at least one other person when moving lifting the unit Internal damage to the weld unit may occur if operated in the vertical position The unit may also tip over causing injury Lie the unit back down horizontally after transporting if usin...

Page 14: ... The power unit will operate in harsh environments Regardless it is important to follow simple preventative measures in order to assure long life and reliable operation The machine must be located where there is free circulation of clean air such that air movement in the back out the sides and bottom will not be restricted Dirt and dust that can be drawn into the machine should be kept to a minimu...

Page 15: ... the weight of the unit When working in high lying locations such as bridges ladders or platforms the Nelweld N550c Arc Charger must be secured against the risk of falling The Arc Charger must be adequately protected against the intrusion of liquids It may not be installed on liquid bearing pipelines In order to guarantee unimpeded temperature exchange with the environment a minimum clearance of 3...

Page 16: ...elweld N550c Arc Charger welding unit must be switched off The input power switch of the unit must be in the 0 position 1 X2 Connection of Gun Control Cable to the unit 2 X1 Connection of Weld Cable to the unit 3 X3 Connection of Weld Cable to the unit 4 Input Power Connection of the Input Power Cable Figure 3 2 1 N550c Connections 4 3 2 1 ...

Page 17: ... manufacturers These inconsistencies may cause nuisance tripping in some cases See F Code list to adjust charging characteristics which may improve the performance on GFCI protected circuits DEDICATED CIRCUIT REQUIREMENTS This power unit requires a dedicated 115V 20A circuit that powers nothing but the welding power source Any current draw from other devices on the same circuit may result in a cur...

Page 18: ...Part No 729 110 040 Rev 1 41 June 2016 2016 Nelson Stud Welding Inc All Rights Reserved 17 ...

Page 19: ... Cable socket permits the connection of the control cable to the Arc Charger unit The signals to control the gun are transmitted via the control cable Gun Control Cable Connection X2 Silver Pin White Wire Broad Pin Brass Pin Black Wire Narrow Pin 3 3 3 Dual Connection of Work piece Ground Cable The welding current return takes place via the Work piece Ground Cable which must be connected as follow...

Page 20: ...s shipbuilding etc 3 Place the work piece ground terminals if possible at the same distance from the point of welding when 2 ground clamps are used Prior to connecting the earth ground terminals the following advice on avoiding arc blowing must be observed 3 4 Arc Blow Effect Blowing effect is the designation for the lateral deviation of the arc from a central position Depending on the cause a dis...

Page 21: ...ding In the event of a one sided earth ground terminal the arc blows away from the terminal The condition can be eliminated by additional metal plates The polarity in the illustrations provided refers to ferromagnetic materials When welding aluminum reverse polarity is normally used Influences upon the arc as a result of welding cable itself can largely be avoided by turning the weld gun through 9...

Page 22: ... the back out the sides and bottom will not be restricted Dirt and dust that can be drawn into the machine should be kept to a minimum Failure to observe these precautions can result in excessive operating temperatures and nuisance shutdown Keep the machine dry Shelter it from rain and sun Do not place on wet ground or in puddles DO NOT MOUNT OVER COMBUSTIBLE SURFACES Where there is a combustible ...

Page 23: ...apply plug needed for outlets in your area CHANGES TO THE INPUT GROUNDING CONNECTIONS Only a qualified electrician should connect the N550c Arc Charger Installation should be made in accordance with the appropriate National Electrical Code all local codes and the information detailed below TROUBLESHOOTING WITH COVER OFF Unlike other welders the N550c Arc Charger power unit has HIGH VOLTAGE present...

Page 24: ...Part No 729 110 040 Rev 1 41 June 2016 2016 Nelson Stud Welding Inc All Rights Reserved 23 4 Control Display Elements 11 10 3 2 1 4 5 6 7 9 8 ...

Page 25: ...the machine Upon powering up the internal control software performs a series of diagnostic tests to ensure correct connection and operation of the power source 8 Weld Time Stud Expert Display The TIME setting is displayed on the front panel LOWER display It can be changed using the Up Down arrow keys to the right of the current display in one 1 amp increments 9 Warning Alert This indicator turns O...

Page 26: ...Part No 729 110 040 Rev 1 41 June 2016 2016 Nelson Stud Welding Inc All Rights Reserved 25 Figure 2 Weld Tool Icon ...

Page 27: ... positioning the grounding clamps or magnetic masses 7 Ensure that there is good current transfer low resistance in all contact points in the welding circuit welding cable connections chuck grounding clamps 8 Always lay out the welding and earth ground cable without coils to avoid electromagnetic influences Check the settings of the N550c welding unit and of the connected gun that you require for ...

Page 28: ...2 ways 1 directly setting the current and time values or 2 use the Stud Expert tm mode based on stud diameter 5 3 1 Setting Current Reading Current Display The current setting controls the amperage during the weld and is displayed in the upper display of the front panel It can be adjusted in 1 amp increments using the up down arrow keys to the right of the current display As each of these keys re ...

Page 29: ...le mode max main arc time is 100 ms and drawn arc min main arc time is 100 ms or change gun type or plunge dampener shock absorber Simply go to F31 and shoot a stud The actual gun speed is measured and the actual drop time is saved in F31 When you display F31 on the front panel and make a weld F31 should automatically update with the actual drop time from the new weld The newly updated F31 value s...

Page 30: ...ding conditions The best possible weld parameters must always be determined with proper attention to factors such as the material and surface quality of the workpiece plate thickness welding position stud type stud dimensions etc in trial welds Attention must be paid conducting the trial welds under conditions equivalent to the real conditions used for production In obtaining the best welding resu...

Page 31: ...ARC Preset Stud Size Current Amps Time s 1 3 mm 200 0 150 2 4 mm 280 0 200 3 3 16 300 0 150 4 5 mm 350 0 230 5 6 mm 410 0 250 6 1 4 450 0 170 7 7 mm 470 0 300 8 5 16 500 0 250 9 8 mm 550 0 300 0 3 8 550 0 320 5 3 8 Parameters for Drawn Arc Procedure Assuming a 20 ms short circuit on time of 20 ms Stud Weld Rate Parameters listed are those used testing and should be used only when considering opera...

Page 32: ...olzen M3 400 0 015 3 16 Pulse 160 0 200 3 16 Pitch Base 280 0 140 3 16 Full Base 310 0 150 4 mm Pitch Base 240 0 120 4 mm Full Base 270 0 130 4 mm IS Bolzen 280 0 200 4 mm SC Bolzen M4 500 0 015 5 mm Pitch Base 290 0 140 5 mm Full Base 320 0 160 5 mm IS Bolzen 350 0 230 6 mm Pitch Base 340 0 170 6 mm Full Base 370 0 190 6 mm SD6 MR M8 S6 410 0 250 1 4 Pitch Base 360 0 180 1 4 Full Base 400 0 210 1...

Page 33: ...n representative for a Weld Cable Length calculator NOTE Cable lengths described in the chart Figure 6 assume weld times shown in the chart text Longer weld times may not be possible holding all other variables constant due to the fixed energy available in the power unit capacitors 8 mm Pitch Base 440 0 230 8 mm Full Base 500 0 270 8 mm MR M10 S8 550 0 300 ...

Page 34: ... Output Voltage Figure 7 is 40V 5 4 3 Supply Cable Lengths Based on 3 drop and maximum 7 below nominal at mains connection during weld The same guideline applies to power drops from the mains high current breaker box or fuse box to disconnect boxes and plug in for machine connection 115 VAC Domestic Up to X feet AWG Cable copper 35 12 60 10 230 VAC Export Up to X feet AWG Cable copper mm2 copper 3...

Page 35: ...unction that is with F31 on the display attempt a weld The gun will lift and drop but no weld current will pass The gun s drop time is measured stored displayed and used in weld timing as will be described later in this document F2 Plunge short circuit on time This is the time that the weld current re input power on after the stud is scheduled to have made contact with the workpiece Front Panel Ti...

Page 36: ...ual Weld Time is 50 ms The main current would be on for the Front Panel Time Plunge short circuit on time F2 50 ms 50 ms 100 ms but the arc would exist only during the Actual Weld Time or 50 ms The important thing to note is that normally the stud begins to drop at Front Panel Time Drop Time But if the Drop Time exceeds the Front Panel Time the stud would need to begin to drop prior to the start o...

Page 37: ...diode in either the gun itself or inside the power source it will drop much later than a configuration with a diode resistor since the energy is dissipated in the resistor after the coil is de energized PLUNGE DAMPENER Tranquil arc dampeners will slow the rate of stud travel speed in the downward direction Dampeners can adjust this rate for up to a few hundred milliseconds of travel time Plunge da...

Page 38: ...s Replace parts as needed Debris in the housing will resist travel 5 7 Inspection and Testing of the Weld To assure the quality of stud welds the following testing must be carried out before during and after production standard work testing simplified work testing continuous production monitoring STANDARD WORK TESTING For welding according to the drawn arc and short cycle method ten studs must be ...

Page 39: ...rt Cycle Method Visual Inspection Inspection and testing of the weld is restricted in this manual to the visual inspection of welds A description of the mechanical and technological tests involved would go beyond the scope of the manual See EN ISO 145552 for detailed information in this regard 2 EN ISO 14555 Welding Arc stud welding of metallic materials 2006 Perfect weld Even bead no perceptible ...

Page 40: ...s Perfect weld Bead is even glossy and closed Stud length after welding within tolerance Corrective measures Not necessary No alteration to the electrical and mechanical parameters Faulty weld 1 Constriction of the weld stud too long Corrective measures Increase plunge distance check lift check centering of the ceramic ferrule Decrease weld current and or weld time Faulty weld 2 Feebly formed unev...

Page 41: ...t any presets by manually changing the time and or current if necessary so that no preset buttons are backlit Make a good weld go to F32 press and hold the Lock key until the display says the target is saved A target can be created for each preset Choose a preset make a good weld and go to F32 While viewing F32 press and hold the Lock key until the display says the target is saved for the backlit ...

Page 42: ... ms F12 Stud Feed Enable OFF ON OFF X F13 Stud Feed Time 10 to 2000 50 ms Pulse width of stud feed signal This only applies when Stud Feed is enabled F14 Stud Feed Normal Level NORMAL CLOSED NORMAL OPEN NORMAL OPEN X This only applies when Stud Feed is enabled F15 Stud Feed Style AFTER CONTACT BREAK AFTER WELD AFTER CONTACT BREAK X When to get the signal This only applies when Stud Feed is enabled...

Page 43: ...rrent time ms E Energy Joules tD Drop Time ms tP Pilot Time ms NA x This F code gives information about the last weld F45 Calibration Offset Value 0 to 200 100 X Used by manufacturing Do not change F46 Plunge Current Enable OFF ON OFF X When enabled the current will change to the selected value while the stud is plunging F47 Plunge Current 100 to 550 or higher for Short Cycle Model 500 Amps When P...

Page 44: ... the weld will deliver the front panel current F50 current F52 Pulse Weld Low Time 20 to 25 25 ms This is the time the weld will deliver the low current F67 Charge Intensity 10 to 100 90 Controls charge current Use this F code to reduce charge current for compatibility with GFCI devices NOTE Reducing this value increases the time it takes to recharge between welds ESA Mode Fixed at 75 Internationa...

Page 45: ...e control board senses that the current was more than 50 low while the control to the power system was at the maximum for 15ms it will abort the weld and display this error This will happen if the current sensing failing for any reason wiring power supply etc This exists as a safety mechanism in case current sensing fails This is most likely caused by the arc actually popping out No No Problems Mo...

Page 46: ...gun control cable Mechanical binding of the gun Pilot arc board failure Sometimes will also indicate contact with workpiece incorrectly Replace pilot arc board Workpiece not directly clamped to output of unit Pilot arc circuit Look for evidence of pilot arc If there is no pilot arc mark on the work material replace the pilot arc board Lift height too high or plunge depth stick out is too much Perf...

Page 47: ...e is Too Long for Short Cycle The Configuration of the drop time F31 and the front panel time make it such that the pilot arc supply must be on for more that 40ms The Maximum time the pilot arc will stay on is 40ms so it is possible the arc will go out before the main arc starts No No Problem Requires reconfiguration of drop time and or front panel time E020 Voltage on Output Studs A voltage highe...

Page 48: ... of the power supply board They should read 18VAC If 18VAC is present replace the power supply board If the 18VAC is not present replace the transformer 6 2 3 Additional Warning F32 Actual Weld Time Actual weld time in F32 is different than front panel weld time setpoint See Operational Function Codes Error Codes F31 must be calibrated for each preset 6 2 4 Additional Warning Continuous Tripping o...

Page 49: ...e possibility of stud hang up 2 Be sure the weld energy is appropriate for the application 3 Inspect foot alignment Adjust if necessary A misaligned foot will almost guarantee stud hang up Ensure that the stud is centered within the ferrule 4 Inspect chuck Replace if necessary Check for a good grip of the stud in the chuck A good grip is needed to eliminate slipping of the stud 5 Tighten foot reta...

Page 50: ... plunge settings are being used and correct if necessary Incorrect ferrule Ensure that the ferrule being used in the welding process is the proper ferrule for the stud size and application Weld appears COLD Time setting or current setting is too low Check the stud burn off If the burn off is much less than what is typical for that diameter stud the time and current settings may not be correct Cons...

Page 51: ...ring the weld Plunge is too short Plunge is measured by the amount of stud protruding beyond the bottom edge of the ferrule Consult Lift Distance and Plunge Distance Parameters to ensure proper lift settings are being used Correct the lift to the proper setting if the lift is improperly set Mechanical bind in accessories or ferrule Position the foot or ferrule grip of the gun so that the stud is c...

Page 52: ...ase plate or stud may cause the arc to become erratic Ensure that there is no rust scale oil water residue paint galvanization etc present between the stud and the workpiece Welding to a clean plate can help diagnose if there is any foreign substance on the base material or studs Incorrect ferrule Ensure that the ferrule being used is the proper ferrule for the stud size and application Actual mai...

Page 53: ...ached to the machine works best Neither aggressive or alcoholic agents nor combustible liquids may be used for the cleaning work The unit casing of the N550c must be wiped down with a dry cloth Type plate and safety advice must be very legible The front plate of the N550c must be cleaned with a fat dissolving cleansing agent The LED display elements must be recognizable The electrical connecting c...

Page 54: ... clean will result in cooler operation and higher reliability Be sure to clean the following areas with a low pressure air stream See figure D 1 for component locations Power and control printed circuit boards Power switch Input rectifier Heat sink fins Output terminals Heatsinks may be hot 1 Examine capacitors for leakage or oozing Replace if needed 2 Examine the sheet metal case for dents or bre...

Page 55: ...Arc Charger N550c Manual Part No 729 110 040 Rev 1 41 June 2016 2016 Nelson Stud Welding Inc All Rights Reserved 54 7 3 Explosion Drawing Domestic Export N550c Final Assembly ...

Page 56: ...16 1 701 182 000 BRIDGE 17 2 701 186 000 MODULE CHOPPER OUTPUT 18 1 701 185 000 MODULE CHOPPER CHARGING 19 1 700 147 001 CHOKE ASM CHARGING N550c 20 3 717 140 010 GROMMET 21 2 702 120 000 CAPACITOR SNUBBER OUTPUT MODULE 22 1 709 274 010 SWITCH POWER 23 1 709 276 001 709 276 005 BREAKER 20A 10A NS 1 715 060 006 FUSE CHARGING 16A 500v 6 3 x 32mm 24 1 700 145 000 700 148 000 ASM TRANSFORMER N550c 115...

Page 57: ...3 SS 7 59 41 524 005 121 WASHER LOCK M4 SS 60 8 524 005 287 WASHER FLAT M8 SS 61 6 524 005 288 WASHER LOCK M8 SS 62 6 524 005 302 WASHER FLAT M3 SS 63 1 87 05 19 LABEL UNPLUG BEFORE SERVICE 64 1 724 576 015 LABEL MADE IN USA 65 1 87 09 35 LABEL CARDIAC PACEMAKER 66 1 724 577 004 LABEL RATING PLATE N550c 724 577 007 LABEL RATING PLATE N550c EXPORT 724 577 008 LABEL RATING PLATE N550c SHORT CYCLE 72...

Page 58: ...4 CONNECTOR HUBBELL 84 1 717 091 000 HANGER CABLE 85 4 524 005 341 SCREW M6 X 20 HHCS SS 86 8 727 029 221 SLEEVING 5 8 HIGH TEMP RUBBER 87 1 724 572 004 DECAL HOIST LIFT 88 1 724 485 012 DECAL TWO PERSON LIFT 89 1 724 569 013 LABEL TRASH CAN CE RoHS 90 2 724 577 006 LABEL CHOPPER DIAGRAM N550c 91 1 750 615 021 PCB ASM ARC CHARGER AUMOTATED ACCESSORY 92 1 724 485 016 LABEL TIP OVER HAZARD ...

Page 59: ...50c Manual Nelweld N550c Wiring Diagram Part No 729 110 040 Rev 1 41 June 2016 2016 Nelson Stud Welding Inc All Rights Reserved 58 8 Nelweld N550c Wiring Diagram 8 1 Domestic Wiring Diagram 8 2 Export Wiring Diagram ...

Page 60: ...Part No 729 110 040 Rev 1 41 June 2016 2016 Nelson Stud Welding Inc All Rights Reserved 59 ...

Page 61: ...Part No 729 110 040 Rev 1 41 June 2016 2016 Nelson Stud Welding Inc All Rights Reserved 60 8 3 Domestic Short Cycle Wiring Diagram ...

Page 62: ...Part No 729 110 040 Rev 1 41 June 2016 2016 Nelson Stud Welding Inc All Rights Reserved 61 ...

Page 63: ...Part No 729 110 040 Rev 1 41 June 2016 2016 Nelson Stud Welding Inc All Rights Reserved 62 8 4 Export Short Cycle Wiring Diagram ...

Page 64: ...Part No 729 110 040 Rev 1 41 June 2016 2016 Nelson Stud Welding Inc All Rights Reserved 63 ...

Page 65: ...ional England Nelson U K Ltd 47 49 Edison Rd Rabans Lane Ind l Estate Aylesbury HP19 8TE UK Phone 44 1296 433500 Fax 44 1296 487930 Middle East Europe Nelson Germany Postfach 40 20 58272 Gevelsberg Germany Phone 49 2332 661 0 Fax 49 2332 661 165 France Nelson Frances S A S Z 1 du Chemin Vert 8 rue de l Angoumois F 95100 Argenteuil France Phone 33 1 3411 9400 Fax 33 1 3411 2033 Asia Pacific Postfac...

Reviews: