If the zero sign of the stitch length regulating knob does not
reach the mark on the machine arm, correct as follows:
Remove right-hand (motor) cover.
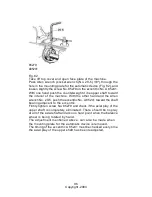
Disconnect lower end of spring " 3 " (Fig. 74) from machine arm
to facilitate the adjusting procedure.
Loosen the two screws " 8 " which hold the bushing " 9 " on the
pin " 13 " of the regulating shaft.
Do not loosen the two screws " 10 ".
Turn the stitch length regulating knob counter-clockwise until the
zero sign coincides with the mark on the arm.
Tighten again the two screws " 8 ".
After having made the above adjustments, it is indispensable
to
recheck the adjustment " c " and " d " as explained in chapter.
" Important Adjustments on the Stitch Length Regulating Knob ".
ADJUSTMENT OF THE FEED DOG DISENGAGING MECHANISM
(SEE FIGS. 79 AND 80)
The adjustment of the Feed Dog Disengaging Mechanism has
to be made with the aid of the screw No. 042090 GAB and the
nut No. 041030 DA.
When the knob No. D 85559 is completely down in the darning
position, the conical part No. 85545 must come out completely
from its position in part No. 85544 (see Fig. 79). In the illustrations
Figs. 79 and 80 a sectional view of part No. 85544 is given to
clarify these illustrations. Therefore, when the knob D 85559 is
completely pressed down, then conical part No, 85545 must disen-
gage the part No. 85544.
91
Copyright -2004
Summary of Contents for Supernova
Page 1: ...Instructions For Servicing The Necchi Supernova Sewing Machine 1 Copyright 2004...
Page 15: ...15 Copyright 2004...
Page 17: ...Fig 11 Fig 12 Fig 13 17 Copyright 2004...
Page 23: ...False needle Fig 18 False needle Fig 19 23 Copyright 2004...
Page 43: ...Fig 38 43 Copyright 2004...
Page 49: ...49 Copyright 2004...


