English-5
English
Image Persistence: When a residual or “ghost” image of a previous image remains visible on the screen, this is called image
persistence. Unlike CRT monitors, LCD monitors’ image persistence is not permanent, but constant images being displayed for
a long period of time should be avoided.
To alleviate image persistence, turn off the monitor for as long as the previous image was displayed. For example, if an image
was on the monitor for one hour and a residual image remains, the monitor should be turned off for one hour to erase the image.
NOTE: As with all personal display devices, NEC DISPLAY SOLUTIONS recommends using a moving screen saver at regular
intervals whenever the screen is idle or turning off the monitor when not in use.
Maintenance:
a) Before fi rst use of this monitor for diagnostic imaging, an initial calibration to DICOM Part 14 is highly recommended.
To ensure constant visual quality over the life of this monitor, the recommended time interval to re-calibrate this model is
12 months.
b) This model is equipped with an integrated front sensor and ambient light sensor complying with the IEC 62563-1 standard
requirements for measurement devices with a calibration traceable to a primary standards laboratory. Therefore, these sensors
can be re-calibrated using external luminance and illuminance meters as a reference, which were calibrated following country
specifi c legal obligations for metrological control. When re-calibrated in a regular manner, the integrated front sensor and
ambient light sensor may then be used for remote quality assurance following the IEC 62563-1 standard. NEC Display Solutions
recommends to re-calibrate the integrated front sensor and ambient light sensor latest after 2 years, whichever comes fi rst.
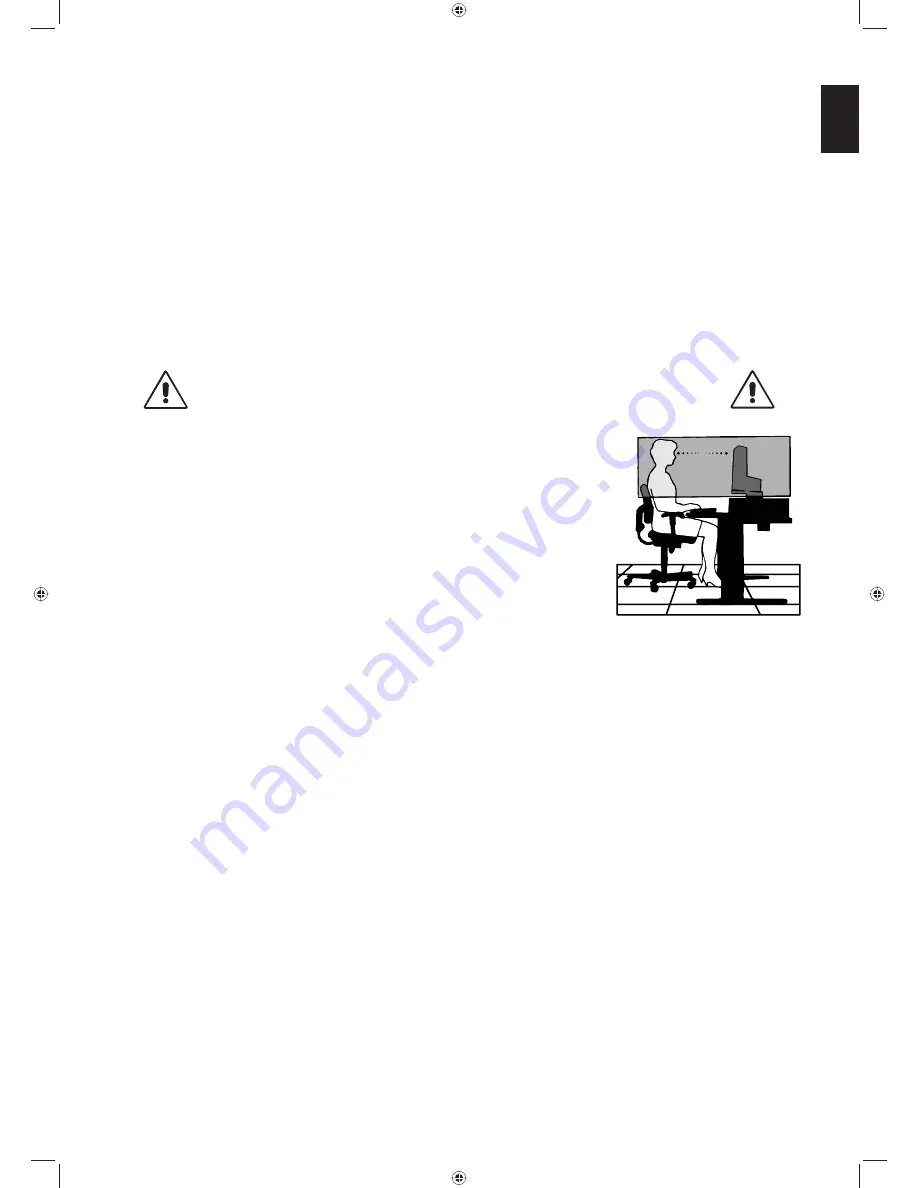
CORRECT PLACEMENT AND ADJUSTMENT OF THE MONITOR CAN
REDUCE EYE, SHOULDER AND NECK FATIGUE. CHECK THE
FOLLOWING WHEN YOU POSITION THE MONITOR:
•
For optimum performance, allow 30 minutes for the monitor to warm up.
•
Adjust the monitor height so that the top of the screen is at or slightly below eye level.
Your eyes should look slightly downward when viewing the middle of the screen.
•
Position your monitor no closer than 40 cm (15.75 inches) and no further away than
70 cm (27.56 inches) from your eyes. The optimal distance is 50 cm (19.69 inches).
•
Rest your eyes periodically by focusing on an object at least 20 feet away. Blink often.
•
Position the monitor at a 90° angle to windows and other light sources to minimize glare
and refl ections. Adjust the monitor tilt so that ceiling lights do not refl ect on your screen.
•
Avoid displaying fi xed patterns on the monitor for long periods of time to avoid image
persistence (after-image effects).
•
Get regular eye checkups.
NOTE:
This model is set up in the factory so that the NEC logo is briefl y displayed after the monitor is powered on.
This feature can be turned on or off in the Advanced OSD.
In case you fi nd such bright Brand Logo annoying in your reading room environment, you may easily switch this off.
By keeping the “EXIT” button pressed while this logo is displayed, the BOOT LOGO menu will appear. It is possible to
change the BOOT LOGO setting to OFF.
Cleaning the LCD Panel
•
When the LCD is dusty, please gently wipe with a soft cloth.
•
Please do not rub the LCD panel with hard or coarse material.
•
Please do not apply pressure to the LCD surface.
•
Please do not use OA cleaner as it will cause deterioration or discoloration on the LCD surface.
Cleaning the Cabinet
•
Unplug the power supply
•
Gently wipe the cabinet with a soft cloth
•
To clean the cabinet, dampen the cloth with a neutral detergent and water, wipe the cabinet and follow with a dry cloth.
NOTE:
Many plastics are used on the surface of the cabinet. DO NOT clean with benzene, thinner, alkaline detergent,
alcoholic system detergent, glass cleaner, wax, polish cleaner, soap powder, or insecticide. Do not touch rubber or
vinyl to the cabinet for a long time. These types of fl uids and fabrics can cause the paint to deteriorate, crack or peel.
MD211G3 paper manual.indb 5
MD211G3 paper manual.indb 5
3/27/12 11:18:31 AM
3/27/12 11:18:31 AM


