14
2
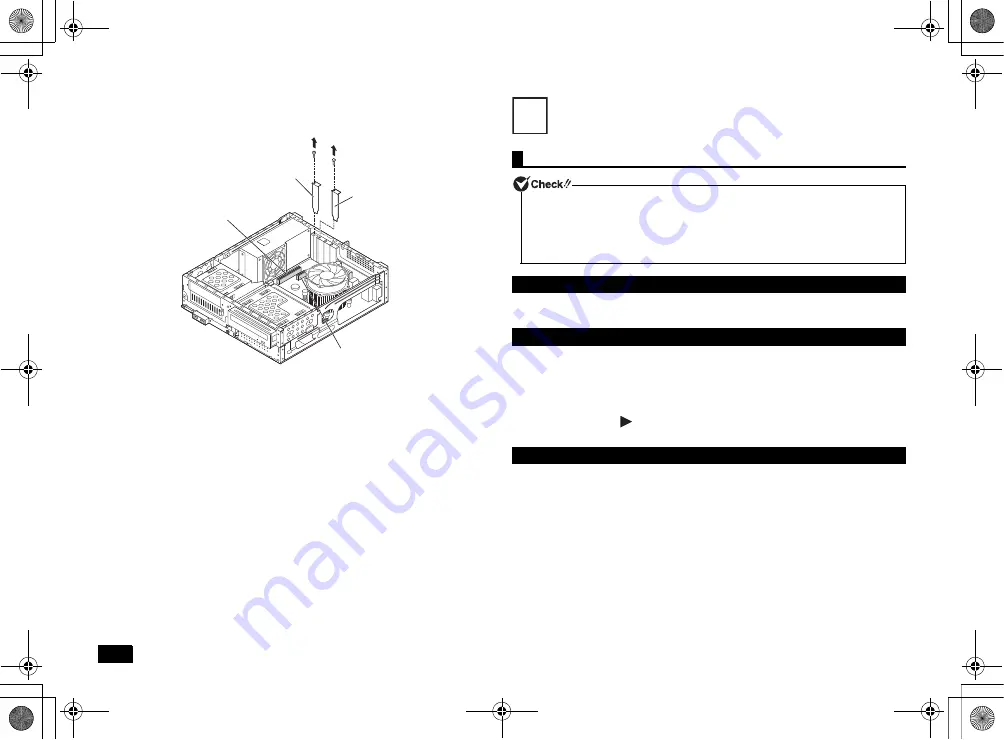
Remove one screw from the PCI board slot cover that you are installing,
and remove the slot cover.
3
Secure the PCI board to the PCI slot using the screw from step 2.
4
Close the roof cover as described in "Closing the roof cover" (p.11).
System Configuration
1
Turn on the power and immediately press <F2> several times.
The BIOS setup utility will then be displayed.
• You can use the keyboard.
• Select the menu bar cursor using <
> <
> and settings using <
> <
>. Open the
pop menu using <+> <-> or <Enter> and use <
> <
> to change the setting values.
• You can move the cursor in the settings (e.g., Hour/Minute/Second of the system
time) using <Tab> or <Enter>. Use the numeric keys to enter the date and time.
• For the settings with
, press <Enter> to display the sub-menu and press <Esc>
to return.
Please follow these steps to restore your system to the default factory settings.
1
Enter the BIOS setup utility.
2
Press the <F9> key.
The message [Load Optimized Defaults?] appears.
3
Confirm that [Yes] is selected and then press <Enter>.
This will load the default factory setting values.
4
Press the <F10> key.
The message [Save configuration and reset?] appears.
5
Confirm that [Yes] is selected and then press <Enter>.
These setting values are saved, the BIOS setup utility will finish, and your
computer will restart.
Configuration is now complete.
PCI Express x1
Slot cover
PCI slot cover
PCI board
connector
PCI Express x1
Slot connector
The BIOS setup utility
Do not turn your computer off with the power switch while in the BIOS setup utility.
When turning the power off after configuration is complete, be sure to either exit the
BIOS setup utility and shutdown your computer from the Windows menu after
Windows has loaded, or turn the power off after selecting [Save Changes and Power
Off] from the [Exit] menu when you wish to save the new settings.
Entering the BIOS setup utility
BIOS setup utility basic operation
Restoring default factory setting values
10
NEC_Mate.fm Page 14 Monday, November 12, 2012 3:39 PM


