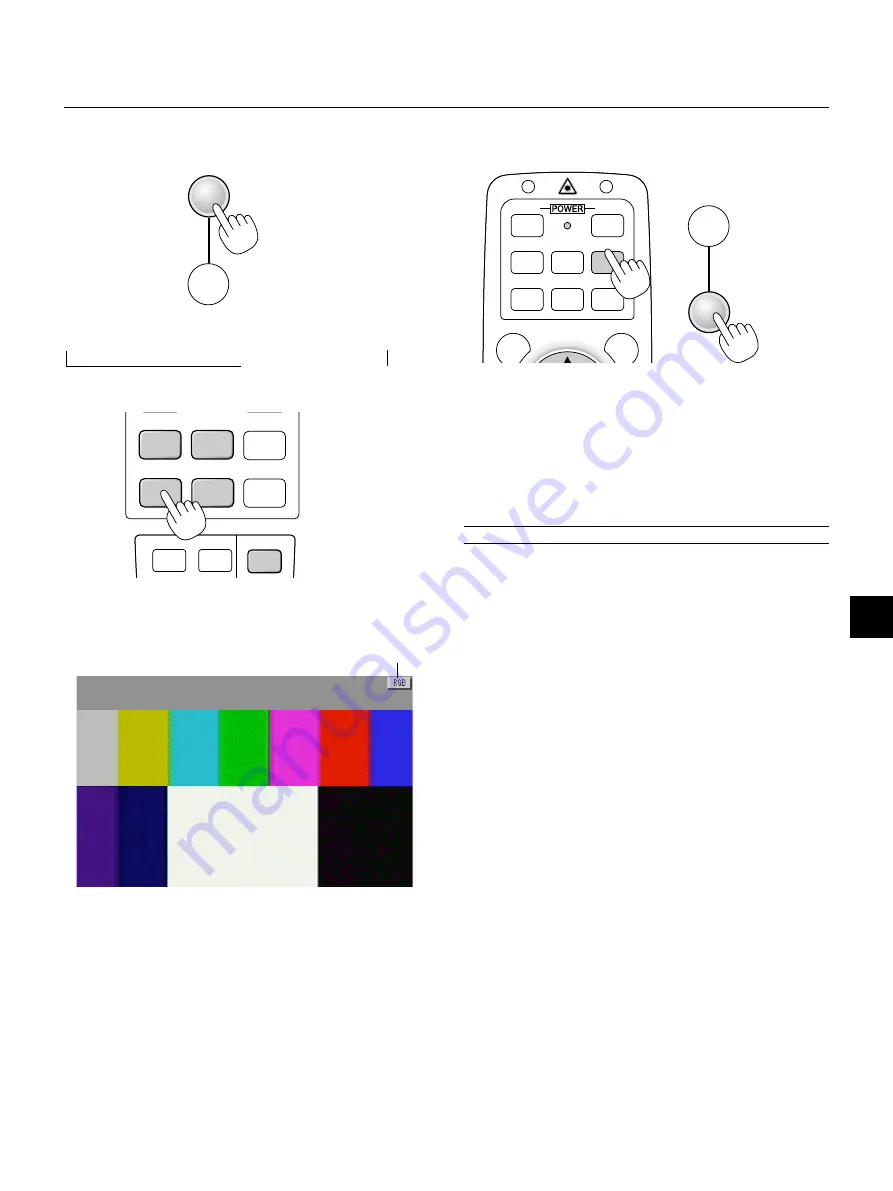
background image

E – 27

Source display

Each time the Source button is pressed, the input source will change
as follows:

 RGB [“DVI (DIGITAL) 

  DVI (ANALOG)” on LT156] 

 Video 

PC Card Viewer 

 S-Video 

If no input signal is present, the input will be skipped.

Press the Auto Adjust button to fine-tune the computer image or to
remove any vertical banding that might appear and to reduce video
noise, dot interference or cross talk (this is evident when part of your
image appears to be shimmering). This function adjusts the clock fre-
quencies that eliminate the horizontal banding in the image. This func-
tion also adjusts the clock phase to reduce video noise, dot interfer-
ence or cross talk. (This is evident when part of your image appears to
be shimmering.)
This adjustment may be necessary when you connect your computer
for the first time.

NOTE: 

The Auto Adjust function does not work for component signal.

Basic Operation

Selecting the computer or video source:

Optimizing RGB image automatically

Press the Auto Adjust button to optimize an RGB image automatically.

SOURCE

AUTO
ADJUST

HELP

POINTER PC CARD

AUTO ADJ.

VIDEO

S-VIDEO

RGB 1

RGB 2

PJ

SOURCE

AUTO
ADJUST

VIDEO

S-VIDEO AUTO ADJ.

RGB 1

MENU

LASER

RGB 2

PJ

ON

OFF

On LT156:

Press the RGB 1 button on the remote control to select DVI digital
signal and the RGB 2 button for DVI analog signal.

Summary of Contents for LT156 - MultiSync XGA DLP Projector

Page 1: ...LCD Projector MultiSync LT156 155 LT154 User s Manual...

Page 2: ...the dealer from whom you purchased the product 2 Whenever warranty service is required the original dated invoice or a copy must be presented as proof of warranty coverage In order to obtain warranty...

Page 3: ...ence received including interference that may cause undesired operation U S Responsible Party Address Tel No NEC Technologies Inc 1250 N Arlington Heights Road Itasca Illinois 60143 630 467 5000 Type...

Page 4: ...MultiSync LT156 LT155 LT154 LCD Projector User s Manual English M E N U E N T E R C A N C E L S E L E C T P O W E R S T A T U S O N S T A N D B Y S O U R C E A U T O A D J U S T P C C A R D A C C E S...

Page 5: ...ment regulation could void your right to operate this equip ment This equipment has been tested and found to comply with the limits for a Class B digital device pursuant to Part 15 of the FCC Rules Th...

Page 6: ...range glow Immediately after the cooling fan stops working The cooling fan con tinues to work for ONE minute after the projector is turned off with the POWER button While the POWER and the STATUS indi...

Page 7: ...olor Matrix E 35 White Balance E 35 Position Clock E 35 Resolution E 35 Video Filter E 35 Factory Default E 36 Projector Options E 36 Menu E 36 Menu Mode E 36 Advanced Menu Basic Custom Menu E 36 Lang...

Page 8: ...B signals within a horizontal frequency range of 15 to 100 kHz and a vertical frequency range of 50 to 120 Hz This includes NTSC PAL PAL N 3 PAL M 3 PAL60 SECAM and NTSC4 43 stan dard video signals NO...

Page 9: ...L P P O I N T E R P C C A R D V ID E O S V ID E O A U T O A D J R G B 1 M E N U L A S E R R C L IC K C A N C E L R G B 2 P J O N O F F M A G N IF Y V O L S L ID E F O L D E R S L ID E L IS T Q u i c k...

Page 10: ...lever Remote Sensor Lens cap Adjustable Tilt Foot Lens Ventilation inlet Air Filter Controls Front Side Features One touch Tilt Button Built In Monaural Speaker 0 5W Focus ring Attaching the lens cap...

Page 11: ...he supplied power cable s three pin plug here Terminal Panel Slot for Kensington Micro saver Security System Rear Side Features Rear Foot Remote Sensor Ventilation inlet Ventilation outlet Bottom Lamp...

Page 12: ...n H V and Pixel Clock Phase for an optimal picture Some signals may not be displayed correctly or take time to switch between sources 7 Power Button ON STAND BY Use this button to turn the power on an...

Page 13: ...n the tradi tional composite video format 4 Video Input RCA Connect a VCR DVD player laser disc player or document camera here to project video 5 PC Control Port Mini DIN 8 Pin Use this port to connec...

Page 14: ...LT156 Press this button to select DVI analog signal from a computer 10 Auto Adjust Button RGB only Press this button to automatically adjust the vertical horizontal posi tion clock frequency phase and...

Page 15: ...d without turning off the menu 23 Volume Button Press to increase the volume and to decrease it 24 PC Card Button Press this button to select the PC Card Viewer source 25 Slide Button Press to select...

Page 16: ...ries or new and old batteries Remote Control Precautions Handle the remote control carefully If the remote control gets wet wipe it dry immediately Avoid excessive heat and humidity If you will not be...

Page 17: ...USB port of PC or Macintosh To Mouse port of PC To ADB port of Macintosh USB Cable PS 2 Cable Mac ADB Cable To USB To PS 2 or Mac Notes on Connecting with USB Cable When you use an IBM PC the Remote...

Page 18: ...again press the PJ button to light red To move the pointer or a magnified image again turn off the pointer and then turn on the pointer press the POINTER button two times When the PJ button is lit if...

Page 19: ...d diagonally when the projector is roughly 3 7 feet 1 1 m from the wall or screen The largest the image can be is 300 7 6 m when the projector is about 40 1 feet 12 2 m from the wall or screen Screen...

Page 20: ...stance between lens center and screen center C Throw distance D Vertical distance between lens center and screen bottom screen top for ceiling installa tion Throwing Angle Throwing Distance C 1 6 40 3...

Page 21: ...ng on the power to the notebook PC In most cases signal cannot be output from RGB output unless the notebook PC is turned on after connecting with the projector NOTE If the screen goes blank while usi...

Page 22: ...nal cable longer than the supplied one Audio cable not supplied DVI D DVI D signal cable supplied To DVI connector on the projector DVI A VGA adapter supplied IBM VGA or Compatibles IBM VGA or Compati...

Page 23: ...IP 2 3 4 5 6 Pin adapter for Macintosh not supplied For older Macintosh use a commercially available pin adapter to connect to your Mac s video port Connecting Your Macintosh Computer Macintosh Deskto...

Page 24: ...nect your DVD player to the RGB INPUT connector on the projector For a DVD player without component video Y Cb Cr outputs use common RCA cables not provided to connect a composite VIDEO output of the...

Page 25: ...e power to the projector and VCR laser disc player or document camera 2 Connect one end of your RCA cable to the video output connector on the back of your VCR or laser disc player connect the other e...

Page 26: ...Japa nese To select a menu language follow these steps 1 Use the Select or button to select one of the seven languages for the menu 2 Press the Enter button to execute the selection 3 The Basic Custo...

Page 27: ...o use NOTE To turn the projector on by plugging in the power cable use the menu and enable the Auto Start feature See page E 38 NOTE Immediately after turning on the projector screen flicker may occur...

Page 28: ...enu button on the remote control or the cabinet and use the menu to select your video source Video S Video RGB DVI on LT156 or PC Card Viewer NOTE If no input signal is available the projector will di...

Page 29: ...t remove the spacer black rubber and rotate the rear foot to the desired height If the projected image does not appear square to the screen then use keystone correction for proper adjustment Adjust th...

Page 30: ...e This func tion also adjusts the clock phase to reduce video noise dot interfer ence or cross talk This is evident when part of your image appears to be shimmering This adjustment may be necessary wh...

Page 31: ...ANCEL Exit Help Using Pointer You can use one of eight pointers to draw your audience s attention to the portion of a projected image you want Press the Pointer button to display the pointer Use the S...

Page 32: ...in menu For other operations do the same way as you use your PC mouse 2 Press the buttons on the remote control or the projector cabi net to highlight the menu for the item you want to adjust or set 3...

Page 33: ...Confirmation Change Menu upon completion of Basic Custom Menu editing In this case selecting Yes then Enter will close all the menus and apply the changes from the Advanced menu to the Basic Custom Me...

Page 34: ...5 300 sec Capture Options High Quality Normal High Compression Signal Select RGB Auto RGB Component Video Auto NTSC3 58 NTSC4 43 PAL PAL60 SECAM S Video Auto NTSC3 58 NTSC4 43 PAL PAL60 SECAM Auto Adj...

Page 35: ...cates settings or the direction of adjustment OK button Press to confirm your setting You will return to the previous menu Cancel button Press to cancel your setting You will return to the previous me...

Page 36: ...nput VCR DVD player or laser disc player NOTE A frame may freeze for a brief period of time when a video is played back in fast forward or fast rewind with a Video or S Video source PC Card Viewer Thi...

Page 37: ...ral 1 for better flesh tone Natural 2 for true reproduction of middle tones Each mode is recommended for Normal For the regular picture Natural 1 For true color reproduction of natural tones Natural 2...

Page 38: ...While you are displaying an image with higher resolution than the projector s native resolution even when you are in the Native mode the image is displayed full screen using the Advanced AccuBlend fea...

Page 39: ...moving your Pointer icon to the area you want on the screen press the Magnify button on the remote control to enlarge the se lected area on the screen See page E 28 for more details NOTE There may be...

Page 40: ...OTE The Auto Play Interval time set on the PC Card Viewer Utility over rides the one set here Manual Play Views a slide manually when PC Card Viewer input is selected NOTE The Auto Play and Manual Pla...

Page 41: ...ake any adjustment to DVI digital signal the Auto Adjust feature automatically adjusts position and stability Horizontal and Vertical Posi tion and Resolution However the horizontal and vertical adjus...

Page 42: ...the CompactFlash card NOTE Be sure not to turn off the power or remove the CompactFlash card while capturing an image Doing so could cause a loss of the data in the CompactFlash card or damage to the...

Page 43: ...ette con taining four eraser of different thickness from which you can select an eraser you prefer by left clicking Clear Left click to clear the drawing completely from the ChalkBoard screen View Hid...

Page 44: ...with PC Card Viewer Microsoft Windows and PowerPoint are registered trademarks of Microsoft Corporation Inserting and Ejecting a CompactFlash Card A CompactFlash card is used to view presentation data...

Page 45: ...rting Up the PC Card Viewer Software on your PC PC Card Viewer Utility 1 0 Use the PC Card Viewer Utility 1 0 for creating viewer slides To start the PC Card Viewer software Select Start Programs NEC...

Page 46: ...cally or manually depending on the set ting on PC Card Viewer Options of the menu This allows you to move on to the next slide when Manual Play is selected Stop This allows you to stop Auto Play while...

Page 47: ...of slides and moving pictures from a VCR etc it is possible to switch from a PC Card Viewer slide to the video picture then back to the PC Card Viewer slide simply by using a source button and PC CAR...

Page 48: ...ard data If the CompactFlash card data is damaged use a computer to repair the data NOTE The folder in the right bottom is always a folder exclusively for captured images To display the list of folder...

Page 49: ...oftware Use the procedure described below to uninstall the PC Card Viewer software files 1 From the Start menu select Settings then Control Panel 2 In the Control Panel dialog box double click on Add...

Page 50: ...A specifications It is one fourth the volume of a PCMCIA card PCMCIA 2 1 PC cards are divided into three types according to their thickness Type I 3 3 mm Type II 5 0 mm and Type III 10 5 mm A type of...

Page 51: ...happens contact your NEC dealer for lamp replacement To replace the lamp 1 Loosen the lamp cover screw until the screwdriver goes into a freewheeling condition and remove the lamp cover The lamp cove...

Page 52: ...the projector without a filter cover Your projector will not operate unless the filter cover is installed cor rectly To clean the air filter Vacuum the filter through the filter cover M E N U E N T E...

Page 53: ...batteries See page E 13 Make sure there are no obstacles between you and the projector Stand within 22 feet 7 m of the projector See page E 13 Make sure that you are in the Projector mode or the PJ b...

Page 54: ...ard been destroyed While an image with over 1024 768 dots is projected several lines of information will be lost Use the supplied software change the image to 1024 768 dots in size Use a computer etc...

Page 55: ...ly Horizontal Resolution 500 TV lines NTSC PAL NTSC4 43 YCbCr 550 TV lines LT156 only 350 TV lines SECAM RGB 1024 dots horizontal 768 dots vertical Power Requirement 100 120 200 240 VAC 50 60 Hz Input...

Page 56: ...C A N C E L SELECT POWER STATUS ON STAND BY SOURCE AUTO ADJUST PC CARD ACCESS 207 8 15 40 35 1 59 17 0 67 40 3 1 59 31 2 1 23 63 2 5 5 0 2 266 10 47 Cabinet Dimensions Unit mm inch LT156 LT155 LT154 L...

Page 57: ...Cb 4 Ground 5 Ground 6 Red Ground Cr Ground 7 Green Ground Y Ground 8 Blue Ground Cb Ground 9 No Connection 10 Sync Signal Ground 11 Ground 12 Bi directional DATA SDA 13 Horizontal Sync or Composite...

Page 58: ...52 900 61 796 65 95 92 94 Y SGI 1152 900 71 736 76 05 105 6 Y VESA 1280 960 60 60 108 Y SGI 1280 1024 63 9 60 107 35 Y VESA 1280 1024 64 286 60 02 108 Y MAC 1280 1024 64 31 60 38 107 Y MAC 1280 1024 6...

Page 59: ...E OFF 02H 11H 00H 00H 00H 13H SOUND MUTE ON 02H 12H 00H 00H 00H 14H SOUND MUTE OFF 02H 13H 00H 00H 00H 15H ON SCREEN MUTE ON 02H 14H 00H 00H 00H 16H ON SCREEN MUTE OFF 02H 15H 00H 00H 00H 17H LT156 Fu...

Page 60: ...Printed in Japan 7N8P0203...

Reviews: