background image

Chapter 4 Web Configuration 

32 


Reg. Server: 

Input the registration server IP address, 

“(IP Address of SV8100): (port number)”, a port number 

is necessary, and default value of SV8100 is 

“5070”


Registration Server port:

 Input the registration server port


Proxy Server: 

Input the proxy server IP address.


Proxy Server Port: 

Input the proxy port number.


Proxy Address: 

Input the outbound proxy server IP address.


Proxy Address Port:

 Input the proxy port number


Voice Mail:

 Input the number to dial the voice mail system.


SRTP:

 Select 

“Disable”, SRTP is not supported on SV8100.


Expire time: 

User can set the timeout duration for registration request, it should be 

“120” or more.


DTMF Type:

 Input the DTMF type options: RFC2833 / SIP INFO / In-Band 


Retry Expire Time:

 User can set the timeout duration for registration failed retry request. 


Send Keep Alive:

 On/Off. Typically enabled to instruct the phone to send SIP keep-alive message for 

maintaining a 

“pinhole” in the user’s firewall through which SIP messages can pass. 


MWI:

 Enable / Disable to ask server auto provide Message Waiting Indicator. 


Subscribe Expire Time:

 User can set the timeout duration for subscribe request. 


Status:

 Displays the status of the SIP Account. 

3.


Click 

Submit

 to confirm your settings or 

Cancel 

to cancel. 

Note: 

A maximum of ten SIP accounts can be registered. However, you will always call out with the first account number registered. 


N

N

e

e

t

t

w

w

o

o

r

r

k

k


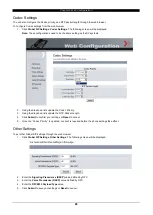
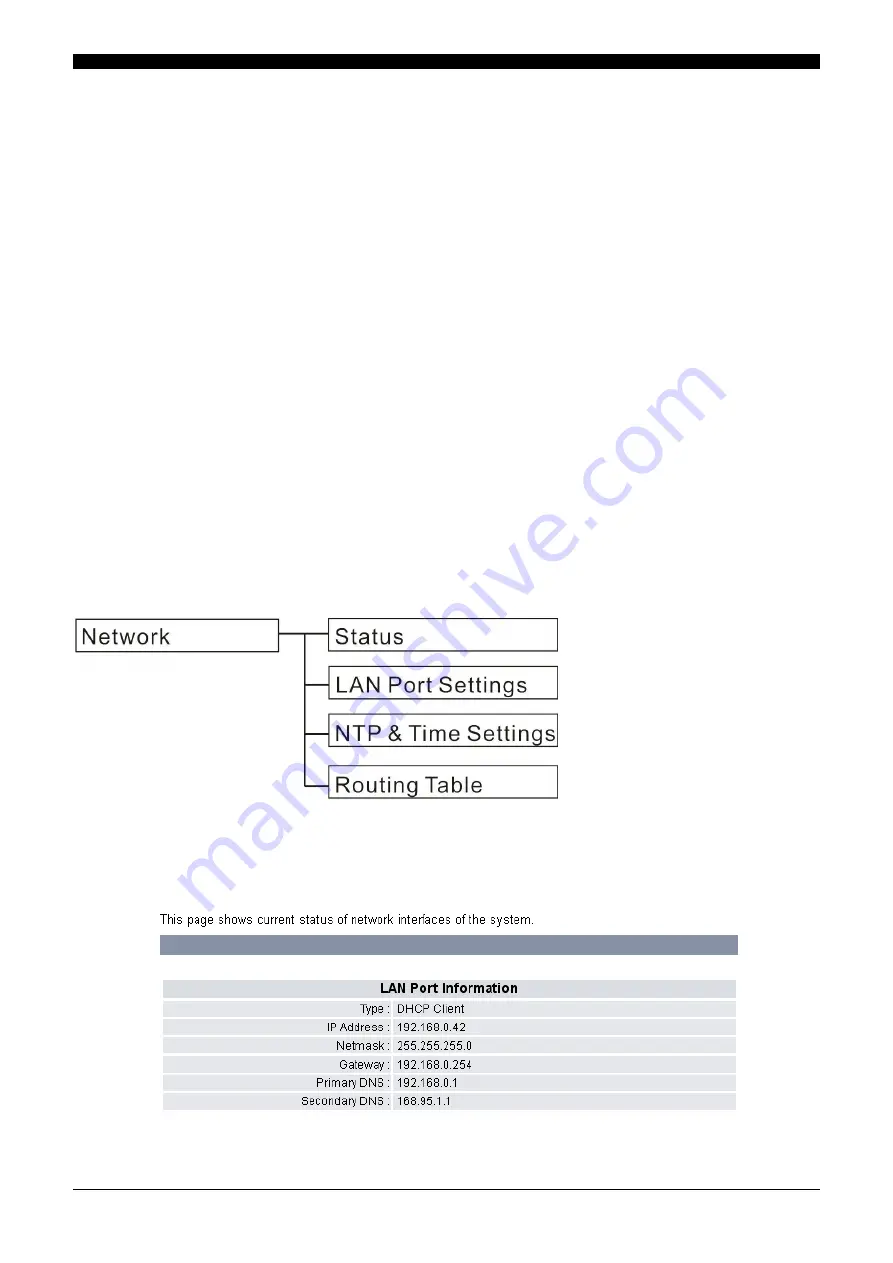
Network menu allows you to view and setup LAN port, NTP and Time settings, IP mapping, and routing table settings. 


Status 

You can view the LAN Port information from the 

Status

 submenu. 

Click 

Network

Status

. The following screen will be displayed. 


Summary of Contents for GT200

Page 1: ...A50 035098 001 Issue 1 0 GT200 Terminal User s Guide for UNIVERGE SV Series ITX 1DE 1W BK TEL ...

Page 2: ...Document History 2 Document History 1 Revision 1 0 Jan 1st 2014 First release ...

Page 3: ...try to correct the interference by one or more of the following measures Reorient or relocate the interference receiving antenna Increase the distance of separation between the equipment and interference receiver Connect the equipment to a power outlet on a circuit different from that to which the interference receiver is connected Consult the dealer or an experienced radio TV technician for help ...

Page 4: ...hine Interface Configuration 9 Phone Book 9 Call History 10 Phone Settings 11 Network Settings 13 SIP Settings 14 SIP Account 15 System Settings 17 4 Web Configuration 18 Call History 19 Phone Book 19 Phone Settings 20 System Settings 24 Global SIP Settings 27 SIP Accounts 29 Network 32 5 Feature List 37 6 Operation 40 Answering a Call 40 Making a Call 40 Call Options 40 7 Specification 42 ...

Page 5: ...dvantage of its features P Pa ac ck ka ag ge e C Co on nt te en nt ts s When unpacking the VoIP phone ensure all the following items are present and undamaged If anything appears to be missing or broken contact your dealer for a replacement 1 VoIP Phone 1 set 2 Handset 1 set 3 Curl cord 1 set 4 Regulatory Information Sheet 1 sheet VoIP Phone Handset Regulatory Information VoIP Phone system Used to...

Page 6: ...2 P Pr ro od du uc ct t D De es sc cr ri ip pt ti io on n This chapter contains important information to help you familiarize yourself with the functions of the VoIP phone F Fr ro on nt t V Vi ie ew w 1 2 15 14 13 12 11 10 3 4 5 6 7 8 9 ...

Page 7: ...ys Press these keys to enter phone numbers and texts 8 CONF Press to activate the three way conference call 9 MESSAGE key with indicator Press to listen to voice mail messages Red light indicates unheard messages 10 SPEAKER key with indicator Activates the speakerphone to allow hands free conversations 11 REDIAL Press to call the last dialed number 12 VOLUME Press to increase or decrease the volum...

Page 8: ... to connect the VoIP phone to power LAN and the handset S Su up pp po or rt ti in ng g C Co om mm mu un ni ic ca at ti io on n S Se er rv ve er rs s The following communication servers support the VoIP Phone 1 UNIVERGE SV8500 S7 or higher 2 UNIVERGE SV8300 R9 or higher 3 UNIVERGE SV8100 R9 or higher Backside LAN Hub LAN Cable ...

Page 9: ...turn to the previous menu level 6 To choose a menu setting press SELECT Note Accessing the Phone Setting Network Settings SIP Settings SIP Account and System Settings submenus requires a password Default password is 1234 to login P Ph ho on ne e B Bo oo ok k The phone book feature enables you to create new entries for your contacts and edit their contact information It also enables you to store a ...

Page 10: ...lls xxMissedCalls xx number of Missed Calls is displayed on the idle screen This indication will disappear in the following cases See Missed Calls in MMI Configuration Reboot the VoIP terminal Dialed Calls The Dialed Calls list consists of the most recent numbers dialed You can choose to dial detail delete or save a single entry from the dialed call logs Select a call from the list and press the S...

Page 11: ... requires you to input the following 1 Press the MENU EXIT key Select Phone Settings then Busy Forward 2 Select from the following options Switch Press to enable or disable this function Number The phone number to forward incoming calls Domain This refers to the SIP account number 3 Press the MENU EXIT key then use the UP and DOWN keys to switch from YES NO Press the SELECT key again to confirm or...

Page 12: ...After setting Auto Answer the phone answers to incoming call with one short ringtone Ring Tone You can select the ring tone type according to your preference To set the ring tone type 1 Use the UP and DOWN keys to select the favorite ring tone then press the SELECT key to confirm selection 2 To adjust the ring tone volume simply press the UP and DOWN volume control key to increase decrease the rin...

Page 13: ...k the internet information 3 Press the MENU EXIT key to return to the main menu LAN Port Setup This IP phone supports three different types of connection DHCP Static IP and PPPOE If your phone is set to Static IP client configure the Static IP settings as follows 1 Choose Static IP setting and press the SELECT key to view the submenus 2 Use the UP and DOWN keys to check the Static IP Setting 3 Cho...

Page 14: ...DNS setting is only available when using the static IP setting DNS setting is not available when the PPPoE or DHCP IP setting is selected NTP Time The NTP Time Setting allows you to configure the date and time of the VoIP phone manually or synchronize the clock with the NTP Network Time Protocol server and specify the time zone you are in The NTP function should be disabled if you want to set the ...

Page 15: ...ing SIP account information set to Enable on SV8500 Reg ID Input the registration ID it is Extension number registered on SV8500 Display Name Input the user name The user name will be shown on the terminal display when the phone is idle Auth Name Input the Authentication Name used for authentication It can be identical to or different from SIP Registration ID It is Extension number registered on S...

Page 16: ... To keep connected to the server by period time Typically enabled to instruct the phone to send SIP keep alive message for maintaining a pinhole in the user s firewall through which SIP messages can pass MWI Enable disable to ask server auto provide Message Waiting Indicator Voice Mail Input the speed dial number for your SIP reg server or IP PBX Voice Mail system Save To save your settings 2 Pres...

Page 17: ... Note If you have more than one SIP account repeat the settings in step 1 to configure additional SIP accounts S Sy ys st te em m S Se et tt ti in ng gs s System settings contain information to administrate the VoIP phone Date Time By default the system default retrieves Date Time information from the NTP server when connected to the Internet To manually set the Date and Time 1 Go to Network NTP T...

Page 18: ...of the IP Address assigned to the VoIP phone 2 Set the network setting to DHCP on your PC 3 Open your web browser and type in the web address of the phone For example if the IP address of the VoIP phone is 192 168 1 2 input the web address http 192 168 1 2 8000 4 The Web login page is displayed Enter the user name and the password and click Login The administrator s user name and password are admi...

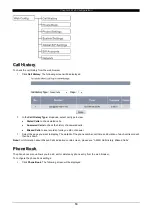
Page 19: ... calls Missed Calls to see records of calls you did not answer 3 Select the page you want to display The details of the phone number call time and duration of each call record will then be shown Note For Information about Missed Calls indication on idle screen please see 3 MMI Call History Missed Calls P Ph ho on ne e B Bo oo ok k The phone book menu allows you to add edit or delete any phone entr...

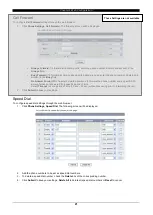
Page 20: ...Add Phone section input the contact information of all the required fields to add a phone entry 5 In the Edit Phone section edit the desired options to be changed 6 Click Submit to confirm your settings or Reset to cancel P Ph ho on ne e S Se et tt ti in ng gs s The phone settings menu provides a number of options to configure your phone such as Call Forward Speed Dial Ring Tone Dial Plan and Voic...

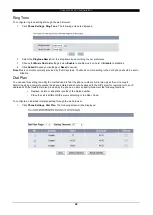
Page 21: ...ou to forward the phone number and a specific SIP account when not answered for a specific period of time Select Timeout to set a period of time 10 sec 50 sec without answering prior to forwarding the call 2 Click Submit to save your settings Speed Dial To configure speed dial settings through the web browser 1 Click Phone Settings Speed Dial The following screen will be displayed 2 Add the phone ...

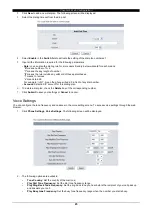
Page 22: ...Hold setting in the VoIP phone should be set to Disable Dial Plan You can use this setting to modify the method used to filter the phone numbers A dial plan gives the unit a map to determine when a complete number has been entered and should be passed to the SIP server for resolution into an IP address With the flexible dial plan provided by the phone a user can easily implement the following func...

Page 23: ...ont of any dial number Account Select a SIP account for this dialing plan 6 To delete a dial plan check the Delete box of the corresponding number 7 Click Submit to save your settings or Cancel to cancel Voice Settings You can configure the tone frequency and cadence in the voice settings menu To access voice settings through the web browser 1 Click Phone Settings Voice Settings The following scre...

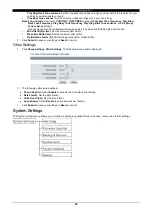
Page 24: ...itter Buffer ms Set the minimum jitter buffer Max Jitter Buffer ms Set the maximum jitter buffer Optimization factor 0 13 Set the dynamic factor of jitter buffer 3 Click Submit to save your settings or Reset to cancel Other Settings 1 Click Phone Settings Other Settings The following screen will be displayed 2 The following options are available Pound Key Dial Select Enable to activate the Pound K...

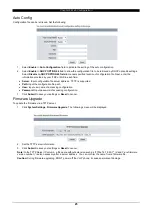
Page 25: ...ed Path Input the configuration file path User Input user name of accessing configuration Password Input password of accessing configuration 3 Click Submit to save your settings or Reset to cancel Firmware Upgrade To update the firmware via a TFTP server 1 Click System Settings Firmware Upgrade The following screen will be displayed 2 Set the TFTP server information 3 Click Submit to save your set...

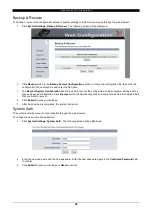
Page 26: ... recover the configuration values of system settings from a previously saved configuration Click Browse button to select backup files from the local machine to download files that you want to recover 4 Click Submit to save your settings 5 After file download is completed the system will reboot System Auth The system authority menu is only accessible through the web browser To change the user name ...

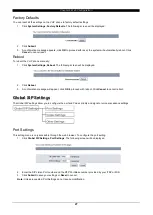
Page 27: ...eboot 3 A confirmation message will appear click OK to proceed with reboot Click Cancel to cancel reboot G Gl lo ob ba al l S SI IP P S Se et tt ti in ng gs s The Global SIP settings allow you to configure the port and Codec priority and signal or voice precedence settings Port Settings This setting menu is only accessible through the web browser To configure the port setting 1 Click Global SIP Se...

Page 28: ...Priority 3 Using the dropdown lists update the RTP Packet Length 4 Click Submit to confirm your settings or Reset to cancel 5 Once the Codec Priority is updated a reboot is required before the phone settings take effect Other Settings To set other Global SIP settings through the web browser 1 Click Global SIP Settings Other Settings The following screen will be displayed 2 Enter the Signaling Prec...

Page 29: ... setting from the web browser click SIP Accounts The following screen will be displayed To delete an SIP account 1 Check the Select box of the corresponding item to delete 2 Click Delete button To edit an SIP account setting 1 Click the underlined ID number The following screen will be displayed ...

Page 30: ...e Input the Authentication Name used for authentication It can be identical to or different from the SIP Registration ID It is Extension number registered on SV8500 Password Input the register password Reg Server Input the registration server IP address IP Address of SV8500 port number a port number is necessary and default value of SV8500 is 5060 Registration Server port Input the registration se...

Page 31: ...umber is necessary and default value of SV8300 is 5070 Registration Server port Input the registration server port Proxy Server Input the proxy server IP address Proxy Server Port Input the proxy port number Proxy Address Input the outbound proxy server IP address Proxy Address Port Input the proxy port number Voice Mail Input the number to dial the voice mail system SRTP Select Disable SRTP is no...

Page 32: ...ry Expire Time User can set the timeout duration for registration failed retry request Send Keep Alive On Off Typically enabled to instruct the phone to send SIP keep alive message for maintaining a pinhole in the user s firewall through which SIP messages can pass MWI Enable Disable to ask server auto provide Message Waiting Indicator Subscribe Expire Time User can set the timeout duration for su...

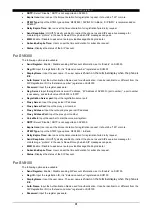
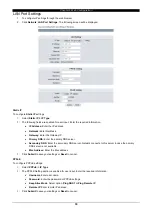
Page 33: ...ary DNS Enter the primary DNS server Secondary DNS Enter the secondary DNS server Network connects to this server in case the primary DNS server is not available Mac Address Enter the Mac address 3 Click Submit to save your settings or Reset to cancel PPPoE To configure PPPoE settings 1 Select PPPoE in IP Type 2 The PPPoE Setting section is enabled for user input Enter the required information Use...

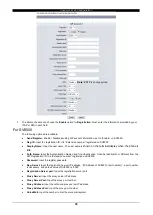
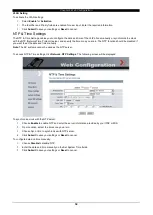
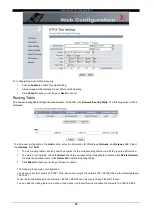
Page 34: ...should be disabled if you want to set the date and time manually Note The SV systems cannot be used as the NTP server To access NTP Time settings click Network NTP Settings The following screen will be displayed To synchronize clock with the NTP server 1 Choose Enable to enable NTP and enter the server information provided by your ITSP or MIS 2 From Location select the time zone you are in 3 Choos...

Page 35: ... field Select the Interface from LAN 1 To edit a routing table click the underlined number of the corresponding hostname Edit the required information 2 To delete a routing table check the Select box of the corresponding routing table to delete Click Delete Selected to delete the checked item or click Delete All to delete all routing tables 3 Click Submit to save your settings or Reset to cancel T...

Page 36: ...Chapter 4 Web Configuration 36 Example 1 to access only one IP address Example 2 to access the entire network ...

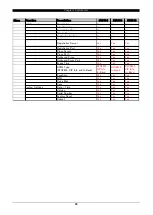
Page 37: ...n Phone Book Creating a New Entry Yes Yes Yes Deleting a Contact Yes Yes Yes Call History Missed Calls Yes Yes Yes Dialed Calls Yes Yes Yes Answered Calls Yes Yes Yes Phone Settings Always Forward N A N A N A Busy Forward N A N A N A No Answer Forward N A N A N A Speed Dial Yes Yes Yes Auto Answer Yes Yes Yes Ring Tone Yes Yes Yes Music on Hold N A N A N A Date Format Yes Yes Yes 12 24 Hour Yes Ye...

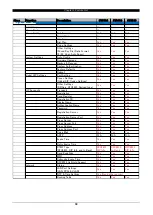
Page 38: ...es Registration Port Yes Yes Yes Proxy Server Yes Yes Yes Proxy Port Yes Yes Yes Outbound Proxy Yes Yes Yes Outbound Proxy Port Yes Yes Yes Expire Time Yes Yes Yes DTMF Type RFC2833 SIP Info and In Band RFC2833 SIP Info In Band RFC2833 In Band RFC2833 SIP Info In Band KeepAlive Yes Yes Yes MWI Yes Yes Yes Voice Mail Yes Yes Yes Save Yes Yes Yes System Settings Date Time Yes Yes Yes Version Yes Yes...

Page 39: ...Serv RFC2833 Payload type Yes Yes Yes SIP Accounts Transport Yes Yes Yes Registration Yes Yes Yes Send Register Yes Yes Yes Registration ID Yes Yes Yes Display Name Yes Yes Yes Authentication Name Yes Yes Yes Password Yes Yes Yes Registration Server Yes Yes Yes Registration Server Port Yes Yes Yes Proxy Server Yes Yes Yes Proxy Server Port Yes Yes Yes Proxy Address Yes Yes Yes Proxy Address Port Y...

Page 40: ...Making a Call to an IP Address You can also make a call to an IP address by inputting the IP address with the keypad For example 192 168 1 100 Switching SIP Accounts In order to make a SIP call the phone must be registered to a SIP server If there is more than one account registered you can use the UP and DOWN keys to select an account Speed Dial You can use the speed dial hotkeys to configure the...

Page 41: ...ile a call is in progress press the TRANSFER key on the phone Dial the transfer destination number and go on hook to initiate a blind transfer 2 While a call is in progress press the TRANSFER key on the phone Dial the transfer destination number and announce the call when answered Go on hook to complete supervised transfer Note Cancel transfer call Ring back tone Caller ID for transferred Call and...

Page 42: ...on keys MESSAGE HOLD SPEAKER MUTE RJ45 10 100 Ethernet LAN port x 1 Power over Ethernet PoE IEEE802 3af Class 2 Power consumption Max 2 88W Net weight 716g Dimension L 225mm x W 152 x H 95mm Operating humidity 10 95 Operating temperature 0 to 40 Storage temperature 10 to 60 RJ9 Handset jack x 1 DC jack x 1 Optional Codec Narrowband Codec G 711 u law A law G 729A Network Protocol DHCP Client DNS PP...

Reviews: