background image


Chapter 1:  Product Overview  1-27 

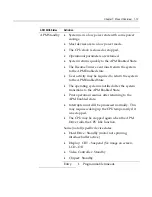
Keylock 

The Big Ticket and 68-key keyboards have a four-position keylock 
switch. The positions are explained in the following table. 

Abréviation Position 

Description 

Ex 

Exception  Used by the customer or service 

representative to perform low-level 
programming such as terminal 
diagnostics, configuring the terminal, 
or loading the terminal. 

Locked 

Used to lock keyboard input to 
prohibit use of normal functions. 

Register 

Used when performing normal retail 
mode functions. 

Supervisor  Used by supervisor to provide highest 

level of terminal control in cases such 
as refunds and running totals. 

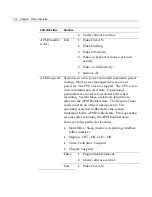
Speaker 

A programmable speaker generates key clicks and error tones. 

Buzzer 

The buzzer is an internal on board Buzzer. 

System Status Indicator LED 

The system status indicator is a two-color LED. The green color 
indicates the keyboard is powered. Red indicates an error condition. 
When the system is off, the LED is extinguished. 
When the 68-key keyboard is in the special “PC setup” mode, the LED 
flashes red/green. 

Summary of Contents for RealPOS 80c

Page 1: ...NCR RealPOS 80c Release 1 1 Hardware User s Guide B005 0000 1359 Issue C...

Page 2: ...right to change specifications without prior notice All features functions and operations described herein may not be marketed by NCR in all parts of the world In some instances photographs are of eq...

Page 3: ...tion For continued protection against risk of fire replace only with the same type and ratings of fuse Attention Pour pr venir et vous prot ger contre un risque de feu remplacer la fusible avec une au...

Page 4: ...nt Battery Disposal Switzerland Refer to Annex 4 10 of SR814 013 for battery disposal IT Power System This product is suitable for connection to an IT power system with a phase to phase voltage not ex...

Page 5: ...ctrician Improper connection of the equipment grounding conductor can result in a risk of electric shock The conductor with insulation having an outer surface that is green with or without yellow stri...

Page 6: ...e B005 0000 1324 NCR 5972 2 x 20 Customer Display User s Guide B005 0000 1372 NCR 5973 International VFD Customer Display User s Guide B005 0000 1162 NCR 5982 5 Inch LCD Operator Display User s Guide...

Page 7: ...1 8 Storage Media 1 8 Power Supply 1 8 Operating Systems 1 9 UPS 1 9 Power Management 1 10 Operator Displays 1 16 5964 12 1 Inch Touch Screen 1 16 5942 12 1 Inch Color LCD 1 18 7452 K309 K404 9 Inch M...

Page 8: ...guration Diagrams 1 36 Chapter 2 Hardware Installation Introduction 2 1 Installation Restrictions 2 1 Cautions 2 1 Out of Box Hardware Installation 2 2 Installing the Keyboard and Mouse 2 3 PS 2 Keybo...

Page 9: ...al Display 2 18 Installing an NCR 5972 Remote Customer Display 2 20 Installing an NCR 5973 Remote Customer Display 2 22 Customer Display Cable Connections 2 23 Chapter 3 Setup Introduction 3 1 Enterin...

Page 10: ...ttings 4 8 Recommendation 4 9 NCR RealPOS 80 80c Windows XPe Operating System Recovery Software LPIN D370 0570 0100 4 9 Installed Software 4 9 Software Drivers 4 10 Special Settings 4 10 Recommendatio...

Page 11: ...fics 6 6 Dump Process Overview 6 6 Restrictions and Limitations 6 6 Performing the Memory Dump 6 9 Configuring the Terminal 6 9 Dump Procedure 6 9 Tunes Tones 6 10 Moving the Files to Hard Disk and Re...

Page 12: ...olor C 5 CRT AC Power Extension C 6 5982 5 Inch LCD C 6 5953 DynaKey C 6 5953 DynaKey w Insert C 7 Wedge Keyboard Y Cable C 7 5972 VFD Customer Display Powered RS 232 C 8 5972 LCD Customer Display Pow...

Page 13: ...siderations D 2 Non TAPS DOS Environment D 2 TAPS DOS Environment D 3 Revision Record Issue Date Remarks A June 2002 First issue B Oct 2002 Added Memory Dump chapter C Dec 2002 Changed product name to...

Page 14: ...cation of this equipment or the substitution or attachment of connecting cables and equipment other than those specified by NCR The correction of interference caused by such unauthorized modification...

Page 15: ...nterference VCCI International Radio Frequency Interference Statement Warning This is a Class A product In a domestic environment this product may cause radio interference in which case the user may b...

Page 16: ...100 240 V 6 0 A 50 60 Hz NCR Corporation 1700 South Patterson Boulevard Dayton OH 45459 USA declares that the equipment specified above conforms to the referenced EU Directives and Harmonized Standar...

Page 17: ...xv...

Page 18: ......

Page 19: ...ironments The system offers superior connectivity for retail with support for legacy peripheral interfaces RS 232 PS 2 Parallel and VGA as well as emerging interface standards such as Powered USB and...

Page 20: ...Celeron 64 MB FDD HDD 4 RS 232 4 USB U S International Power Cords 7456 1010 566 MHz Celeron 64 MB FDD HDD 4 RS 232 4 USB UPS U S International Power Cords 7456 1020 566 MHz Celeron 64 MB FDD Compact...

Page 21: ...7456 features a compact cabinet optimized for space constrained environments and modular configurations In addition depending on the peripherals selected it can also be used in a unified configuratio...

Page 22: ...MM memory upgrade PC 133 7456 K133 256MB DIMM memory upgrade PC 133 7456 K141 Internal CD ROM Drive 7456 K152 64MB Compact Flash Memory 7456 K154 256MB Compact Flash Memory 7456 K160 Hard Disk Drive K...

Page 23: ...4 10 02 Class 7456 NCR Corporation Atlanta GA 30096 Made in Singapore This device complies with Part 15 of the FCC rules Operation is subject to the following two conditions 1 this device may not caus...

Page 24: ...Memory Unified Memory Architecture UMA Two IDE ports Ultra DMA 33 66 100 Master Mode EIDE Controller 1 44 MB Flex Disk interface DVI I connector Digital Video Interface 15 pin D shell connector for CR...

Page 25: ...SB controller at Bus 0 Device 7 Function 3 Note The USB controller can be disabled in BIOS Setup under the Advanced menu in the OnChip Multi function Device menu It is identified as OnChip USB 2 Devic...

Page 26: ...USB controller can be disabled in BIOS Setup under the Advanced menu in the OnChip Multi function Device menu It is identified as OnChip USB 2 Device ATX Riser Card An ATX style PCI Riser Card provid...

Page 27: ...C Power is lost This permits sufficient time for the terminal to finish the current transaction and perform a logical shutdown of the Operating System which helps to guard against disk corruption caus...

Page 28: ...a low power state such as hibernation under Windows 2000 This is similar to the WakeOnLan feature APM BIOS States Definition System is not working No AC power is connected to the system Operational pa...

Page 29: ...ng 4 Wake On Alarm Soft Off cont Exit 5 Remove AC System is working and not power managed APM Disabled 1 Press power button 2 Wake On LAN 3 Wake On Ring Entry 4 Wake On Alarm 1 Turn off unit via power...

Page 30: ...yboard mouse or touch activity 6 Wake on USB activity 1 Turn off unit via power button Power button can be configured for either instant off or for off after being pressed for longer than four seconds...

Page 31: ...to the APM Enabled State The operating system is notified after the system transitions to the APM Enabled State Prior operation resumes after returning to the APM Enabled state Interrupts must still...

Page 32: ...tate Operational parameters are saved to be restored later when resuming System takes a relatively long time to return to the APM Enabled state The Resume Timer event must be on of the wakeup events T...

Page 33: ...he operating system or application software An APM driver is better suited to make power management decisions for unique peripherals than the BIOS and can override most BIOS requests to go into standb...

Page 34: ...e top mount with tilt and swivel and convenient connections for an external keyboard and hand held scanner Features Resistive Touch Screen Touch overlay uses 5 wire resistive technology for ease of us...

Page 35: ...nector RJ 45 interface provides 5 V power and communication for the NCR RS 232 hand held scanner Tone Speaker Sounds error tones audible feedback during operator input controlled by TAPS OPOS commands...

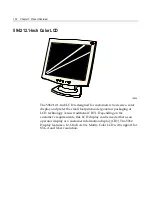
Page 36: ...and prefer the small footprint and ergonomic packaging of LCD technology versus traditional CRT s Depending on the customer s requirements this LCD display can be used either as an operator display or...

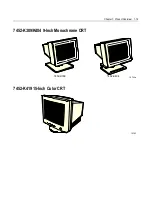
Page 37: ...Chapter 1 Product Overview 1 19 7452 K309 K404 9 Inch Monochrome CRT 19742a 7452 K309 7452 K404 7452 K419 15 Inch Color CRT 19743...

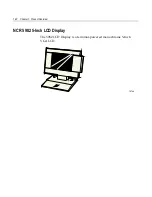
Page 38: ...1 20 Chapter 1 Product Overview NCR 5982 5 Inch LCD Display The 5982 LCD Display is a terminal powered monochrome 5 Inch VGA LCD 19744...

Page 39: ...set of DynaKeys located beside the LCD These keys change function depending on the software application appearing on the LCD Also unique are two up down scroll keys The keypad module contains configu...

Page 40: ...Unique to the 5952 DynaKey is a set of dynamic keys located beside the LCD These keys change function depending on the software application appearing on the LCD Also unique are two up down scroll key...

Page 41: ...ylock The 109 key USB keyboard is a multifunction keyboard that is two keyboards built into one The keyboard consists of two major sections 38 key POS keyboard Industry standard alphanumeric PC keyboa...

Page 42: ...ion Position Description Ex Exception Used by the customer or service representative to perform low level programming such as workstation diagnostics configuring the workstation or loading the worksta...

Page 43: ...es of MSR ISO Tracks 1 2 and 3 JIS II and ISO Track 2 Keyboard Status LEDs The keyboard has three status LED s Num Lock Caps Lock Scroll Lock These features are used to provide the present state of th...

Page 44: ...cator LED Magnetic Stripe Reader MSR External Decoded Scanner Connector Special PC Setup mode on the 68 key keyboard The operations of the user programmable speaker Magnetic Stripe Reader MSR keylock...

Page 45: ...it use of normal functions R Register Used when performing normal retail mode functions S Supervisor Used by supervisor to provide highest level of terminal control in cases such as refunds and runnin...

Page 46: ...support two different types of MSR ISO Tracks 1 2 and 3 JIS II and ISO Track 2 Big Ticket and full featured 68 key keyboards only Note MSR signals are routed to the Wedge controller and passed into th...

Page 47: ...68 key keyboard into an alternate keypad layout that can be used with many PC BIOS setup and configuration routines The alternate layout contains keys such as ESC TAB END and arrow keys which are not...

Page 48: ...1 30 Chapter 1 Product Overview Remote Customer Displays NCR 5972 2 x 20 Customer Display Desktop Model 19749 5972 1000 VFD 5972 2000 LCD...

Page 49: ...ures RS 232 Interface Socket for 32K of PROM for additional character sets 5972 1000 VFD 7 x 9 pixel characters 5972 1000 VFD 5 x 8 pixel characters on 5972 2000 LCD Diagnostics Character sets Code Pa...

Page 50: ...D Customer Display 20448 16 Inch Post Desktop Model Features 256x64 dots graphic VFD Micro controller Flash ROM Display driver circuitry Communication power connector Power converter circuitry Communi...

Page 51: ...er on top that prints receipts and an impact slip printer in front to print on forms and checks that you insert The printer features a dual interface so it can connect to the host terminal either thro...

Page 52: ...upply or through the 24V Powered USB port on the terminal It also has a connector for cash drawers 15220a Power Supply AC Adapter Cable NCR 7194 Printer The NCR 7194 Printer is a high speed high resol...

Page 53: ...e host terminal The printer can connect through a USB port or a serial port It can receive power from a power supply or through a USB power cable 19711a Power Supply AC Adapter Cable NCR 7197 Printer...

Page 54: ...S 2 Keyboard Hand Held Scanners Wedge 7837 7892 5964 Touch Screen PS 2 Keyboard Hand Held Scanners Wedge 7837 7892 CRT 7875 7196 7162 Motherboard PCI LCD Card Parallel DVI VGA AC 7197 7167 7158 5932 U...

Page 55: ...Chapter 1 Product Overview 1 37...

Page 56: ......

Page 57: ...all the RealPOS 7456 near an electrical outlet that is easily accessible Use the power cord as a power disconnect device Do not permit any object to rest on the power cord Do not locate the RealPOS 74...

Page 58: ...t the external cables The following illustration identifies the Back Panel cable connectors Mic Audio Out E D C B A 24V RS232 C RS232 D RS232 A RS232 B VGA DVI 1 Parallel LAN PS 2 19531 RS232 A RS232...

Page 59: ...be used in configurations with Wedge type DynaKeys or Touchscreen displays However standard PC keyboards can be used with these displays PS 2 Keyboard Mouse Installation 19805 Mic Audio Out E D C B A...

Page 60: ...es varies depending on which USB Daughter Card is present If you are connecting the keyboard or mouse to a USB port connect the device as follows 19806 Mic Audio Out E D C B A 24V Use Port C D or E E...

Page 61: ...Supported Printer USB RS 232 7158 7162 7167 7194 7197 USB Installation Connect the Powered USB Printer Interface Cable to the USB Connector and Power Connector on the printer and to the 24 V Powered...

Page 62: ...terminal 2 Connect the Printer Power Cable to the Power Connector on the printer and to the 24 V Powered USB Connector on the terminal 19738 Mic Audio Out E D C B A 24V RS232 C RS232 D RS232 A RS232...

Page 63: ...h LCD Cable Connections The following illustrations show the cable connections for the 5964 and the RealPOS 7456 There are two cables required DVI Cable provides the video interface to the 5964 RS 232...

Page 64: ...Connect the cable to the DVI Connector on the 5964 display and RealPOS 7456 terminal 19815 DVI Mic Audio Out E D C B A 24V RS232 C RS232 D RS232 A RS232 B VGA DVI 1 Parallel LAN PS 2 DVI 497 0422831 1...

Page 65: ...PS 2 connector on the RealPOS 7456 terminal 2 Connect the other end of the Y Cable to the RS 232 connector on the 5964 display 19813 PS 2 RS 232 Mic Audio Out E D C B A 24V RS232 C RS232 D RS232 A RS2...

Page 66: ...VGA DVI 1 Parallel LAN PS 2 Power Supply VGA DC Power AC Outlet VGA 1 Connect the LCD Cable to the VGA connectors on both the 5942 monitor and RealPOS 7456 terminal 2 Connect the power to the display...

Page 67: ...grated in the 7456 5953 F022 Remote Table Top Mount 7401 K533 Wall Mount 5952 K024 Checkstand Mount w Base 5953 K023 Checkstand Mount There are two types of interface models of the 5953 DynaKey For in...

Page 68: ...edge DynaKey is a combined display and keyboard device It can be installed in the following configurations Integrated in the 7456 5953 K032 Remote Table Top Mount 5964 K032 Checkstand Mount For instal...

Page 69: ...ount 19744 Installing the PCI LCD Board 5952 052 Before the 5982 Display can be connected the PCI LCD board 5952 K052 must be installed in the terminal 1 Power the system OFF 2 Set SW1 to select Panel...

Page 70: ...Install the PCI LCD Board into one of the PCI slots in the terminal Caution Use care to not damage the Speaker or Keyboard Header connectors on the Motherboard during card installation Connecting the...

Page 71: ...PCI LCD Adapter card 69000 chip VIA SVGA LCD CRT or DVI LCD Mother board VIA VT8601 B 5952 K052 VGA LCD Adapter card 65550 chip VIA SVGA LCD CRT or DVI LCD Mother board VIA VT8601 C VIA SVGA LCD CRT...

Page 72: ...2 1 Color LCD or 15 Color CRT 7452 K419 VGA connector on Motherboard B 5952 10 4 Dynakey PS 2 5952 K052 VGA Adapter 65550 chip 5942 12 1 Color LCD or 15 Color CRT 7452 K419 VGA connector on Motherboar...

Page 73: ...or from a standard AC outlet which requires an AC Adapter Cable To install dual displays 1 Install the required PCI Adapter Card for the dual display configuration you will be using 2 Connect the appr...

Page 74: ...he Video Display settings are correct in the BIOS Note Dual Display configurations require that the plug in card be defined as the Secondary Display The Primary video setting in the BIOS must be set t...

Page 75: ...Drivers are required to allow the application to switch output from one display to the other These drivers are found on G370 0828 0000 LPIN For information on dual display software installation and c...

Page 76: ...Customer Display There are two models of the NCR 5972 Remote Customer Display 5972 1000 Vacuum Fluorescent Display VFD 5972 2000 Liquid Crystal Display LCD Table Top Model 19749 5972 1000 VFD 5972 20...

Page 77: ...of the surface Drill a hole if necessary 3 High Post Mount If you are installing High Post model secure the Mounting Plate with screws 4 that are provided 14622 Mounting Plate 4 06 mm 0 160 in Diamet...

Page 78: ...Customer Display 20448 16 Inch Post Desktop Model 1 Locate the Display Mount within 4 meters 13 ft of the host terminal 2 Determine if the cable should be routed down through the mounting surface or i...

Page 79: ...you are installing High Post model secure the Mounting Plate with screws 4 that are provided 14622 Mounting Plate 4 06 mm 0 160 in Diameter 7 6 cm 3 0 in Customer Display Cable Connections Connect th...

Page 80: ...2 24 Chapter 2 Hardware Installation...

Page 81: ...see the NCR logo displayed Note Setup can also be entered from the Boot Menu that is displayed when you press ESC during POST How to Select Menu Options The following keyboard controls are used to sel...

Page 82: ...he regular DynaKey keypad layout such as the ESC and 0END keys Although the DynaKey has a PC keyboard connector a PC keyboard may not be readily available to the operator Note No setup is required for...

Page 83: ...p 3 3 The following key layout is active in the special mode 14419 1 2 3 4 5 6 7 8 9 9 8 7 4 5 6 1 2 3 18 19 20 21 14 15 16 17 10 11 12 13 CR 22 23 24 25 35 34 F1 F2 26 27 28 29 30 31 33 32 F1 F2 ESC...

Page 84: ...essing the 7 and 9 keys simultaneously The normal keypad layout is shown below 12389 Shift F3 1 2 3 4 5 6 7 8 9 Shift F2 Shift F1 Shift F4 Shift F5 Shift F6 9 8 7 4 5 6 1 2 3 18 19 20 21 14 15 16 17 1...

Page 85: ...in Windows The recourses are actually available BIOS Default Values Main Menu System Time variable System Date variable Legacy Diskette A 1 44 1 25 MB 3 IDE Primary Master Auto Total Sectors variable...

Page 86: ...toring Disabled IDE Secondary Master Auto Type Auto Multi Sector Transfers Disabled LBA Mode Control Disabled 32 Bit I O Disabled Transfer Mode Standard Ultra DMA Mode Disabled Smart Monitoring Disabl...

Page 87: ...k Write Back Cache Base 512 640k Write Back Cache A000 AFFF Disabled Cache B000 BFFF Disabled Cache C800 CBFF Disabled Cache CC00 CFFF Disabled Cache D000 D3FF Write Protect Cache D400 D7FF Write Prot...

Page 88: ...can Enabled Enable Master Enabled Latency Timer 0040h PCI Device Slot 3 Bottom Option ROM Scan Enabled Enable Master Enabled Latency Timer 0040h PCI Device Slot 4 on Motherboard Option ROM Scan Enable...

Page 89: ...al port B Enabled Base I O address 2F8 Interrupt IRQ 3 Parallel port Auto Mode ECP Floppy disk controller Enabled Serial port C Powered Enabled Base I O address 3E8 Interrupt IRQ 10 Serial port D Powe...

Page 90: ...11 52 V CPU Temp 37 o C 98 o F System Temp 27 o C 80 o F CPU Fan Speed 6241 Varies Multiple ROM MS DOS Memory Dump Disabled On board PXE LAN Enabled Parallel CD ROM Boot Disabled Selectable ROM 3 Disa...

Page 91: ...up Display Logo QuickBoot Mode Enabled Floppy check Disabled Summary screen Enabled Beep Error Codes Off Continuous Post Disabled Boot Menu Retry Keyboard Security Menu Supervisor Password Is Clear Us...

Page 92: ...nd Resume On Modem Ring Off Resume on Time Off Power Button Immediate off Reset Switch Reset AC Power Default On Auto Warm Boot Disabled Throttling Duty Cycle 50 Boot Sequence Removable Drives Hard Dr...

Page 93: ...orm a BIOS update using a network connection Refer to the NCR FitClient Software User s Guide B005 0000 1235 for information about that procedure Caution When performing an OS recovery from a larger s...

Page 94: ...tions BackPack CD ROM Series 5 or later is required 1 Connect the external CD ROM 2336 K024 drive to the Parallel connector on the terminal 19816 Mic Audio Out E D C B A 24V RS232 C RS232 D RS232 A RS...

Page 95: ...he screen prompt to enter Setup 5 In the Advanced menu select I O Device Configuration 6 Verify that the LPT 1 Mode is set to ECP 7 Go back to the Advanced menu select Multiple ROM Menu 8 Set the Para...

Page 96: ...or file again but nothing should be done that writes to the hard disk before rebooting GHOST ERR is on the RAM disk and is lost on reboot 14 Select which type of recovery you want to perform from the...

Page 97: ...ll perform a disk check and then continue with the Windows 2000 installation 2 Enter the User Name and Organization 3 Enter the Computer Name for the client 4 Enter the Administrator s Account Passwor...

Page 98: ...orm a disk check and then continue with the Windows XPe installation 8 Enter the User Name and Organization 9 Enter the Computer Name for the client 10 Enter the Administrator s Account Password optio...

Page 99: ...stalled Software Microsoft Windows 2000 Professional w SP3 installed Microsoft Internet Explorer 6 0 SP1 installed 6 0 2800 1106 SP1 VIA Tech Video driver installed 6 13 10 3137 VIA AC 97 Audio driver...

Page 100: ...owing parameters Automatically include PID Established a FAT32 primary system partition that fills the entire drive Included necessary OS cab files in C Install Made SP3 folder available in C Install...

Page 101: ...ry for support NCR RealPOS 80 80c Windows XPe Operating System Recovery Software LPIN D370 0570 0100 The NCR RealPOS Windows XPe Operating System Recovery Software provides the means of restoring the...

Page 102: ...Furthermore the following settings revisions are configured Preinstalled XPe to include the Product ID Number PID Placed the Gold Drive Part Number Date Created LPIN and Release in Registry under HKey...

Page 103: ...tware LPIN D370 0564 0100 Installed Software Microsoft Windows NT Workstation 4 0 w SP6a Microsoft Internet Explorer 6 0 SP1 installed 6 0 2800 1106 SP1 VIA Tech Video driver installed 4 0 00 3125 VIA...

Page 104: ...e the registry Established a 2gb FAT16 primary system partition Established a secondary NTFS partition that fills the remainder of the drive Included necessary OS cab files in C Install Made SP6a fold...

Page 105: ...strongly recommends that any drivers placed in the C Install directory be left intact for the purposes of servicing and maintaining the system If you are using this information in order to build your...

Page 106: ...the DOS screen prompts After each entry you are asked to confirm your input You can use 1 or y for Yes 2 or n for No 3 Enter No at the Disk verification question 4 Select which type of recovery you wa...

Page 107: ...cond partition O S Second Partition Format Second Partition Size DOS 2GB FAT16 2 GB FAT16 Win95 2GB FAT16 Fill remainder as FAT 32 WinNT 2GB FAT16 Fill remainder as NTFS Win98 Single FAT 32 partition...

Page 108: ......

Page 109: ...connection Refer to the NCR FitClient Software User s Guide B005 0000 1235 for information about that procedure Crisis Recovery In the event the BIOS becomes corrupt such as the result of a power fai...

Page 110: ...ip to step three 1 Connect the external CD ROM 2336 K024 drive to the Parallel connector on the terminal 19816 Mic Audio Out E D C B A 24V RS232 C RS232 D RS232 A RS232 B VGA DVI 1 Parallel LAN PS 2 P...

Page 111: ...e CD ROM has been recognized Starting MS DOS 9 Follow the screen prompts on the client to update the BIOS You can select two methods to run the update program Automatic BIOS Update update process runs...

Page 112: ...a successful update 11 Remove the CD 12 Press any key to reboot 13 When the system reboots press F2 at the screen prompt to enter Setup 14 In the Exit menu select Load Setup Defaults 15 Go to the Adv...

Page 113: ...rare occurrence and should not be confused with other hardware errors that cause a no video state This procedure is not intended to be used for changing or upgrading an operational BIOS Required Hard...

Page 114: ...ocedures Recovery Procedures 1 Connect the Parallel Dongle to the parallel connector on the terminal Mic Audio Out E D C B A 24V RS232 C RS232 D RS232 A RS232 B VGA DVI 1 Parallel LAN PS 2 19817 Paral...

Page 115: ...232 A RS232 B VGA DVI 1 Parallel LAN PS 2 RS 232 COM1 3 Boot the PC in the DOS mode with CD ROM support Note The PC must be running in the DOS mode not in a Windows DOS box for the software to operate...

Page 116: ...Enter A blue screen displays as the program runs showing the program progress followed by a green screen indicating a successful load PhoenixPhlash Status PRESS ANY KEY TO EXIT Flash memory has been...

Page 117: ...ion Parallel Dongle 19513 25 Pin D shell Receptacle Viewed from wiring side 25 24 23 22 21 20 19 18 17 16 15 14 13 12 11 10 9 8 7 5 4 3 2 1 6 RS 232 Cable 19512 1 2 3 4 5 6 7 8 1 2 3 4 5 6 7 8 P1 P2 9...

Page 118: ...5 10 Chapter 5 BIOS Updating Procedures...

Page 119: ...ontained in the BIOS and can be updated by the BIOS Phlash update Process Utilities See the BIOS Updating Procedures chapter Memory Dump capability on the 7456 requires NCR BIOS version 3 0 0 0 or gre...

Page 120: ...6 2 Chapter 6 Memory Dump Each diskette s dumpinfo xxx file is created with the same time and date information to help designate a diskette as being part of a specific set...

Page 121: ...M enabled in BIOS Setup Pharlap 286 DOS Extender Not Supported Windows 3 1 Windows 3 11 Windows for Workgroups 3 1 Windows for Workgroups 3 11 Windows 95 Not Supported Windows 98 Not Supported Windows...

Page 122: ...m Properties select Advanced and then Startup and Recovery 3 Under System Failure check the following boxes Write an event to the system log Send an administrative alert Automatically reboot 4 In Writ...

Page 123: ...Write debugging information to In the box enter the file name and the path to the local drive example C Memory dmp Note The size of the memory file can be very large Therefore the file should be dump...

Page 124: ...plete all diskettes successfully used in the dump denote a set of diskettes that comprise a single consolidated memory dump image The data from the diskettes is then moved to hard disk and the consoli...

Page 125: ...OM s NMI handler is not invoked at this time further activation of the memory dump switch will not produce a NMI as no software has run to re enable the SERR signal to produce a NMI This would only oc...

Page 126: ...orb the NMI when it is active on the screen When the user exits the debugger and returns to DOS the dump does not then occur and further depressions of the memory dump switch will not cause a memory d...

Page 127: ...nu select Multiple ROM Menu 4 Set the MS DOS Memory Dump to Enabled 5 In the Power menu set the Reset Switch to Memory Dump 6 In the Exit menu select Save Changes and reboot Dump Procedure The number...

Page 128: ...ompted by the audio tones The pseudo CMOS is dumped first followed by the 640 KB of base memory After this the extended memory is dumped Tunes Tones Periodic tunes tones are sounded as memory is copie...

Page 129: ...port change line bad drive disk disabled etc 2 3 failed reading a sector from diskette Extended flat tone followed by a Success tune repeated sequences with a short delay to distinguish the end of a s...

Page 130: ...copy command MUST have the binary file option b specified each time it is used Note The amount of hard disk space required to assemble the file is twice the memory dump image size individual files pl...

Page 131: ...e to indicate need disk Has disk been inserted 1 Yes No Fill diskette with data More data to dump Sound tone success tune sequence Disk successfully filled Has disk been removed Sound success tune rep...

Page 132: ...the extension using the FAT 8 3 filename format The default filename extension is dmp The diskette files composing the image must be moved manually to an empty subdirectory at a Memory Dump Analyzer w...

Page 133: ...Chapter 6 Memory Dump 6 15...

Page 134: ......

Page 135: ...is necessary to perform DOS functions on the RealPOS 7456 The following illustration provides the character layout for the 68 key keyboard 11371 m a b c d e f g h i j k l n o p q r s t u v w x y z _ B...

Page 136: ...ternate layout has the following keys F1 Up Arrow F2 Down Arrow ESC Right Arrow Tab End Left Arrow Enter Special PC Setup Keypad Mode Activated 68 Key Keyboard only 14613 12 13 14 20 21 22 28 29 30 36...

Page 137: ...onfiguration To enter the special PC Setup mode proceed as follows 1 Power up the system 2 After the memory test completes hold down key number 36 and key number 38 simultaneously refer to the keypad...

Page 138: ...2 Power cycling the system Special PC Setup Keypad Mode Activated 68 Key Keyboard Upon power up if the 36 and 38 keys are pressed simultaneously before any other keys the 68 key keyboard goes into th...

Page 139: ...required for the DynaKey module itself at installation unless the factory default configuration needs changing The operational parameters can be changed using the Wedge Configuration Utility LPIN G370...

Page 140: ...board Key Layouts The following key layout is active in the special mode 14419 1 2 3 4 5 6 7 8 9 9 8 7 4 5 6 1 2 3 18 19 20 21 14 15 16 17 10 11 12 13 CR 22 23 24 25 35 34 F1 F2 26 27 28 29 30 31 33 3...

Page 141: ...ng or by pressing the 7 and 9 keys simultaneously The normal keypad layout is shown below 12389 Shift F3 1 2 3 4 5 6 7 8 9 Shift F2 Shift F1 Shift F4 Shift F5 Shift F6 9 8 7 4 5 6 1 2 3 18 19 20 21 14...

Page 142: ...on Before using this keyboard for DOS functions on a 7452 make sure you have the current keyboard matrix layout Down Page Up Page Pause Screen Print Lock Num Lock Scroll 0 1 4 7 5 2 6 3 8 9 O Shift M...

Page 143: ...on these sites 1 Select General Search 2 Select the Kits icon 3 In the Title field enter the Kit Title Example Memory or In the Product ID field enter the Kit Number Example 7456 K141 1 Select Search...

Page 144: ...ry upgrade PC 133 7456 K133 256MB DIMM memory upgrade PC 133 7456 K141 Internal CD ROM Drive 7456 K152 64MB Compact Flash Memory 7456 K154 256MB Compact Flash Memory 7456 K160 Hard Disk Drive Kit Stan...

Page 145: ...Power USB Printer 24V USB Terminal 497 0424888 1 m 1416 C713 0010 497 0424501 4 m 1416 C713 0040 Power Printer 19307a USB Power Power Only 497 0424887 1m 1416 C712 0010 497 0422292 4m 1416 C712 0040 1...

Page 146: ...pendix C Cables RS 232 19722a 9 pin D shell Receptacle 9 pin D shell Receptacle 497 0408349 0 7 m 1416 C359 0007 497 0407943 4 m 1416 C266 0040 497 0409379 15 m 1416 C266 0152 RS 232 Printer RS 232 Te...

Page 147: ...Pin Plug 497 0300422 4 m 1416 C019 0040 RS 232 Terminal 7892 Scanner Powered RS 232 20450a Scanner D Shell 9 Pin Receptacle Modular 10 Pin Plug 497 0425593 3 0 m 1416 C643 0030 RS 232 Terminal 7882 Sc...

Page 148: ...C 4 Appendix C Cables 7837 Scanner Powered RS 232 19724a Scanner D Shell 9 Pin Receptacle Modular 10 Pin Plug 497 0412952 2 5 m 1416 C430 0025 RS 232 Terminal...

Page 149: ...ture D Shell 15 Pin Receptacle VGA Terminal VGA Display Color 16318a Sub Miniature D Shell 15 Pin Plug Sub Miniature D Shell 15 Pin Receptacle VGA Display VGA Terminal 497 0009680 4 m 1416 C261 0040 4...

Page 150: ...237 4m 1416 C508 0040 5982 5 Inch LCD 19731a LCD PCI Card 5982 497 0409750 4m Champ 50 pin Plug 24 pin Minifit Plug 5953 DynaKey 19847a 5953 50 pin Amplimite Plug 50 pin Amplimite Plug 497 0414885 1 m...

Page 151: ...Plug 50 pin Amplimite Plug 497 0410939 1 m 1416 C405 0010 497 0410940 4 m 1416 C405 0040 LCD PCI Card Wedge Keyboard Y Cable 19733a 497 0407490 0 5 m 1416 C338 0005 RS 232 Terminal Kybd Terminal 6 pin...

Page 152: ...040 9 pin D Shell Receptacle 24 Position Microfit Receptacle 5972 LCD Customer Display Powered RS 232 19726a 9 pin D shell Receptacle 12 pin Receptacle Customer Display RS 232 Terminal 497 0420928 1 0...

Page 153: ...0 497 04222834 4m 1416 C725 0040 PS 2 Terminal 19734a Wedge Keyboard Adapter 19735a 497 0406868 PS 2 Terminal 6 pin Mini DIN Plug 5 pin Mini DIN Plug LCD PCI Card 12 1 Inch LCD Aux Power Cable 20444 P...

Page 154: ...wer Y Cable 15808a 497 0409394 0 6 m 1416 C372 0006 Cash DWR 1 Cash DWR 2 Cash Drawer Terminal Printer Cash Drawer Extension Cable 19730a 230 0145735 3 0 m 1424 C112 0030 Cash Drawer Terminal Printer...

Page 155: ...Appendix C Cables C 11 Communications Cable Ethernet 10 100BaseT 16298a Modular 8 Pin Plug Modular 8 Pin Plug 497 0008905 3 0 m 1416 C059 0030...

Page 156: ...eyboard PS 2 Terminal 6 pin Mini DIN Plug 6 pin Mini DIN Receptacle 497 0406056 1 8 m 1416 C281 0018 PS 2 Y Cable 17894a PS 2 Mouse PS 2 Terminal 6 pin Mini DIN Plug 6 pin Mini DIN Receptacle PS 2 Key...

Page 157: ...Cables C 13 Signature Capture Electronic Payment Terminal Cable 5945 5992 EPT RS 232 w Power 19723a 497 0418406 4 0 m 1416 C634 0040 9 pin D shell Receptacle RS 232 EFT Unit RS 232 Terminal 9 pin Min...

Page 158: ...power cables not shown also have an IEC connection of 45 mm 1416 C325 0030 006 8601001 Japan Twist Lock 1416 C325 0023 006 8601010 International 1416 C325 0020 006 8601011 SEV 1416 C325 0021 006 86010...

Page 159: ...S 2 1 3 3 and Before PC BIOS 128 K Legacy USB 16 K DMI Strings 16 K Backpack CD ROM 8 K Video BIOS 48 K Textmode Data 32 K SLP 6 K PXE 4 K Memory Dump 8 K VGA Data 64 K Conventional Memory 640 K Monoc...

Page 160: ...ime Any memory used by added adapter cards should also be accounted for with the appropriate exclude parameters The examples below assume there are no added adapter cards The latest BIOS has a startin...

Page 161: ...00 B7FF X C000 CBFF I CC00 DBFF X DC00 DCFF I DD00 E7FF I B000 B7FF 32 KB This is the VGA Monochrome Text Mode Video RAM area This assumes that for monochrome text the VGA Color Text Mode Video RAM wi...

Page 162: ...D 4...

Page 163: ...icket Keyboard 1 25 BIOS crisis recovery 5 5 BIOS crisis recovery 5 5 BIOS Default Values 3 5 BIOS Recovery crisis recovery procedures 5 5 C Cables cash drawer C 10 display C 5 keyboard C 12 power C 1...

Page 164: ...sitions 1 27 Kits B 1 L LEDs 1 27 M Memory dump assemble exe utility 6 14 Flex diskette format 6 1 Functional flow charts 6 13 Moving files 6 12 Performing 6 6 Pharlap 286 DOS extender usage 6 3 Restr...

Page 165: ...default factory settings 3 2 Signature Capture Electronic Payment Terminal Cables C 13 Speaker 1 27 System status LEDs 1 27 T Terminal installation 2 2 Terminal Power Cables C 14 Tones and tunes 6 10...

Reviews: