International LT625
COMPANY CONFIDENTIAL
© 2019 SmartDrive Systems, Inc. This information is intended for use by SmartDrive customers only. Any other use without the express written consent of SmartDrive Systems, Inc. is strictly prohibited.
Rev 5, August 04, 2020
Forward-facing Camera Installation Instructions
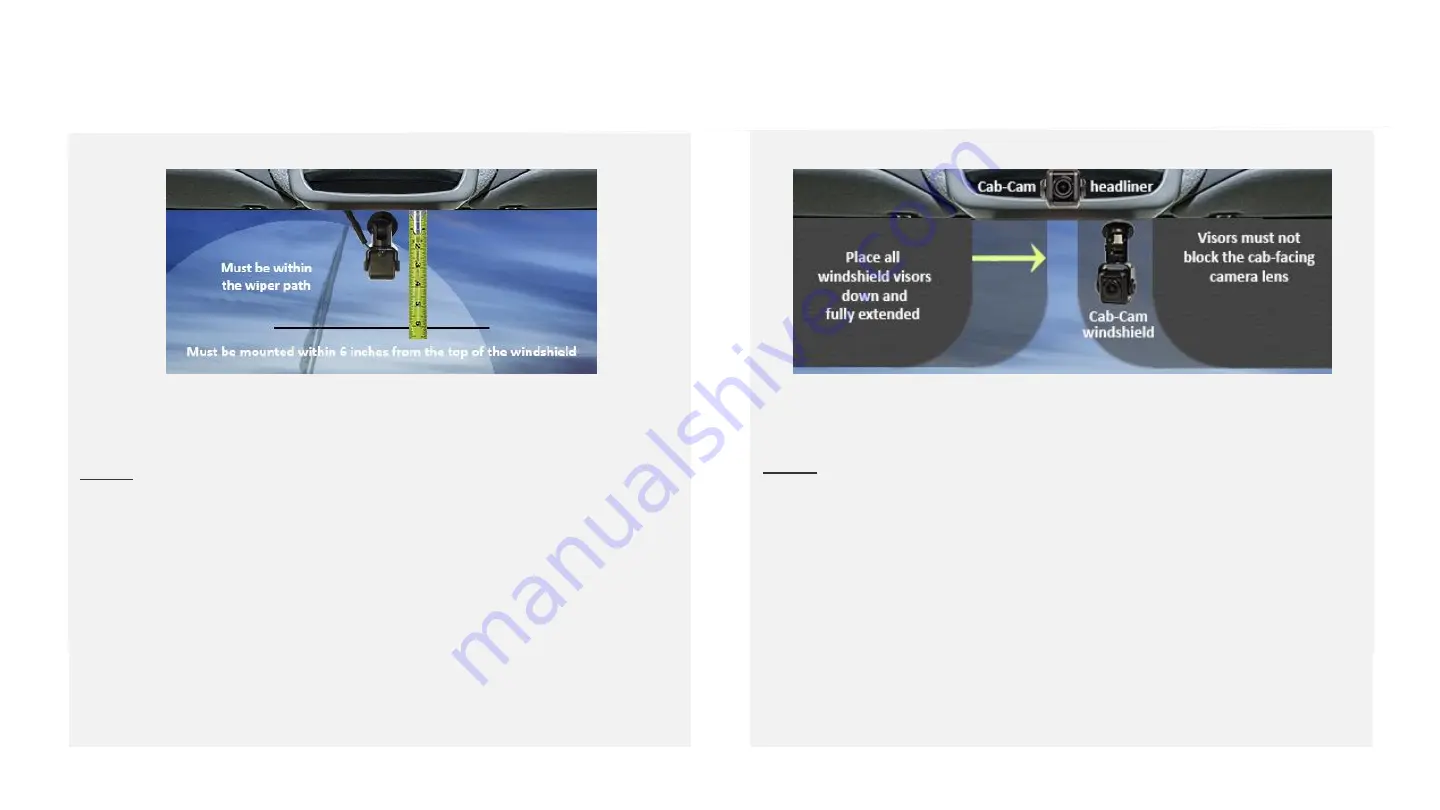
Mount the camera within 6" from the top of the windshield.
Camera cannot interfere with a driver’s line of sight
to the road, traffic signals, or road signs
Details
1. Before removing the adhesive backing, check to make sure the camera
fits properly. Use a pocket level to ensure the bottom of the camera is
mounted level looking from left to right.
2. Using an alcohol pad clean the windshield and wipe dry with a lint-free
clean cloth. Do not use shop rags which contain grease even when
clean.
3. Press firmly on camera bracket for 10 seconds to ensure adhesion
4. Use ¼ loom to protect the cable and to keep it from coming loose from
the headliner
5. Run the camera cable down to the controller.
6. Cables must not block air bag functionality
Cab-facing Camera Installation Instructions
Camera lens must have a complete view of the driver when the visors are
in the down and fully extended position. Use a headliner location
when the fully extended visor covers the camera lens.
Details
1. Mount the Cab-facing camera on a flat hard surface Using an alcohol
pad clean the windshield and wipe dry with a clean cloth. Do not use
shop rags which contain grease even when clean.
2. Mount the camera where the sun visor does not block the lens
(windshield or headliner)
Headliner: Secure with 2-3 self-tapping screws
3. Press firmly on camera bracket for 10 seconds to ensure adhesion
4. Use ¼ loom to protect the cable and to keep it from coming loose from
the headliner
5. Run the camera cable to the controller
6. Cables must not block air bag functionality
7. Ensure the cable doesn’t get pinched
Best Practice: Forward and Cab-facing Camera Installation Instructions


