COPYRIGHT © 2009
--
5
--
naturemill.com
STEP 2: TRANSFER THE COMPOST
Please WAIT
until the
mixing chamber is nearly full, and food waste items are
unrecognizable. Then
push the OK button
to transfer compost to the lower tray.
If the Wait light comes on, wait up to 48 hours while the compost process finishes.
After you push the OK button, the motor will give the compost some final mixing.
Then it will reverse direction for several minutes, pushing up on the latches to open
the trap door. The compost will fall down to the red cure tray below, where it will
continue to compost and dry out for several more days or weeks. Finally, the motor
will reverse again to close the trap door. The entire transfer process is 15 minutes.
Wait
at least 3-5 days
between transfers. More time makes better compost.
Wait
at least 12-24 hours
after adding the last items. They need time to mix.
A good time to transfer is after a weekend away or just before preparing a meal.
If necessary, hold back new waste items in a bowl overnight to allow more time
for items already in the mixing chamber to compost.
Some compost remains in the mixing chamber to “activate” the next batch. No
new soil is needed.
Some compost may leak from the mixing chamber down to the cure tray even if
you don’t press the OK button. This is normal and is not a problem.
STEP 3: REMOVE COMPOST
Please WAIT until the blinking FULL light turns on.
It will come on after
every other cycle
, usually as you press OK to transfer again. Leave compost in the
unit as long as possible for best results. More time allows more curing and drying.
Remove the red cure tray and the small drip tray. Empty outdoors.
The area below the cure tray may be wet, or may contain some stray compost.
Clean this area out when you remove the trays.
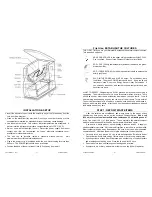
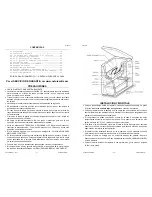
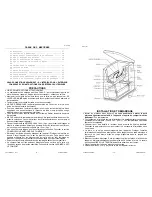
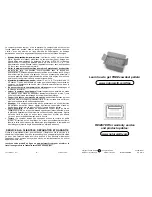
Reinsert the trays right away, with the small drip tray
at the far end away from
the cure door
. See diagram.
Close the door tightly, then push the OK button to reset the FULL light. Resume
normal use.
Mold is normal and is generally harmless. It is a sign of healthy organic activity.
To reduce mold, add more sawdust in the future.
You can use the compost outdoors right away, or store outdoors for later use.
A hot, cold, frozen, wet, or dry storage location is ok.
Do not cover or store
indoors for prolonged periods.
PATENT PENDING
--
6
--
naturemill.com
MODE SELECTION: Energy Save, Heavy Duty, Regular
Press the selector button
to change modes as follows:
Regular mode
is intended for every day composting, with moderate mixing,
heat, and air flow rate. Some models have a light labeled “Regular”. If your
model does not have a Regular light, then press the selector button until
neither
the Heavy Duty nor Energy Save light is on.
Energy Save mode
reduces energy consumption by 75%. Use this if you add
items infrequently, or during a vacation. Use this mode if your compost is often
dried out.
Do not use Energy Save mode for regular loads
or for the first
load, as the compost will not be fully processed and may develop odors.
Heavy Duty mode
is available on select models only. This mode increases
mixing for extra heavy loads, but may increase noise level and wear and tear.
Compost may become over-processed if quantity is low.
Temporary Heavy Duty
mode is intended for a one-time heavy load.
Press the selector button again, until the Heavy Duty light blinks slowly.
The machine will return to regular mode automatically after 18 hours.
GARDENING WITH COMPOST
Discard the liquid in the small drip tray, if any.
Fresh compost is ready for outdoor use, but not for indoor use. This is because
it is still active and may attract earthworms and beneficial insects. For indoor
use and for easier handling, first cure and dry your compost:
OPTIONAL: Cure and dry outdoors
for several weeks. Leave uncovered, so
compost receives
oxygen
and dries out. You can even add to an existing
compost pile to speed up composting there. Cold, freezing, rain, or snow will
slow curing but will not harm the cultures.
TIP: Use a hand trowel to break apart clumps for appearance. Remove
uncomposted items and try to avoid them in the future.
Fresh compost is very powerful.
For gentle time-release, spread compost
around plants on soil surface only, like mulch.
Watering gradually draws
nutrients into the soil. Turning the soil seasonally mixes in nutrients.
Consult with a local gardening expert, or plant reference materials, for proper
application of compost for your specific plants, soil, and growing conditions.
One batch of compost is generally enough for 10-40 sq ft (1-4 sq m) of grass or
garden plants, applied one to four times per year.
Mix
1
part
fully cured
compost with 10 to 20 parts regular soil. Full curing
requires several months.
TIP: make “compost tea” liquid fertilizer - see naturemill.com.

