26
|
ni.com
|
Getting Started with AKD EtherCAT Drives and NI SoftMotion
Note
Do not plug in or turn on any power to the system until after all required
hardware connections are made.
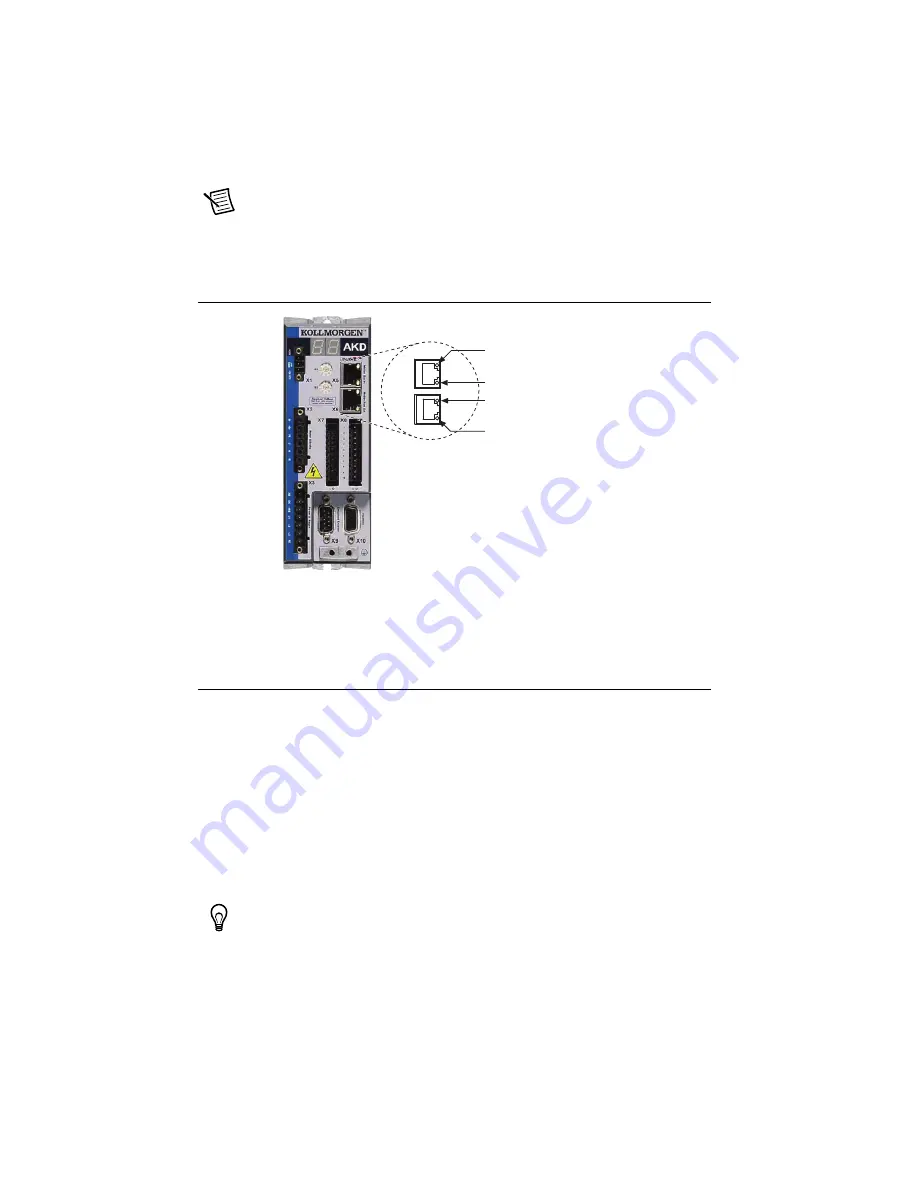
The LED indicators on the AKD Motion Bus IN and Motion Bus OUT ports display the
communication status. Figure 5 shows the LED indicators on the X5 and X6 connectors.
Figure 21.
AKD X5 and X6 Motion Bus Connectors
3.
Install software on the RT target as described in
Step 3: Install Software on and Configure
.
4.
Disable
Legacy USB Support
in the PXI master PC BIOS, if it is enabled.
Tips and Troubleshooting
The Drive Does Not Enable
If, after going through all steps in this document, the AKD EtherCAT servo drive does not
enable, verify the following settings:
•
Make sure that the hardware enable is connected to the +24 V power supply as described
in
Connect the Hardware Enable on the X8 Connector
•
The software enable must be enabled. Verify that the NI Scan Engine is in active mode and
that Drive Enable is active. You can use the
Interactive Test Panel
dialog box or the Power
function to enable the drive.
•
The drive must not be in a fault state. You can use the
Interactive Test Panel
dialog box
or the Clear Faults function to clear the drive faults.
Tip
Refer to the
AKD Fault and Warning Messages
card that came with the drive
or the
NI SoftMotion Module Help
for fault information and solutions.
Not c
u
rrently
us
ed
X5
X6
IN port link
(on =
a
ctive, off = in
a
ctive)
R
u
n
(on = r
u
nning, off= not r
u
nning)
OUT port link
(on =
a
ctive, off = in
a
ctive)


