9
WWW
.N
AKAYAMA
T
OOLS
.
COM
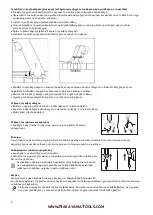
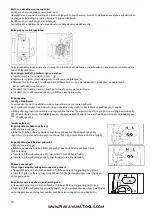
Μόλις ο κινητήρας
εκκινηθεί:
Μετακινήστε το
ρυθμιστικό μοχλό
(2) στην κάτω θέση, έτσι ώστε ο κινητήρας να τεθεί
σε ταχύτητα ρελαντί.
Για να απενεργοποιήσετε
τον κινητήρα:
Σύρετε το διακόπτη (1) στη θέση
OFF
.
Σε πολύ χαμηλές θερμοκρασίες
επιτρέψτε στον κινητήρα να ζεσταθεί
Μόλις ο κινητήρας τεθεί σε πλήρη λειτουργία:
• Μετακινήστε το μοχλό ρύθμισης στην κάτω
θέση
-
ο κινητήρας τίθεται σε ταχύτητα ρελαντί.
• Ανοίξτε ελαφρά το γκάζι
-
θερμάνετε τον κινητήρα για μικρό χρονικό διάστημα.
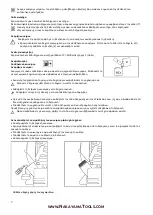
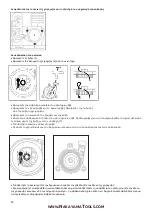
Εάν ο κινητήρας δεν εκκινηθεί:
Εάν δεν γυρίσατε τον μοχλό του τσόκ στη θέση
γρήγορα μετά την εκκίνηση του κινητήρα, ο θάλαμος καύσης θα
γεμίσει με παραπάνω καύσιμο από όσο χρειάζεται (θα μπουκώσει).
•
Αποσυνδέστε
την μπουζόπιπα.
• Ξεβιδώστε και στεγνώστε το μπουζί.
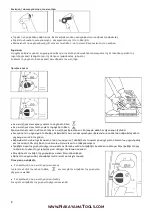
Θέστε το διακόπτη ενεργοποίησης
-
απενεργοποίησης
στη θέση
OFF
• Ανοίξτε πλήρως το γκάζι.
• Τραβήξτε το σχοινί της χειρόμιζας αρκετές φορές για να καθαρίσετε το θάλαμο καύσης. Τοποθετήστε το μπουζί και
επανασυνδέστε το.
• Μετακινήστε τον διακόπτη στη θέση
ON
.
• Γυρίστε το λεβιέ του τσόκ στη θέση
ακόμα και αν ο κινητήρας είναι κρύος.
• Τώρα εκκινήστε
τον κινητήρα.
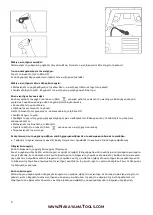
Σε περίπτωση που το μηχάνημα σβήσει επειδή χρησιμοποιήθηκε όλο το καύσιμο και άδειασε το ντεπόζιτο.
•
Τραβήξτε το σχοινί εκκίνησης αρκετές φορές έτσι ώστε να προωθηθεί το καύσιμο στο σύστημα τροφοδοσίας.
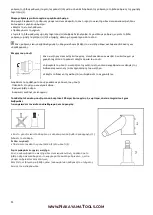
Οδηγίες λειτουργίας
Κατά τη διάρκεια της αρχικής λειτουργίας (Στρώσιμο)
Ένα νέο μηχάνημα δεν πρέπει να λειτουργεί σε υψηλές στροφές (πλήρες φορτίο από το γκάζι) για τα τρία πρώτα γεμίσματα
του ρεζερβουάρ. Αυτό αποτρέπει τα περιττά φορτία κατά τη διάρκεια της περιόδου
στρωσίματος. Καθώς όλα τα κινούμενα
μέρη πρέπει να στρωθούν κατά τη διάρκεια της περιόδου αυτής, η αντίσταση τριβής στον κινητήρα είναι μεγαλύτερη κατά
τη διάρκεια της περιόδου στρωσίματος. Ο κινητήρας αναπτύσσει τη μέγιστη ισχύ του μετά από περίπου 5 έως 15 πλήρωσεις
της δεξαμενής καυσίμου.
Κατά τη λειτουργία
Μετά από μια μακρά περίοδο πλήρους λειτουργίας του γκαζιού, αφήστε τον κινητήρα σε λειτουργία για λίγο με ταχύτητα
ρελαντί, ώστε η θερμότητα στον κινητήρα να μπορεί να μειωθεί μέσω της ροής του
αέρα ψύξης. Αυτό προστατεύει τα
εξαρτήματα που
βρίσκονται πάνω στον κινητήρα (σύστημα ανάφλεξης, καρμπυρατέρ) από τη θερμική υπερφόρτιση.
Summary of Contents for BL4300
Page 1: ...BL4300 Owner s manual Art Nr 023456 WWW NAKAYAMATOOLS COM...
Page 2: ...2 WWW NAKAYAMATOOLS COM GR 1 2...
Page 3: ...3 WWW NAKAYAMATOOLS COM...
Page 4: ...4 WWW NAKAYAMATOOLS COM OFF 3 10...
Page 5: ...5 WWW NAKAYAMATOOLS COM Service OFF ON...
Page 6: ...6 WWW NAKAYAMATOOLS COM 90 Premium...
Page 7: ...7 WWW NAKAYAMATOOLS COM TC H 1 2 TC 25 1...
Page 8: ...8 WWW NAKAYAMATOOLS COM 1 ON 2...
Page 9: ...9 WWW NAKAYAMATOOLS COM 2 1 OFF OFF ON 5 15...
Page 10: ...10 WWW NAKAYAMATOOLS COM 1 2 H L 1 4 H L LA L LA...
Page 11: ...11 WWW NAKAYAMATOOLS COM LA L H H 1 4 A 100 1 2 3 Service...
Page 12: ...12 WWW NAKAYAMATOOLS COM 1 2 3 4 5 6 7 5 4 3...
Page 13: ...13 WWW NAKAYAMATOOLS COM OFF 3 UV 43cc 1 7hp 12m3 min 4200m3 min 1 2L Service...
Page 14: ...14 WWW NAKAYAMATOOLS COM 12 x x x x x x x x x x x x x x x x x x x x x Service x...
Page 15: ...15 WWW NAKAYAMATOOLS COM Service...
Page 30: ...Ser No Part No Part Name Qty Ser No Part No Part Name Qty...
Page 31: ...Ser No Part No Part Name Qty Ser No Part No Part Name Qty...


