


Page | 36
Figure 27 – Using SD Formatter to format the micro SD card for use with any of my products, including Spark™, Spark Color™, Igniter™, and
Sound Hornet™.
To format an SD card, simply select the drive of the micro SD card from the Select card dropdown, type a name
into the Volume label field, ensure Quick Format is chosen, and hit format, clicking yes on the prompt that
appears. This will format the card and erase the existing contents, ensuring it is ready for use with your board.
Note that I do this for every card that gets sent with the board, but this is necessary for those that are changing
fonts and/or have a new SD card.
5.8.
COPY FILES BACK TO THE MICRO SD
To copy the files back, simply move all the files from the “c:\Spark\Saber1” directory to the root of the micro SD
car. This will ensure that the files are written well and can be accessed quickly by Spark 3™. Once this step is done
the micro SD card is ready to be loaded back on to Spark 3™ to enjoy the new settings and fonts!
6.
ERROR CODES
Spark 3™ comes equipped with an on-board SMD error LED, which blinks to indicate certain SD or read failures,
making install a snap. When an error occurs, the led will blink a certain number of times, and then will pause for 1
second. Getting the number of blinks can then be used to determine the failure, by using the table below.
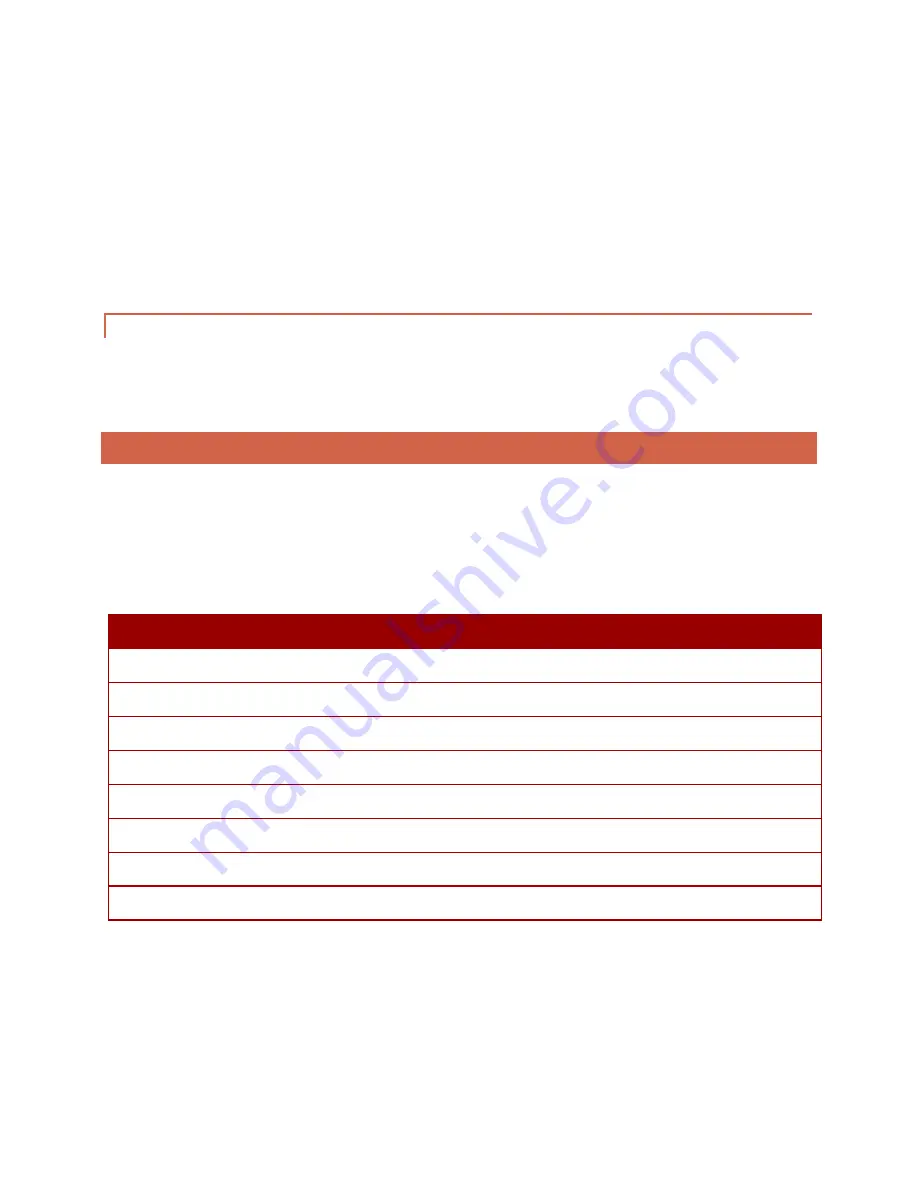
The following table shows the number of blinks and which error it represents. Errors in red are fatal errors and the
board will not be responsive until it is power cycled.
Num of Blinks
Error
2
Bad card, empty card, not formatted
3
DAT not found
4
Boot wav not found
5
Main wav read error
6
Config file not found
7
Effect wav not found
8
Effect incorrect format
9
SD card locked
Table 2 – Error codes for the accent error LED.


