USB MODE
The T 517 can play back MP3/WMA/JPEG/DivX files stored in external USB
(Universal Serial bus) devices. The following are the T 517’s capabilities with
respect to USB device playability.
•
Support USB 1.1 full speed (12Mbps).
•
When more than 650 files are recorded in the USB device, the T 517 may
not be able to play the files correctly.
•
Digital camera & mobile phone are not supported.
uSb plaYback
1
Connect the external USB device to the front panel’s USB input.
2
At STOP mode, press [RTN] button of the DVD 8 to switch from DISC
mode to USB mode and vice-versa.
3
For details of operations on applicable file type, refer to the relevant
sections about MP3/WMA/JPEG/DivX playback.
ABOUT HDMI
HDMI (High Definition Multimedia Interface) supports both video and
audio on a single digital connection for use with DVD Players, Set-Top Boxes
and other AV devices.
HDMI was developed to provide the technologies of HDCP (High Definition
Contents Protection). HDCP is used to protect digital content transmitted
and received.
HDMI has the capability to support standard, enhanced or high-definition
video plus standard to multi-channel surround-sound audio, HDMI features
include uncompressed digital video, a bandwidth of up to 5 gigabytes per
second, one connector (instead of several cables and connectors), and
communication between the AV source and AV devices such as DTVs.
hdmi connection
If you have a HDMI TV or monitor, you can connect it to this player using a
HDMI cable (not supplied).
1
Connect the HDMI OUT jack on the player to the HDMI jack on a HDMI
compatible TV/monitor.
2
image will be displayed if your 1080p-capable TV doesn’t accept
images in 60Hz.
IMPORTANT NOTICE
If your HDMI equipped TV is not capable of decoding DTS or Dolby
Digital Bitstream, set the T 517’s Dolby Digital or DTS setting at the
“Audio Setup Menu” to “PCM”. There maybe a rushing noise heard if your
TV is not capable of decoding such formats.
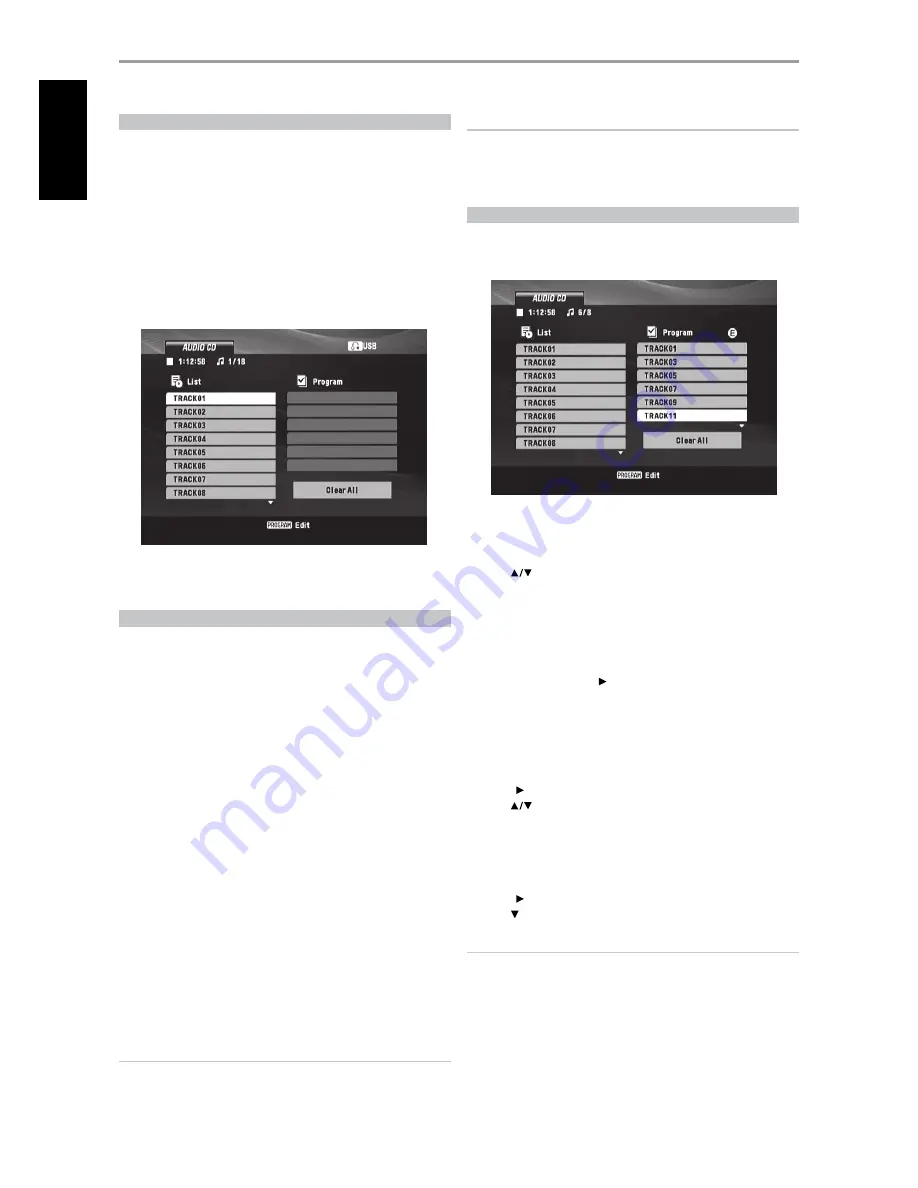
PROGRAMMING
The program function enables you to store your favorite tracks from any
disc in the player memory. A program can contain 30 tracks. To program the
sequence
1
Insert a disc. Audio CD or MP3/WMA discs: Audio CD or MP3/WMA
menu screen appears.
2
Press DVD 8’s [PROGRAM] button. An “E” icon will appear to the right of
the word “Program” on the right side of the menu screen.
3
Use [
] to select a track/file that will be included on the “Program”
list. Press [ENTER]. Repeat to place additional tracks/files on the list.
4
Press [Program] again to finish or exit program mode.
program plaYback
1
Select the track/file you want to start playing from the “Program” list
(right side of the menu screen).
2
To begin playback, press [ ] or [ENTER]. Playback follows the order in
which you programmed the tracks/files. Playback stops after all of the
tracks/files on the “Program” list have been played once.
3
To resume normal playback from programmed playback, select a track/
file on the left side of the menu screen and then press [PLAY].
eraSing a track from program liSt
1
Press [ ] to move to the “Program” list.
2
Use [
] to select the track/file that you wish to erase from the
Program list.
3
Press [CLEAR] button of DVD 8. Repeat to erase additional tracks on the
list.
eraSing the complete program liSt
1
Press [ ] to move to the “Program” list.
2
Use [ ] to select “Clear All”, then, press ENTER.
NOTE
The programs are also cleared when the disc is removed.
OPERATION
uSing the t 517 - featureS
1
EN
G
LIS
H
FR
A
N
Ç
A
IS
ES
PA
Ñ
O
L
IT
A
LIA
N
O
D
EU
TS
CH
N
ED
ER
LA
N
D
S
SV
EN
SK
A
РУ
СС
К
И
Й
Set the TV’s source to HDMI (refer to your TV/monitor’s Owner’s
manual).
When you use HDMI connection, you can change the resolution (480i/576i,
480p/576p, 720p, 1080i, 1080p) for the HDMI output by pressing
RESOLUTION. You can only change the resolution within your TV/Monitor’s
resolution capabilities.
NOTE
No


