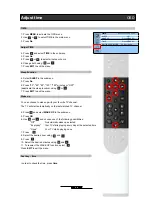
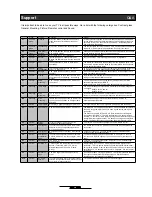
NAD DV58 User Manual Download Page 34

Q&A 

Support

34

It is important to be able to use your TV in all possible ways. Her a list with the following catergories: Contrast glass, 
General, Mounting, Picture, Remote control and Sound. 
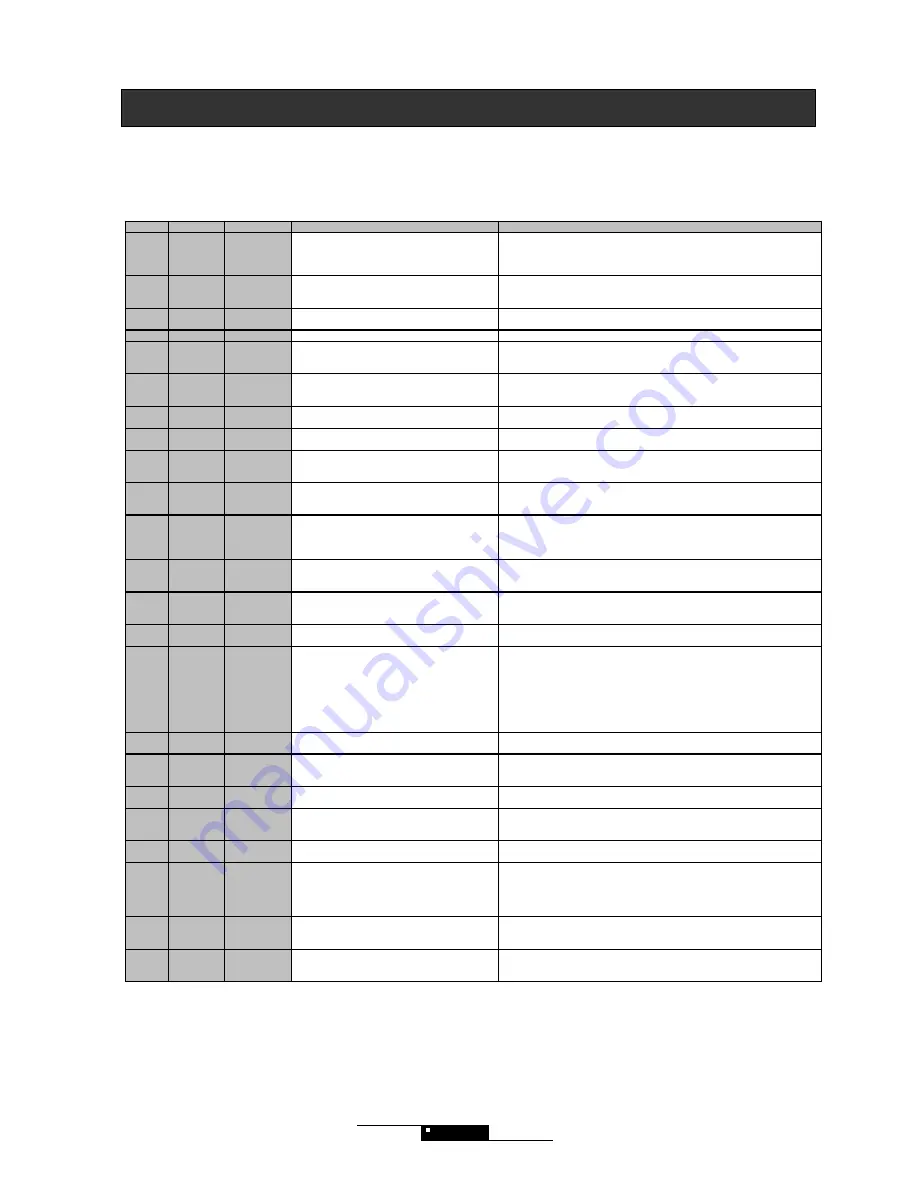
 

Group 

Problem 

Question 

Answer 

C1 

Contrast 
glass 

Cleaning 

May I use alcohol or another strong acid to 
clean the screen?  What about the use of 
water?  

Contrast glass is real glass.  We recommend you clean your screen with 
screen cleaner and a soft tissue that does not make scratches (the micro 
fibre cloth is fine).  The use of water is no problem.  Avoid always water 
from entering in the cabinet. 

C2 

Contrast 
glass 

Functionality 

What is the function of the contrast glass? 

The contrast glass has three functions.  First, it increases the contrast with 
almost 50 %, which results in a better black.  Second, it decreases 
reflexion of light by 25 times. Third, it protects the LCD panel. 

C3 

Contrast 
glass 

LCD panel 
damage 

Can a child damage the LCD panel by hitting 
with a plastic object? 

Although one should be careful, especially with sharp objects, the contrast 
screen protects the LCD panel from being damaged. 

G1 

General 

Bathroom 

May I place the TV in my bathroom? 

No, this is not recommended 

G2 

General 

Burn-in 

I watch the same TV channel every day.  
Should I be afraid for burn-in of the channel’s 
logo? 

No, you shouldn’t.  LCD technology makes burn-in impossible. 

G3 

General 

Heat 

Is it save that the TV feels so warm when 
operating? 

The aluminium frame takes the heat away from the electronic parts.  This 
construction, together with the holes on the rear makes a fan superfluous. 
So it is natural that it feels warm. 

G4 

General 

Power 
consumption 

I have heard that flat screens use a lot of 
power.  Is this correct? 

LCD TVs do not use a lot of power.  Actual power consumption is less then 
an old fashioned TV and about half the consumption of a plasma TV. 

G5 

General 

Sunlight 

Can I place the back of the TV in direct 
sunlight? 

It is not recommended to place the back of the TV in the sunlight. The TV 
could overheat in strong sunlight. 

G6 
 

General 

Ticking 

When I start my LCD TV and it is silent, I can 
sometimes hear a soft ticking.  Is something 
broken? 

No, aluminium is metal and can expand a bit when it becomes warm.  The 
ticking should disappear after a short time. 

G7 

General 

VESA 
mounting 

Can I mount a VESA bracket on the back of 
the screen? 

Yes, but make sure to use only the small ( 5-6mm) screws that were 
delivered together with your NAD TV. 
Never use force to insert a screw in the back panel more then 3,5 mm. 

M1 

Mounting 

Table stand 

Is it possible to buy a table stand? 

Yes, a special designed table stand in aluminium with cable management 
is available. 


DV66TS for 23” and 26” 


DV81TS for 32” 

M2 

Mounting 

Wall 
mounting 

The TV is not hanging correctly on the wall.  
What can I do? 

Remember to place the 20 mm spacer between the TV and the wall as 
shown in you manual.  The spacer makes sure that the air can flow free 
behind the screen and that the TV hangs right.  

M3 

Mounting 

Wall 
mounting 

I would like to hang my screen on the wall.  Do 
you have an easy solution so it hangs stable 
and tight? 

Yes, we can supply our own wall bracket for the 26” and the 32”.  
Ordering number: DV81WB 

P1 

Picture 

720p / 1080i 

What HD TV signal gives the best picture on 
my NAD TV?  720p or 1080i? 

We recommend to use 720p progressive (1280x720 pixels full frames) 

P2 

Picture 

Best Picture 

How do I get the best picture on my LCD TV? 

The NAD LCD TV is a high quality product.  It is nevertheless only possible 
to show a very good picture when you have a good source and a good 
connection. 
The best sources are HD TV and DVD.  Both function best with digital 
connections (DVI, HDMI).  The VGA socket gives you a good picture as 
well (HD TV, computer).  DVD players give a good picture with component 
(especially with progressive scan).  We advise to use a good quality DVD 
player.  The bigger the screen you possess, the more important this is. 

P3 

Picture 

Bright 
setting 

Is there a fast way to give the TV more 
brightness in daylight conditions? 

Yes, there is. You can press the bright key on the remote control. 

P4 

Picture 

Component 

I connected a component cable.  Red is blue 
and blue is red on component signal.  Does 
my TV need service? 

No.  Check the connection.  Probably you switched the red and the blue 
connection. 

P5 

Picture 

Component 

No signal on component signal.  What should I 
do? 

Check the connection.  You have probably not connected the cables 
correctly or one of the cables is loose. 

P6 

Picture 

Component 
progressive 
scan 

I connected a component cable and there are 
2 diffuse pictures on component signal.  What 
is wrong? 

You are sending a progressive signal to the TV while your TV is set to 
component.  Select the right input from the source menu (component p-
scan). 

P7 

Picture 

Dark picture 

The picture is very dark when I turn on the TV.  
What is wrong? 

Your LCD TV has a backlight panel.  Only after 10-15 minutes this light 
reaches its full brightness. 

P8 

Picture 

DVI/HDCP 

I just bought a new DVD player that has a DVI 
socket.  I connected it to my TV, but the 
picture disappears all the time.  What is 
wrong? 

Most probably your TV has no HDCP (High bandwidth digital content 
protection).  This is in short a signal encryption to protect DVD films from 
being copied digitally.  From the second quarter of 2005 we included this in 
our production.  It is possible to have your TV upgraded.  Ask your dealer 
for a price. 

P9 

Picture 

Harmful to 
eyes 

Can a too bright picture be harmful for my 
eyes? 

An LCD panel has a very high brightness.  The contrast glass has however 
the ergonomic feature that it protects your eyes, just like expensive 
sunglasses do.  So, just enjoy your NAD TV. 

P10 

Picture 

No picture 
on DVI 

I connected my DVD player to the DVI socket, 
selected the right source/input, but I do not get 
any picture.  What should I do? 

Try to shut off the DVD player and the TV and start again. 


Summary of Contents for DV58

Page 1: ...V 2005 2 User manual ...

Page 2: ...ions 24 Q A and practical information 33 Congratulations with your high definition LCD TV Passion for Picture We have put all our efforts in creating this unique TV We hope that you will enjoy using it as much as we enjoyed creating it 2 Please read this manual before using the product Keep it for further reference ...

Page 3: ... feet for desktop stand plate Screws for desktop stand 4 pcs 4x12mm 1 extra Skruer til VESA vægbeslag 4 pcs 4x5mm 1 extra Warning label for mounting wallmount VESAmount 220 V power cord CD ROM with manual and other information 3m minijack soundcable with goldconnectors Y adapter with goldconnectors for centre speaker Cloth for cleaning of the frontglass Postcard remote control Accessories Introduc...

Page 4: ...nting In this chapter you will find out how to mount your TV on the complementary desktop stand or on the tablestand or the floorstand which you bought as an option You will also be shown how to use the wallmount 4 ...

Page 5: ...d below 5 2 x rubber feet Your LCD TV can be put on the location of your choice Always take care that the air can flow free through the ventilation holes on the back of the screen Never put the TV in a closed bookcase or hang it flat on the ceiling because in this way air cannot flow free ...

Page 6: ...strated below Check also the instructions that accompany the stand 6 4 x M4x8mm Screw the to fingerscrews in the backplate It is most convenient to stand with your face to the frontglass during this operation Position the screen in the hole Mount the botton piece with 4 screws ...

Page 7: ...low Check as well the information delivered together with the floorstand 4 x M4x8mm Mount the bottompiece with 4 screws Screw the 2 fingerscrews in the backplate It is most convenient to stand with your face to the frontglass during operation Position the screen in the hole 7 ...

Page 8: ... Screw the fingerscrews in the backplate Hang the screen on the wallmount Spacer min 20mm 2x big fingerscrews Wallmount Introduction Mount your wallmount as illustrated below 1 Fix your wallmount to the wall Make sure that it hangs straight and that it is fixed well 2 Screw the to fingerscrews into the backplate and bring the spacer in place 3 Connect the antenna connection 4 Connect the other con...

Page 9: ...5 Connect the powercable 6 Fix the TV to the wall 7 Insert the powercable in the powersocket Your LCD TV can be put on the location of your choice Just always take care that the air can flow free through the ventilation holes on the back of the screen Never put the TV in a closed bookcase or hang it flat on the ceiling because air cannot flow free in this way Remember that the warranty does not co...

Page 10: ...t up In this chapter you get an overview of what kind of objects can be connected to your LCD TV Your TV has a lot of connections sockets The objects you want to connect have the same kind of sockets You will get some examples 10 ...

Page 11: ... HDCP 12 Powersocket 110 240 V 11 5 6 6 6 7 10 12 1 11 Sockets on the left side fast access board 13 AV 2 video in 1xRCA 14 Audio in L R for AV 2 2xRCA 15 Audio out L R via minijack 3 3 mm stereo jack for headphones The Y adaptor should be used when you want to use your TV as a centre speaker in a surround system The audiocable can be used when you have connected somthing to the VGA or DVI socket ...

Page 12: ...in a surround system set up Scart RGB or Component video signal Center speaker Pre Out signal Phono L Phono R S video signal for Receiver OSD Surround speakers Front L R speakers Subwoofer Digital Optical or Digital Coaxial signal T533 T513 T753 T743 TV antennasignal 12 DV 1 ...

Page 13: ...RGB with HDCP VGA analog RGB Stereo Audio mini Jack Component Video Center speaker Pre Out signal S video for Receiver OSD RGB SCART Audio Video signal TV antennasignal or Cable TV PC Laptop High End DVD Player Digital Satellite Receiver DVB T Setup Box Sattelite Receiver HD Recorder VHS Video Surround speakers Front L R speakers Subwoofer Digital Audio Audio out L R ...

Page 14: ...ifferent types can be found as a pdf file on the CD delivered together with your TV You can as well use NAD HTR 2 If you did not receive our aluminum remote but a plastic one you will receive an aluminum remote for free at a later date You just need to send us the included postcard The aluminium remote control is of the learning type and has a USB interface It can control 6 devices meaning that it...

Page 15: ...reen Text TV OSD control buttons TV channel up and down Insert channel Erase channel Skip channel Brightness in 7 steps Still picture Previous channel and subside menu in Text TV Show the time Replace previous channel Sleep function Sound settings Mono Stereo sound Channel information 1 TV 2 RGB Scart 3 AV1 4 AV2 5 S video 6 Component Interlaced 7 Component P scan 8 VGA analog RGB 9 DVI digital RG...

Page 16: ...grammable Digital TV mode programmable Text TV keys Zoom Skip unskip channel in the programme edit menu Text TV keys Zoom Delete channel in the programme edit menu 1 TV 2 RGB Scart 3 AV1 4 AV2 5 S video 6 Component Interlaced 7 Component P scan 8 VGA analog RGB 9 DVI digital RGB Remote control DV 1 This programmable remote control can control up to 7 devices For more information about programming ...

Page 17: ... menu Leave OSD menu or EXIT submenu Choose pictureformat 4 3 Lettebox Lettebox Title TV mode Automode Fill screen channel Info OSD control buttons TV channel up down Insert channel Delete channel Brightness Picture in Picture PIP Still picture Picture settings HTR 2 Sleepfunction 1 TV 2 RGB Scart 3 AV1 4 AV2 5 S video 6 Component Interlaced 7 Component P scan 8 VGA analog RGB 9 DVI digital RGB OS...

Page 18: ...Chapter 4 Get started In this chapter you get an overview over the basic functions 18 ...

Page 19: ... operate in full brightness Switching off your TV 1 Press on your remote control We recommend you to switch off your TV using the switch on the left side if the TV is not used during a longer period The TV goes into stand by if there is no signal in more then 15 seconds Pressing TV GO PG PG will turn the TV on again Choose channel To see the last channel press Pre PG on the remote Volume Control M...

Page 20: ... a source and you connect a DVD player via scart your TV will automatically switch to scart Switching off the DVD player will bring you back to TV You can go back to TV mode by pressing PG PG 1 TV 2 RGB Scart 3 AV1 4 AV2 5 S Video 6 Component Interlaced 7 Component P scan 8 VGA analog RGB 9 DVI digital RGB Standard TV mode RF Scart from a DVD player or HD recorder with RGB signal Use the socket on...

Page 21: ...Hz 33 10 kHz 63 SPATIAL 50 UP DOWN LEFT RIGHT EXIT AUTO SCAN SYSTEM BG D K I STORAGE P 1 SCAN Press MENU GO UP DOWN LEFT RIGHT EXIT MANUAL SCAN SYSTEM BG D K I STORAGE P 1 BAND Cable CHANNEL 35 UP DOWN LEFT RIGHT EXIT 21 OSD menu on a video background Overview OSD menu Get started The OSD menu is build up around keywords Picture to adjust the picture Sound to adjust the sound Misc to choose how th...

Page 22: ...icture on these three sources PICTURE MENU UP DOWN EXIT BRIGHTNESS 50 CONTRAST 60 POSITION Press MENU GO TEMPERATURE User RED 60 GREEN 60 BLUE 60 PIP MENU UP DOWN EXIT PIP ON OFF PIP off PIP SOURCE TV AUDIO SOURCE PIP PIP POSITION POSITION H POSITION 50 V POSITION 50 PHASE 50 H SIZE 50 UP DOWN LEFT RIGHT EXIT 22 H position moves the total picture to the left or the right V position moves the total...

Page 23: ... 18 23 4 3 1 33 1 format 4 3 1 33 1 format 4 3 1 33 1 format Sub title text line 1 Sub title text line 2 Sub title text line 1 Sub title text line 2 16 9 1 85 1 1 78 1 format AUTO mode Use this format only when you have choosen scart as source The picture will automatically change between 4 3 and 16 9 Get started Picture format Picture format Letter Box mode This is a 4 3 picture where you zoom in...

Page 24: ...is chapter you will get more information about the different functions of your LCD TV Your TV is for instance equipped with an ambient light sensor which measures the light in the room and automatically adapts the brightness 24 ...

Page 25: ...ress GO 5 Select MANUAL SCAN and press GO 6 Select CHANNEL and use the navigation keys and If you found a channel you want to stock you can add it by pressing or key inserts a channel key replaces a channel You can continue your search by pressing or 6 Press EXIT to stop Manuel Scan TV SETUP MENU UP DOWN EXIT AUTO SCAN Press MENU GO MANUAL SCAN Press MENU GO FINE TUNE 50 EDIT Press MENU GO TV SETU...

Page 26: ...hannel you want to delete The selected channel will be deleted You cannot delete a channel if you are in the program to edit mode In this case you need to press exit first Delete channel Skip channel Press An s will be shown in another colour on the left side of the channel number To regret press again The coloured s will disappear and you can use PG or PG or the NUMMERIC keys Channel without a na...

Page 27: ...ICTURE menu Reduce the value under FINE TUNE from 50 til 45 D You can also try to reduce the sharpness from level 60 to 20 or even 0 in the PICTURE menu E If all of the above doesn t work try to decrease the contrast from 50 to 40 F Use a 75 ohms low capacity cable or make the cable shorter G The quality of a PAL signal is limited Picture quality is always dependent of the quality of the signal qu...

Page 28: ... 9 Press 10 Select the desired minutes using and 11 To reselect the WAKE UP function select Press EXIT to exit the menu 1 Press MENU to activate the OSD menu 2 Use or to select TIME in the main menu 3 Press Go 4 Press and select TIME in the submenu 5 Press Go 5 Press or to select minutes or hours 6 Change both using and 7 Press EXIT to exit the menu 28 TIME MENU UP DOWN EXIT SLEEP Off WAKE UP Pres...

Page 29: ... EQUALIZER set up Select a sound mode Balance adjustment Volume adjustment You can only change the Equalizer setting if the SOUND MODE is USER In EQUALIZER in the submenu you can use together with GO You can select a frequency and change the settings with The spatial efftect can be adjusted under SPATIAL From 51 you have spacial effect in stead of stereo effect Use and GO to use the Sound mode Use...

Page 30: ...ll finetune the brightness and the contrast individually for every source by pressing the PIC picture key Remark Autobright is not activated when you watch the first time Autobright can also be activated by a B O remote control Autobright is not active on VGA DVI and Component P scan Deactivate autobright 1 Press EXIT consecutively Your TV will accept with one blue blink in the speaker area Manual...

Page 31: ... using or Opaque Select a coloured background Transparent Select a transparent background OSD Miscelaneous Misc adjustment OSD language OSD position OSD background You can choose OSD language in the submenu Select OSD POSITION in the submenu You have 9 choices Select OSD position using or 17 31 MISC MENU UP DOWN EXIT VIDEO SIZE TV mode OSD LANGUAGE English OSD sheet Opaque OSD POSITION V3 0 PD32LE...

Page 32: ...ate fast from chapter to chapter 100 200 300 etc Use this button to go to the next group 110 120 130 etc With this one you can go to the next available page use PG as an alternative Use this button to go to the previous page You can of course use the numeric keypad as well To move to the next or the previous page you can use the navigation keys up and down 32 Subsides Zoom You can zoom in order to...

Page 33: ...Chapter 6 Q A and practical information In case you encounter a problem use Q A as a first reference You can also find other practical information in this chapter 33 ...

Page 34: ...V and the wall as shown in you manual The spacer makes sure that the air can flow free behind the screen and that the TV hangs right M3 Mounting Wall mounting I would like to hang my screen on the wall Do you have an easy solution so it hangs stable and tight Yes we can supply our own wall bracket for the 26 and the 32 Ordering number DV81WB P1 Picture 720p 1080i What HD TV signal gives the best p...

Page 35: ...does not have this function It is however possible to have your TV upgraded You can contact your dealer for an offer R2 Remote control NAD alu remote Is it possible to have my plastic remote control upgraded We regret that the implementation of an appropriate remote was delayed a couple of times It is possible to have your remote control upgraded to a well designed aluminium one with learning mode...

Page 36: ...ur signature Dealers stamp and signature Date We strongly recommend that you keep the original packing The packing is constructed to give optimal support and protection of the LCD TV under transport The packing is important if you would come in the unfortunate situation that your TV needs service or if you move house Never use packing that is not original Address the shop where you bought your pro...

Page 37: ...is warranty does not include the above modifications and nothing will be credited for such modifications or damages that are a result of these modifications The warrany is not valid for a Periodical service general care repair or replacement as the result of normal wear and tear b Costs related to transport demounting or installation of the product c Misuse including the use of the product for oth...

Page 38: ...a lighting pixel or a dark tiny spot on the screen A lighting pixel wil normally be red green or blue Pixel failure Practical Pixel failure policy If there are more then 3 lighting pixtures or 4 dark pixels on your TV the product warranty gives coverage A pixel failure is defined as a lighting or dark pixel that can be seen at a distance of more then one meter Your LCD TV has 1366 x 768 pixels Eac...

Page 39: ...esult in fire or electrical chock Never take the plug out ot the socket with wet hands If you would see smoke or detect a strong smell switch off and unplug the TV and contact your dealer or servicecenter Your TVs ventilation holes may never be covered by curtains or other objects as ventilation will stop A high temperature can cause your TV to fail Do not put your TV in direct sunlight or beside ...

Page 40: ...Passion for Picture ...

Reviews: