EN
8
3.
INSTALLATION
Important
: Prior to installing the N-Com system, it is recommended to write down the identification
code affixed to the product (see chapter 17.5).
You can download the installation video from
www.n-com.it
X-Series Download section.
3.1.
Preliminary operations – Jet helmets or Flip-up helmets
Open the helmet chin guard (only on Flip-up helmets).
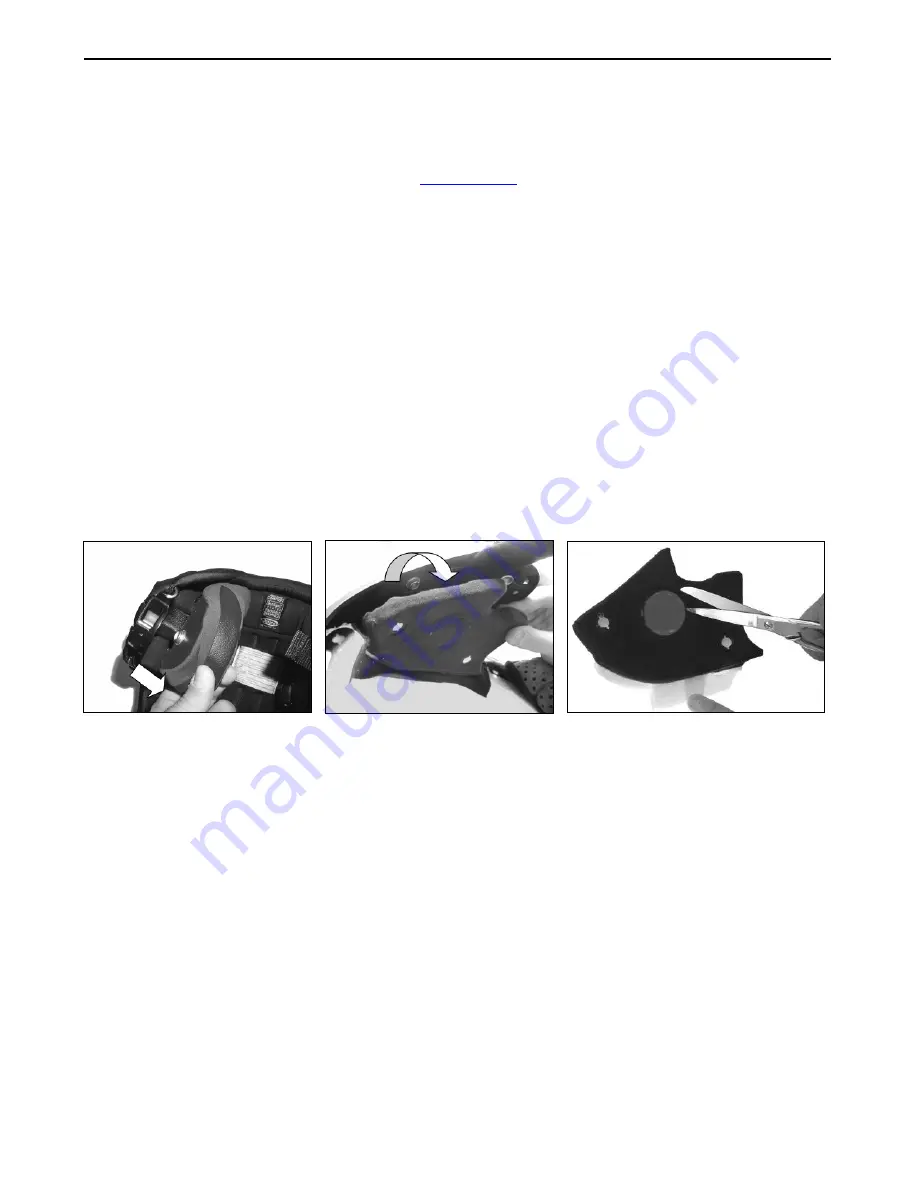
Pull out both comfort cheek pads, left and right, from the helmet. (Fig. 1)
Remove the noise reducers from the cheek pads (if present) and cut the insert using a pair of
scissors, following the pre-cut dots. Reposition the noise reducers in the removable cheek pads.
Take out the rear section of the comfort padding, pulling on the neck roll until it is released from
the shell. Reposition the padding on the outside of the helmet for the time being.
Unhook the press-stud of the polystyrene cheek pads by pulling toward the inside of the helmet
(Fig. 2), then remove the cheek pad by pulling it upward.
Warning
: in case the polystyrene cheek pad is damaged during this operation, please contact your
local dealer to replace it.
Cut out the round foam insert that covers the speaker housing from the polystyrene cheek pad
using a pair of scissors, following the pre-cut dots. (Fig. 3).
3.2.
Preliminary operations – Full-face helmets
Remove both comfort cheek pads, left and right, from the helmet (see specific instructions in the
helmet user manual). (Fig. 4)
Open the visor.
Remove the rear section of the comfort padding, pulling on the neck roll until it is released from
the shell (see specific instructions in the helmet user manual).Reposition the padding on the
outside of the helmet for the time being. (Fig. 5)
Remove the chin guard by pulling on the special red tab (Fig. 6a), then remove the plug from the
chin guard. (Fig. 6b)
Gently remove the polystyrene cheek pads by pulling them upward. (Fig. 7)
Warning
: In case the polystyrene cheek pad is damaged during this operation, please contact your
local dealer to replace it.
Fig. 1
Fig. 2
Fig. 3
Summary of Contents for BX5
Page 2: ......


