


default
then press
the North button immediately
within 2 seconds
and green lights of the tracker blink 5
times at the same time, which
indicates that the tracker resets to
the factory default settings and all
the calibration data is cleared.
CAUTION: If you don’t press North
button within 2 seconds after pressing
CAL. button,
the tracker will start to execute the
hard iron calibration.
Description of the tracker LED indicators:
Indicator
Status
Meaning
Off-Line
(Red Light)
Off
The tracker is tracking.
On
The tracker is in off-line mode.
Blinking
The tracker stands by. If you have set home
position, the tracker will start to track once
the target moves 10 meters away.
North
(Yellow Light)
Blinking
The tracker is executing the North calibration.
CAL.
(Green Light)
On
The tracker is executing the hard
iron calibration.
How to use the auxiliary channels of the tracker
There is 1 auxiliary channel available in a 6-channels tracker. And there are 7 auxiliary
channels available in a 12-channels one. Users can use these auxiliary channels to transmit
their own signals. For example, you put a data radio on the tracker, so maybe you need to
connect the TX, RX, Power and GND from the data radio to your ground device. Use the
auxiliary channels so that you can transmit the data without obstructing the tracker to rotate
continuously.
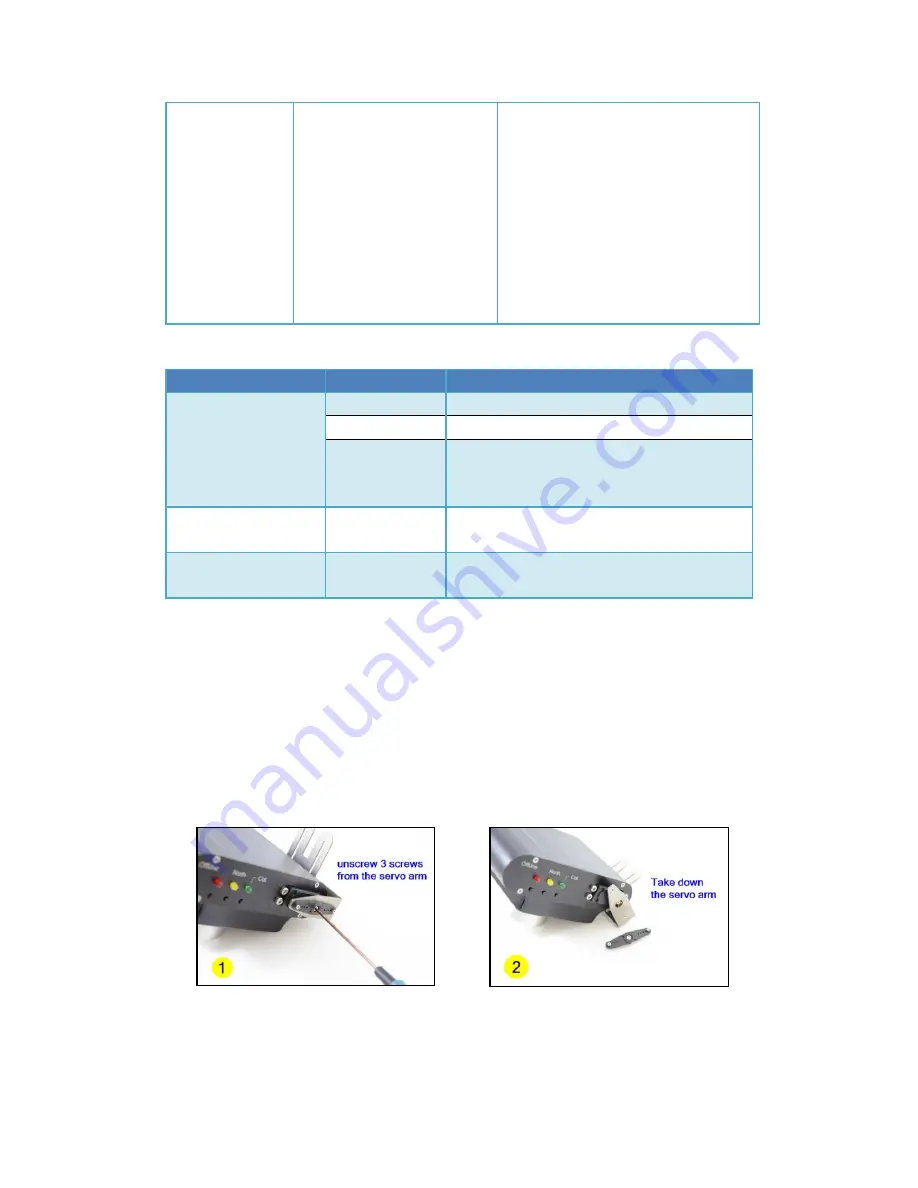
To use these aux channels you must take down the left side panel. These photos show
you how to take down the panel step by step:
Summary of Contents for AAT
Page 1: ...MyFlyDream Automatic Antenna Tracker Manual V2 0 www MyFlyDream com ...
Page 7: ... Connection Diagram A power the GPS by TeleFlyOSD ...
Page 8: ... Connection Diagram B share GPS with other OSD ...
Page 29: ... Click the LoadProject button to open the firmware to be updated e g TeleFlyOSD_v1_1 xwpprj ...
Page 30: ... Click the AUTO button and wait for about 20 seconds until the update is done ...


