


2). Mounting tracker and AATDriver
Please mount the antenna on the antenna handler of the tracker firmly. The image
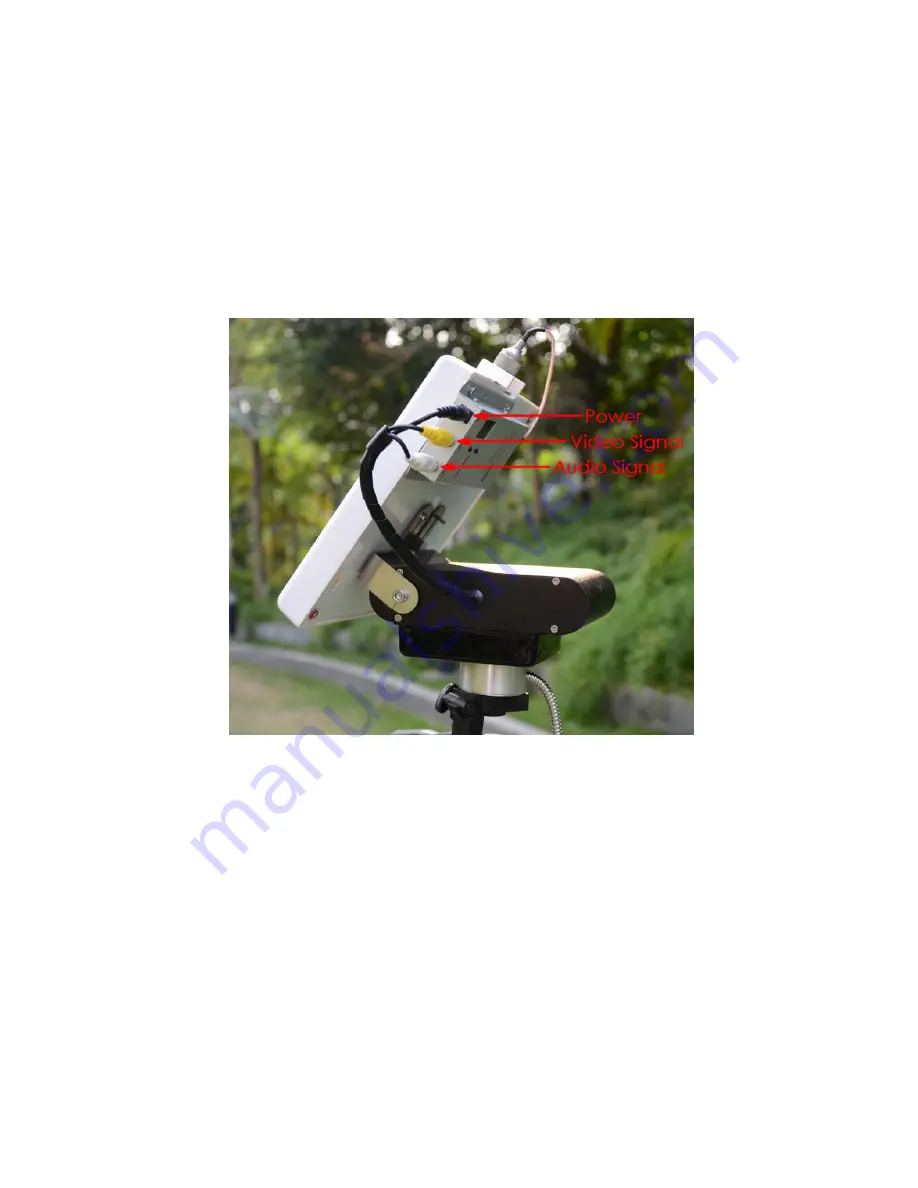
transmission receiver is suggested to be mounted on the antenna handler to avoid
electromagnetic interference and feeder fault due to repeated bending force. Specific
mounting methods should be designed according to the actual situation. The following
picture is for reference only.
Connect the AATDriver to the tracker and mount the tracker on the tripod. Do not ever
try to hold the tracker in hand to test it to avoid damage to the device. Three cables lead from
the tracker: black 5.5mm power plug, yellow video plug and white audio plug. Connect the
three cables to the corresponding jacks on the image transmission receiver. Please note that
the 5.5mm power plug is directly connected to the power supply of the AATDriver. For
example, if the power supply voltage for the AATDriver is 12V, the power plug output is 12V,
too. If the interface specifications or power supply voltage do not match your image
transmission receiver, you need some additional settings to connect them.
Finally, connect the monitor to the yellow RCA terminal of the AATDriver to view the
video signal.
Summary of Contents for AAT
Page 1: ...MyFlyDream Automatic Antenna Tracker Manual V2 0 www MyFlyDream com ...
Page 7: ... Connection Diagram A power the GPS by TeleFlyOSD ...
Page 8: ... Connection Diagram B share GPS with other OSD ...
Page 29: ... Click the LoadProject button to open the firmware to be updated e g TeleFlyOSD_v1_1 xwpprj ...
Page 30: ... Click the AUTO button and wait for about 20 seconds until the update is done ...


