


M1.2.TPT820.NLFREN 21112017
7
NL
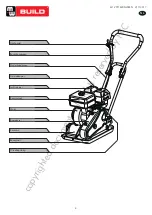
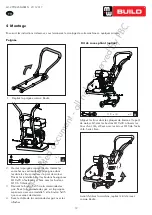
4 Montage
Door onderstaande instructies te volgen, kunt u in enkele minuten de montage van uw trilplaat voltooien.
Handle
6
Vibratory Plate Compactor
Unfold the Handle as shown.
1.
Mount the Handle as shown. Make the Handle
Ends slot into the channels provided by the
Engine Deck. Place
fl
at washers 10, followed by
hex bolts M10x70 at the outer side, and tighten
with lock nuts M10 at the inner side.
2.
Unscrew bolt 5X35 from throttle control.
Secure the Throttle Control onto the Upper
Handle with a
fl
at washer 5 and the bolt 5X35
that just were unscrewed.
3.
Fasten the Throttle Control cable with cable
fasteners.
4.
Folding Wheels Kit (Optional)
Line up the holes in the Link Plates and Engine
Deck. Slide bolts M10x30 through the holes from
one side, then lock nuts M10 from the other side.
Tighten down.
1
M10 70
A
2
M5
2
B
M10 30
Before compacting, fold up the Wheel Kit as shown.
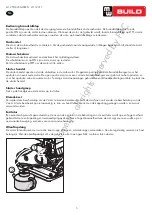
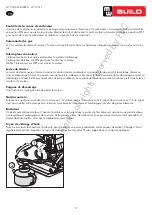
1. Ontvouw de handgreep zoals afgebeeld
2. Monteer de handgreep zoals afgebeeld. Doe de
gleuven aan de uiteinden van de handgreep in
de gaten in de bovenplaat van de motor. Plaats
sluitringen 10 en hex bouten M10x70 aan de
buitenkant, en bevestig met moeren M10 aan de
binnenkant.
3. Draai de bout 5x35 van de gashendel los.
Bevestig de gashendel op de bovenhandgreep
met een sluitring 5 en de bout 5x35 die net
losgedraaid werd.
4. Bevestig de gashendelkabel met kabelklemmen.
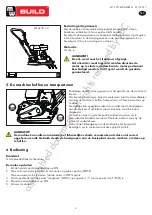
Lijn de gaten in de verbindingplaten en de bovenplaat
van de motor uit. Schuif de bouten M10X30 door de
gaten aan de ene kant en moeren M10 aan de andere
kant. Draai stevig aan.
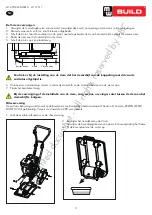
Alvorens te verdichten, vouw de wielenkit zoals
afgebeeld.
Handgreep
Vouwwielenkit (optioneel)
copyrighted
document
- all
rights
reserved
by
FBC