background image

MTIC Installation & Operation Manual


Page 12 of 18 

MTIC Manual R6  


Electrical Connections 


General precautions


Electrical Hazard: 


A certified electrician must supervise all electrical work. Comply with all local 
codes and regulations. 


Before starting work on the unit, make sure that the unit is isolated from the power 
supply and cannot be energized.  


Make sure that all unused conductors are insulated. 


There is a risk of electrical shock or explosion if the electrical connections are not 
correctly carried out or if there is fault or damage on the product. 


Requirements 

These general requirements apply for electrical installation: 


The mains voltage and frequency must agree with the specifications for the product.  


Circuit breakers must be installed between the main voltage line and this unit.  


All fuses and circuit breakers must have the proper rating, and comply with local 
regulations. 


The cables must be in accordance with the local rules and regulations. 


Cables 

These are the requirements to follow when you install cables: 


The cables must be in good condition, not have any sharp bends, and not be pinched. 


The sheathing must not be damaged and must not have indentations or be embossed 
(with markings, etc.) at the cable entry. 


The minimum bending radius must not be below the accepted value. 


Earthing (Grounding) 


Electrical Hazard: 

• 

You must earth (ground) all electrical equipment. This applies to the pump 
equipment, the driver, and any monitoring equipment. Test the earth (ground) lead 
to verify that it is connected correctly. 

• 

If the power cable is jerked loose by mistake, the earth (ground) conductor should 
be the last conductor to come loose from its terminal. Make sure that the earth 
(ground) conductor is longer than the phase conductors. This applies to both ends 
of the power cable. 


5.1  Probe Inputs 

This section is 

blue 

in colour on the rear panel. 

Connect the cables from the MultiTrode probe to the corresponding input terminals. 


Figure 11 

– Probe Inputs 


PROBE
INPUTS

see fig #3

Summary of Contents for MTIC

Page 1: ...MultiTrode MTIC Indicator Controller...

Page 2: ...MTIC Installation Operation Manual Page 2 of 18 MTIC Manual R6...

Page 3: ...the advent of this MultiTrode system these facilities had not been economically practical for hydraulic services in high rise buildings MTIC Installation Operation Manual Revision 6 0 7 August 2013 MU...

Page 4: ...through the manual so you will know how to operate and obtain maximum performance from your product After you have finished reading the manual put it away in a safe place for future reference WARNING...

Page 5: ...Probe Inputs 9 2 4 Output Relays 9 2 5 Analog Output 10 2 6 Power Supply Terminals Ratings Label 10 3 Installation Power Up 10 4 Mounting 11 5 Electrical Connections 12 5 1 Probe Inputs 12 5 2 Output...

Page 6: ...es Fill Charge mode Filling a tank Empty Discharge mode Emptying a tank In a standard installation the liquid level is sensed via a MultiTrode multi sensored probe Individual sensors can be used in in...

Page 7: ...r graph that is used for the placement of labels to indicate at what levels pumps and alarms operate Up to 10 labels can be placed here PROBE INPUTS MAINS POWER OUTPUTS A N E 240VAC 50 60Hz 1 2 3 4 5...

Page 8: ...f prior to altering the DIP switch settings SW Function Position Description A Timer Instantaneous actuation when level reaches sensor B A Timer Time delay on actuation approx 5 seconds B A Timer Time...

Page 9: ...on the rear panel PROBE INPUTS see fig 3 Figure 5 Probe Inputs A MultiTrode probe would be the normal method of level detection Connection of ball floats is also accomplished via these terminals altho...

Page 10: ...abel is located above the supply terminals and power is supplied through these terminals Active Neutral and Earth are connected to their respective terminals as marked 3 Installation Power Up PROBE IN...

Page 11: ...ute max thickness PANEL CUT OUT DEMENSIONS PLAN TOP VIEW CUT OUT ELEVATION TOP VIEW 92mm 120mm 92mm 91mm 8mm 97mm Figure 10 Plan and elevation views of the MTIC Slide the controller in from the front...

Page 12: ...The cables must be in accordance with the local rules and regulations Cables These are the requirements to follow when you install cables The cables must be in good condition not have any sharp bends...

Page 13: ...off at 10 Figure 12 Output Relays 5 3 Analog Output This section is white in colour on the rear panel see fig 1 Figure 13 Analog Output As can be seen by the diagram the MTIC can drive into a maximum...

Page 14: ...MTIC Installation Operation Manual Page 14 of 18 MTIC Manual R6 6 MTIC Pump Station Schematic Overview MTIC STATION OVERVIEW Figure 15 MTIC Station Overview...

Page 15: ...MTIC Installation Operation Manual MTIC Manual R6 Page 15 of 18 MTIC Schematic Figure 16 MTIC Schematic...

Page 16: ...ation approx 5 seconds B A Timer Time delay on actuation approx 10 seconds B A Timer Time delay on actuation approx 15 seconds B C Extra low sensitivity 1K For concentrates such as acids minerals alka...

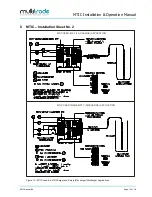
Page 17: ...anual MTIC Manual R6 Page 17 of 18 8 MTIC Installation Sheet No 2 MTIC USED IN A FILL CHARGE APPLICATION MTIC USED IN AN EMPTY DISCHARGE APPLICATION Figure 19 MTIC used in a Fill Charge and Empty Disc...

Page 18: ...com MultiTrode Pty Ltd Head Office Brisbane Technology Park 18 Brandl Street PO Box 4633 Eight Mile Plains Qld 4113 Ph 61 7 3340 7000 Fx 61 7 3340 7077 E mail AUsales multitrode com MultiTrode Inc USA...

Reviews: