19
•
Slide shoulder pads to lowest position in the
lateral guide slots of the slide carrying plate,
tilt
buttons a little towards outside and take pads
out of guide slots
•
Unbutton shoulder pads and hip belt from car-
rying plate
•
Remove lines from receptacles of carrying
plate
•
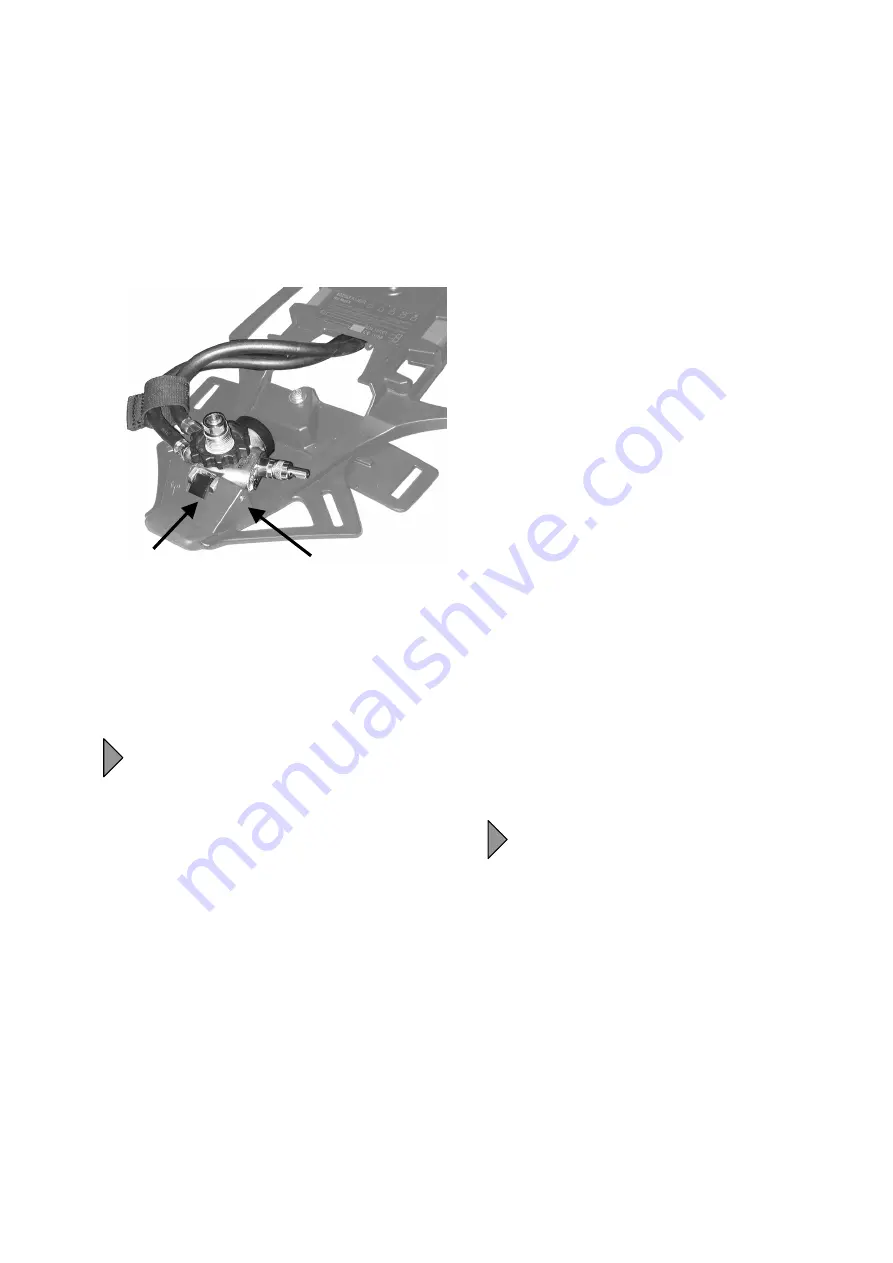
Remove pressure reducer from carrying plate
by pushing the spindle out (e.g. with a small
screwdriver);
do not
push up the stop spring
Fig. 7
•
Set slide carrying plate to smallest position,
push lock and take out the slide plate
•
Clean carrying plate and cylinder strap, as well
as slide plate at max. 60°C
•
Clean harness in a suitable washing machine
at max. 60°C
•
Clean lines, pressure reducer and pressure
gauge, resp. ICU, by hand
Do not submerge pressure reducer into
water
•
Totally dry all AirMaXX components in a drying
cabinet at max. 60°C
5.4
Function and Tightness Check
•
Visually check the high pressure gaskets (see
5.5.2)
•
Connect compressed air cylinder(s) to carrying
plate (see 4.2.1, 4.2.2)
•
Check all AirMaXX components for visible
malfunctions, such as incorrectly assembled
harness, loose compressed air cylinder(s), in-
correctly fitted lines, etc.
•
Open cylinder valve(s); depending on the cyl-
inder size, the operating pressure must be at
least 270bar at 300bar cylinders, resp. 180bar
at 200bar cylinders.
•
Close cylinder valve(s)
•
After 60 seconds the pressure drop in the
pressure gauge, resp. the ICU, must not ex-
ceed 10bar
•
Check the warning device (see Sect. 5.5.1)
5.5
Pressure Reducer Check
5.5.1
Warning Device
•
Connect lung governed demand valve to me-
dium pressure line
•
Open cylinder valve(s); the pressure at the
pressure gauge must be at least 120bar
•
Close cylinder valve(s)
•
Carefully activate flushing mode of lung gov-
erned demand valve (see Instruction Manual of
lung governed demand valve)
•
Observe pressure gauge, resp. ICU
•
The warning signal must sound at 55
±
5bar
5.5.2
High Pressure Gaskets
•
Visually check the sealing ring of the cylinder
connector in the pressure reducer. Damaged
sealing rings have to be replaced.
5.5.3
Overhaul
•
The overhaul of the pressure reducer may only
be performed by MSA or an authorised service
centre
5.6
Filling the Compressed Air
Cylinders
5.6.1
Filling with a Compressor
•
Check compressed air cylinders for valid test
date, visible technical defects, such as dam-
aged valves, in which case they should not be
filled
•
Check for humidity in the connecting thread, if
necessary, dry completely
•
Fill the cylinders at a compressor according to
Instructions with dry breathing air according to
EN 12021
•
After cooling down to ambient temperature,
check whether the maximum operating pres-
sure has been reached, if necessary, refill
5.6.2
Filling Completely Empty Cylinders
Completely empty (pressure-free) cyl-
inders must be dried to preclude an ex-
cessive moisture content.
•
Fill compressed air cylinders completely at
least twice including slow discharge. Assure
that during discharging there is no icing at the
valve. If necessary, reduce the discharge flow
with dosed closing of the cylinder valve
Stop
Spring
Spindle
Summary of Contents for AirMaXX
Page 1: ...AirMaXX...
Page 2: ...2 Deutsch 3 English 13 Der Umwelt zuliebe gedruckt auf 100 Altpapier MSA AUER AirMaXX MSA 2002...
Page 12: ...12 Notizen...
Page 22: ...22...
Page 23: ...23 Notes...


